Meat seems to be high on the list of things that toddlers dislike. I get many messages from parents who are very concerned about their toddler’s protein and iron intake because of the fact that their toddler just absolutely refuses to eat any meat. Maybe it’s something to do with the taste of the meat, maybe it’s the texture, maybe it’s both. The fact is that having a toddler that refuses to eat any meat whatsoever is stressful. Luckily, I’ve dealt with this many times before, and have come up with a list of my top 5 ways to help encourage your toddler to try meat, and all of them involve food play or food exploration!
If you’d rather listen to this info while you multitask on other things, download the podcast episode here.
Why use food play?
Interaction, exploration, and funny jokes all make for good ways to encourage your child to eat their food, without saying “Please take a bite”. This is because toddlers are learners. They absolutely thrive off of exploring new environments – ever seen a toddler completely fascinated by something we often take for granted, like maybe the colour of a beautiful flower? Toddlers are constantly analyzing their surroundings. So why should food be any different?⠀
Now, let’s take this one step further. I want you to think of a time when you had to try a new food. What did you do? Did you smell it first? Poke it with your fork? Take a small bite before diving in? Your toddler is no different! And let’s also remember that for them, the list of foods that are new to them is much larger than your list would be as an adult (assuming you’ve been exposed to a fairly substantial variety over the years). So even if the food is something incredibly common, in that many people in the world consume it regularly, if your toddler has never seen it before, or only seen it a handful of times, it’s still very new to them.
So, instead of banishing food play from the table, try encouraging them to explore their food! Allowing your toddler to be a food explorer can make a world of difference in the progression they make in accepting new foods, and can actually help curb their tendencies to refuse them. As I mentioned above, it’s normal to want to explore a new food a bit before eating it, so allowing your toddler to embrace that, and do what feels comfortable to them, while encouraging them to learn more about the food, is a crucial step in getting them to actually taste that food.
Guiding our children to play with their food is really all about encouraging them to get creative, and to get down to the basic sensory level of food. Let them explore the taste, smell, sound, and texture. This helps them work towards the main goal of eventually eating it. Prompting them to play with their food, and allowing them to squish the food on their hands and face, to compare their foods, to test… “What happens if I do this? What happens if I do that?” All of this can help them become more comfortable, and get over any hesitation they may have.
Don’t be afraid to make silly voices, or become involved in role play with your child! Sometimes silliness can make a world of difference and show them that it’s okay to play with their food! I know this might be tricky for some of us, especially if we were always taught never to play with our food, so I’ve got 5 simple ways you can begin to encourage this with your toddler. Choose what feels like a good fit for you and your family, and start there.
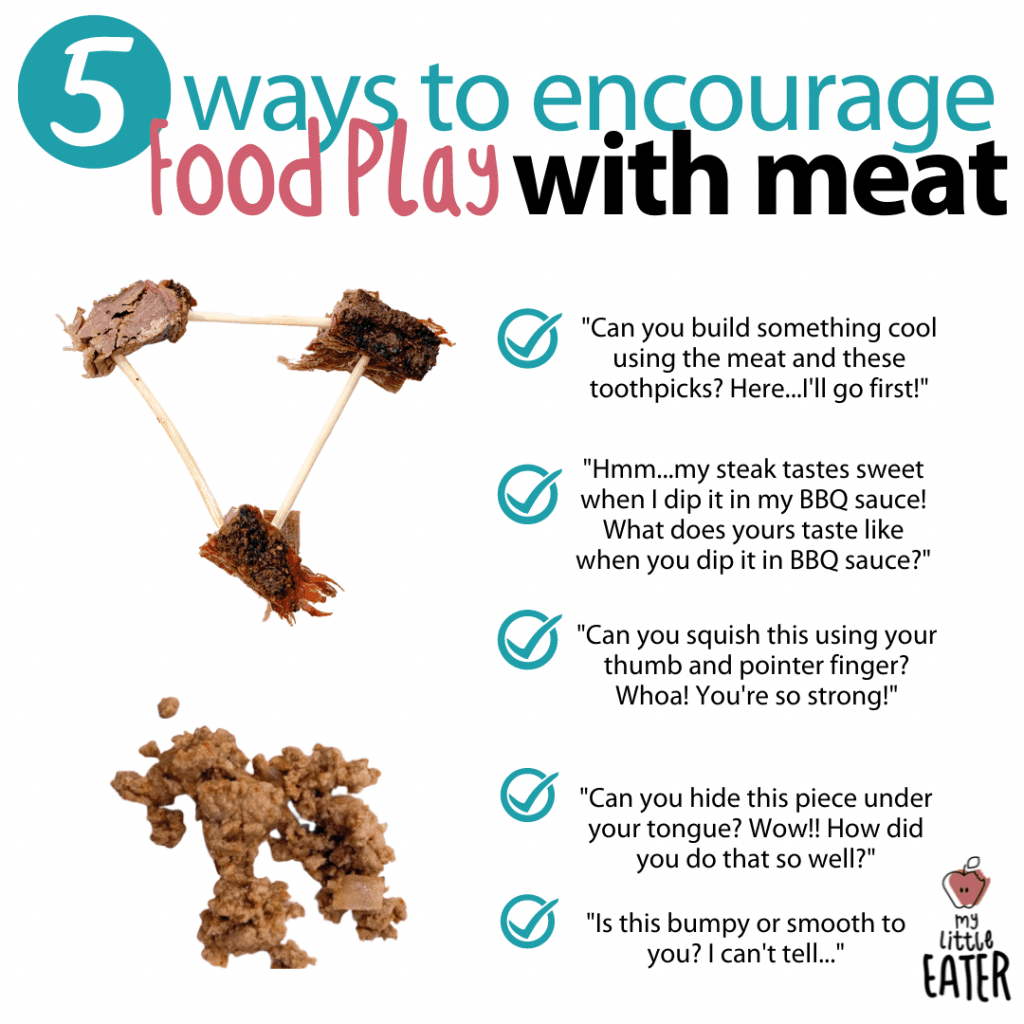
Tip #1: Talk about the taste of the meat when you dip it in different sauces
In this scenario, I want you to try doing it first, while showing your toddler, so that they can then try it too. So for example, maybe you’re having some chicken for dinner, provide the option of having a dip with that, such as BBQ sauce. Then what you can do is dip your chicken in the BBQ sauce, taste it, and say: “HMM…my chicken tastes sweet when I dip it in my BBQ sauce. What does your chicken taste like when you dip it in your BBQ sauce?”
The key here is that you aren’t directly telling them to try dipping their chicken in their BBQ sauce. You’re engaging their natural curiosity by asking them what their chicken tastes like when they do that. Yes, I know that it will most likely taste the same to them, since they’re doing the same thing as you, but your toddler may not understand that, and they may also have a different way of explaining that, so let them!
Another option is to keep these statements even more general to really peak their curiosity. So for example, you could dip your chicken in the BBQ sauce, and then say something like “Oh, that was a different taste.” And this isn’t even really directed at anyone, it’s just more of a comment that you’re making at the table. But what it will do is get your toddler thinking, and they’ll start to wonder what that taste was, and then they may even want to find out for themselves by mimicking exactly what you did.
Tip #2: Ask your toddler to build something with their meat
For this example, I would encourage you to have toothpicks, or child safe picks available for your toddler to use. I have a lot of options in my Amazon shop for things that can help encourage your toddler to play with and explore their food, and child safe picks are on there.
You very simply just need to ask your toddler to build you something using those supplies that you provide. So be sure to have their meat cut up into small pieces that will work with the food picks, this would be great to try with steak. You may need to demonstrate this one for them first if they’ve never tried this before, so make sure you get in there and have some fun with them too!
Now, I want you to remember that even if this activity doesn’t result in your toddler actually eating the steak, the fact that they interact with it by touching it, squishing it, smelling it…whatever it is that they do during this activity, that is a pre-step to eating. There are multiple steps to eating, including: touching, smelling, looking, engaging, and interacting. So if all your toddler does is build the structure, that’s not a failure of an activity – it’s actually a win!
Tip #3: Ask if your toddler can “squish” their meat
This is a really simple one, but basically, if you’re offering a meat that is really moist, and fairly easy to squish, like ground beef, ask your toddler if they can squish it. So you can say something like: “Can you squish your meat like this?” and then when they do, follow it up with “Whoah! You’re so strong!” Again, remembering that the fact that they’re picking up the meat and squishing it is a win, even if they don’t eat it yet. What you should notice as you play games like this is a shift in their attitude. You’ll see them smile and have fun at the table, which is what we want! This means that the pressure to eat has been lifted, and they can enjoy being at the table for mealtimes because they see that you’re going to have fun with them, instead of asking them to eat over and over.
You’re once again engaging their curiosity as well, and encouraging them to explore the meat. You may see them continue to test multiple different pieces, maybe they’ll try comparing squishing the meat with squishing something else on their plate, or they could try squishing between two fingers and then switch and try two different fingers – all of this would be good! Provide them the opportunity, and let them know it’s ok to try this, and then see where they take it themselves, they may surprise you!
Tip #4: Ask if they can hide the meat under their tongue
This one may be a bit trickier, depending on the age of your toddler and what stage they’re at with their food exploration. So, they may have difficulty hiding the meat, and you’ll see that they spit it out, or it falls out, when they try. Or, they may not be ready to put the meat in their mouth, and that’s ok! You need to meet them where they are on this journey, and you can start with some of the other tips first to get them doing those pre-steps of interacting with the meat at the beginning.
You can also try, depending on your child (you know them best and what they may perceive as pressure), asking them to do this while being very clear that they don’t have to swallow it and can spit it out once they’ve tried the trick. If that doesn’t work, no big deal, move onto something else. But if it does, that’s huge! They not only interacted with the meat, but they actually put some in their mouth, and got that flavour exposure to it. And once they’ve done this, the chances that they’ll just chew on that and swallow it, since it’s already in their mouth, is pretty high.
Tip #5: Ask your toddler about the texture of the meat
Again, this will encourage them to try touching the meat so they can feel it and then describe it. You want to make this easy for them to understand, and provide them with concrete examples so they can clearly communicate what they’re feeling when they do try it. So that could sound like asking: “Is this bumpy or smooth? I can’t really tell, what do you think?” This will prompt them to touch the meat so they can figure it out, and if they’re really hesitant, you can suggest trying running a fork over it first.
Depending on your toddler’s age, they may not understand what bumpy or smooth means, therefore you need to be ready to show them what that is with something else, so they can try this one out. And if they tell you that they actually think it’s slimy, rough, etc. just go with it! They may choose to describe the texture in a different way, and that’s great. That means that they were taking part in it, they actually touched it, interacted with it, and they’re showing that they’re open to this type of activity. They don’t need to be “correct”, they just need to engage.
Bonus Tip: Don’t push them to do this!
If you pick an activity from above, and you try to engage in it, and be silly and playful at the table, but your toddler just isn’t having it – don’t push it. This is something that can be done over multiple meals, weeks, months, etc. This isn’t going to be a one-time thing that instantly gets your toddler to eat meat forevermore. This will take some time, and you’ll have to use these activities more than once while watching for those wins. You’re in this for the long haul to see the progress over time, so if your toddler starts to feel pressured to do these activities when they don’t want to, these will no longer work to help them. We want them to have fun and explore now, so that later they’ll want to actually eat the meat.
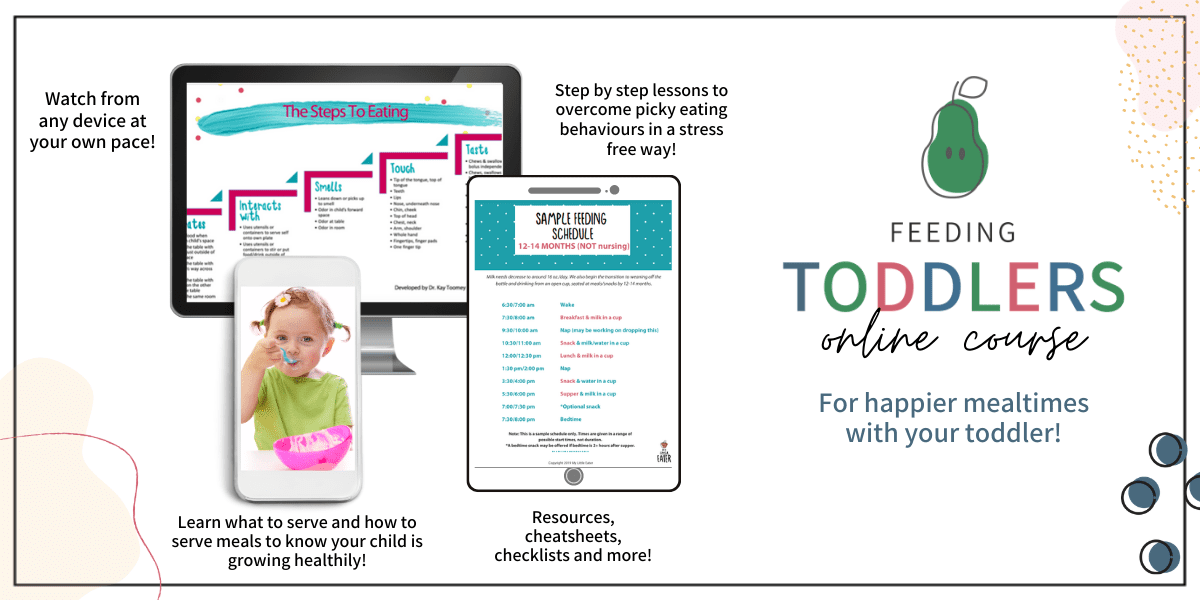
If you’re ready to start enjoying happier mealtimes with your toddler, and want a step-by-step process for preventing or managing picky eating, check out my Feeding Toddlers online course for all the details!
*Please note that I do receive a small commission from any products purchased from the Amazon link in this blog post. But, this comes to no additional cost to you, and I will only ever link items that I FULLY support and stand behind! These small commissions help me keep my website alive and kicking so I can continue to provide you with valuable feeding info.