Peanuts tend to be a cause for concern for most first time parents, and even seasoned parents who’ve been there and done that. And that’s because a lot of people associate peanuts with allergies. It’s a common allergy, and it can be a really scary one, as it can have an anaphylaxis reaction. And to top it off, for these reasons, it’s one that’s suggested to be introduced early on in starting solids when parents are just getting their bearings offering food in general. Cue the anxiety!
I don’t ever want you to be scared, or worried, that you’re doing something in an unsafe manner, or feel as though you don’t really know what to do next, but are unsure where to ask for help. That’s why I’ve started sharing my best tips on how to safely serve a variety of foods right on my podcast – The My Little Eater™ Podcast! So, listen in for my best tips for safely serving peanuts to your baby or toddler, or keep on reading below for the Coles notes.
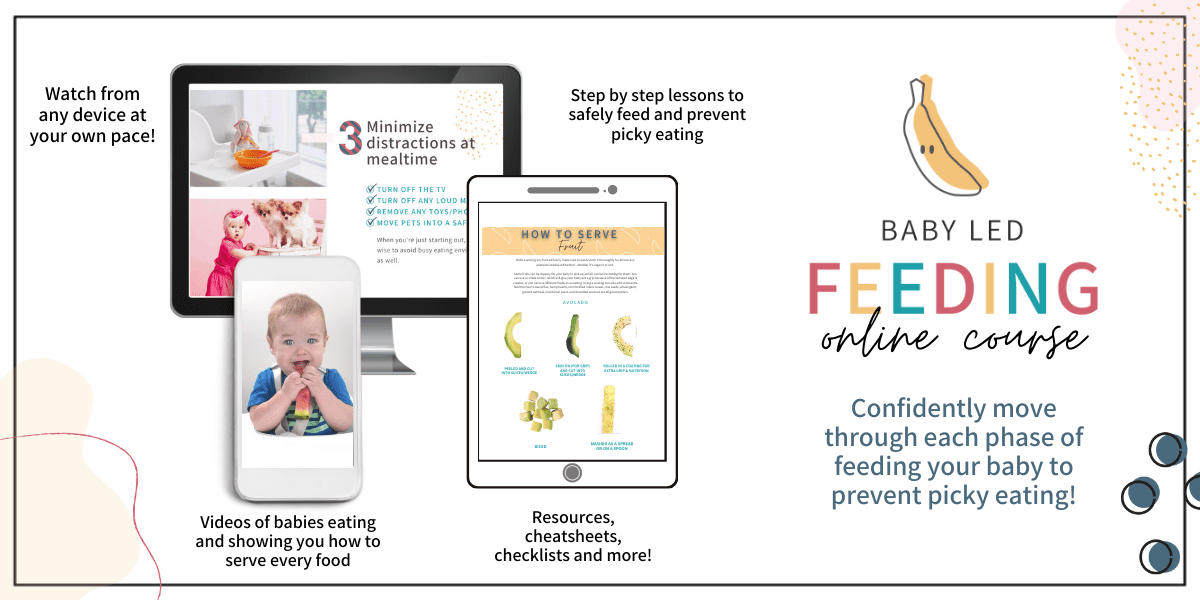
*Also note that I do this in-depth, for all types of foods, inside my Baby Led Feeding online course, so if you’re ready to get the info on everything you’d ever want to serve your baby, that’s your best resource (it even includes video so you can see the texture and modifications I suggest first-hand)!
Facts and nutrition on peanuts
First off – peanuts are not actually nuts! They’re the edible seed of a legume plant (so actually they’re closer to beans!) which is so interesting. They’re also very healthy, are full of protein, healthy fats, and fiber, and give lots of much needed calories for both babies and toddlers. However, you still have to be careful of what type of peanut product you’re offering. If it’s been heavily processed, you could end up with a product that’s actually lost some of the health benefits of natural peanuts. For example, if you’re buying peanuts, or peanut butter, with added sugar or salt, or that has added hydrogenated oils, or flavouring, or preservatives, or if you’re buying peanut oil that’s been highly processed/refined, those options would not be considered as healthy. So if you can, always go for peanut butter that’s all natural and has no added ingredients, besides peanuts and oil, to get the health benefits without the unnecessary additives, especially for your baby.
I often hear from parents who say that they don’t even like those options, so they don’t typically buy them. But, even if you don’t like it, or you’re not used to it, get it for your babies/toddlers to eat, and get them used to it from the beginning. If it’s all they know, they won’t fight it, but if you introduce the processed version with added sugar, it’s way harder to get them to eat the all natural one, afterwards.
You can also look into using peanut butter powders, or peanut flours. You can make them, or purchase them. These have the fat content removed, but still contain a significant amount of fiber, protein, and micronutrients such as zinc, vitamin B6, and folate. Again, make sure that there are no other ingredients added to the peanut butter powder, if you’re buying a ready made one.
Peanut allergies
Now, let’s move on to talk about the fact that peanuts are the most common allergen in the world for kids. And unfortunately, peanut allergies tend to be lifelong for about 80% of the population with that allergy. Having this allergy also puts them at risk for developing allergies to tree nuts like almonds, pecans, pistachios, walnuts, etc. What’s interesting is that many people with peanut allergies are able to safely eat highly refined peanut oils because the allergenic peanut proteins are removed during processing. BUT- be wary of cold pressed peanut oil, as this has less processing, and therefore still contains enough peanut protein that it can cause a reaction (always clarify with your child’s allergist what can or cannot be tried, based on your child’s specific allergy).
The good news is that you can significantly reduce the risk of your baby developing an allergy to peanuts by introducing them early and often. Starting right around 6 months of age, you want to introduce them for the first time, and then continue to offer them often from there. This is always something I recommend, and talk about in-depth in my Baby Led Feeding course, in the section on how to introduce allergenic foods.
How to serve peanuts safely
Whole nuts, and thickly spread nut butters, are considered choking hazards for babies and toddlers. However, there are ways that you can modify them to safely serve them to your baby or toddler, and how you modify them will vary based on age. So let’s begin by identifying how to do that based on the age of your child, and I’ll also share where that modification would fit within my signature Texture Timeline™ tool.
If you’re unsure of what the Texture Timeline™ is, it’s my signature tool found inside of my Baby Led Feeding course that helps you progress through phases of easier to more difficult textures, in a step-by-step manner. If you’re wanting to ease into things, rather than do full-on baby led weaning on all foods from the start, this tool will help guide you through that. It will keep your baby advancing so that you prevent pickiness, and promote oral motor skill development, without freaking you out too much and helping you to ease into it all. You can sign up for my FREE Texture Timeline™ challenge which will take you through 5 days of easy to more challenging textures, answer many common questions about introducing solids, help you overcome any fear of gagging or choking, and gets you introducing a variety of healthy and textured foods to your baby, little-by-little.
4 to 6 months old
I don’t typically recommend ever introducing solids to babies before 6 months of age, BUT sometimes allergists recommend starting with an earlier introduction of allergenic foods, if your baby is at high risk of developing that allergy. So, to introduce it to a 4-6 month old, who most likely will not have the ability to safely swallow solids, or really manage any textures whatsoever, you will have to thin out some smooth peanut butter. You can use hot water to thin it out, and then offer it on your finger tip, or on a spoon, for them to get some exposure to it. You’ll want to make sure that it’s nice and runny so that it’s super safe for them. When you offer peanuts this way, it falls under Phase 0 of my Texture Timeline™, since it’s basically a very thinned out puree.
You’ll also want to introduce only a very small amount at first, just in case there’s an allergic reaction. Reactions can be dose dependent, meaning the higher the dose the more severe the reaction can potentially be, so starting out small will help to limit the risk. Then you can gradually increase the amount each time you serve it again from there.
6 months to 2 years old
At this point, you can offer peanut butter mixed into an oatmeal, yogurt, applesauce…basically any puree texture so that it’s not a thick glob. You want it to be smoothly and evenly distributed into one of those other foods. If you need to thin it out first, you can do so with water, breastmilk, or formula, and then mix that into the pureed food so it mixes easily and evenly.
Another option is to finely grind peanuts in a food processor so that there are no pieces left, it’s all a uniform, almost powdery texture. Then use that powder to coat slippery foods like banana, avocado, or mango. So basically just dip any of those food pieces into the ground peanuts, or roll them in it, and it will provide some grip, flavour and texture to the food, making it easier for your baby to pick it up and providing a new experience for them. You can also sprinkle ground peanuts on top of yogurt, quinoa, roasted veggies, or any other food.
And finally, my fav way to serve peanuts at this age is to simply spread a bit of peanut butter on toast! Make sure it’s spread thinly, as again, big globs can be a choking hazard. But nothing’s easier than that, and it’s a great finger food option for your baby for any snack or meal.
Thinly spread peanut butter, that hasn’t been further thinned out with water or breastmilk, would fall under Phase 1 of the Texture Timeline™, putting it in the thick and creamy category. If peanuts are served in a ground format, that would fall under Phase 3 of the Texture Timeline™. This is the phase where we focus on expanding to various texture types. In this case, ground peanuts would be part of the grainy sub-category. They aren’t perfectly smooth, as it’s composed of little particles that you can feel on your tongue, and that separate in your mouth.
2 years old and up
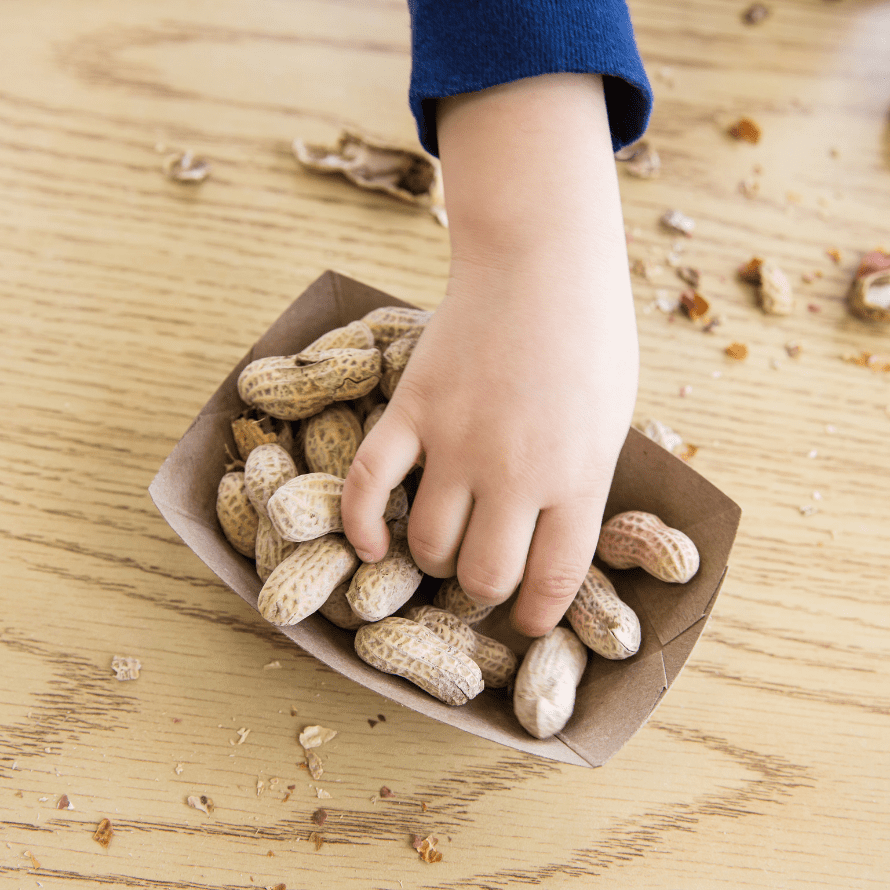
This is where people usually ask me, “When can I offer whole peanuts to my child?”. Technically, the CDC lists them as choking hazards until 4 years of age. But let’s remember that this is a blanket recommendation that doesn’t take into account the fact that some kids develop better chewing skills earlier than others, and that really it’s up to you, as the parent, to know when you think they’re ready to handle it. That being said, whole peanuts are one of the top food related choking hazards among kids under 3 in North America, so be very careful about it.
Instead of forever avoiding offering them whole, I recommend teaching your child how to chew them. This would be considered part of Phase 3 of the Texture Timeline™ as well, and would be under the crunchy/hard texture sub-category. To teach them to chew them well, you’d start with halved peanuts and teach them to take a small bite over their molar area (at the side of their mouth). Have them chomp down on it, and demonstrate this for them in a really exaggerated way, to show them how important it is to chew, chew, chew before swallowing. Be sure you’re modelling this for them, and then also have them do it in front of you slowly. I recommend even counting the number of chews, or chomps, they do to ensure it’s ground up enough in their mouth before they swallow. Be silly with it (but try not to make them laugh while they’re chewing though) and have fun – kids tend to remember the information better when it’s part of “play”.
If you want to learn all my best tips for how to safely serve all foods to your baby from the very beginning so that you confidently move through each phase of feeding your baby to prevent picky eating, the Baby Led Feeding course is for you!