This post may contain affiliate links, please view our disclosure policy for more details.
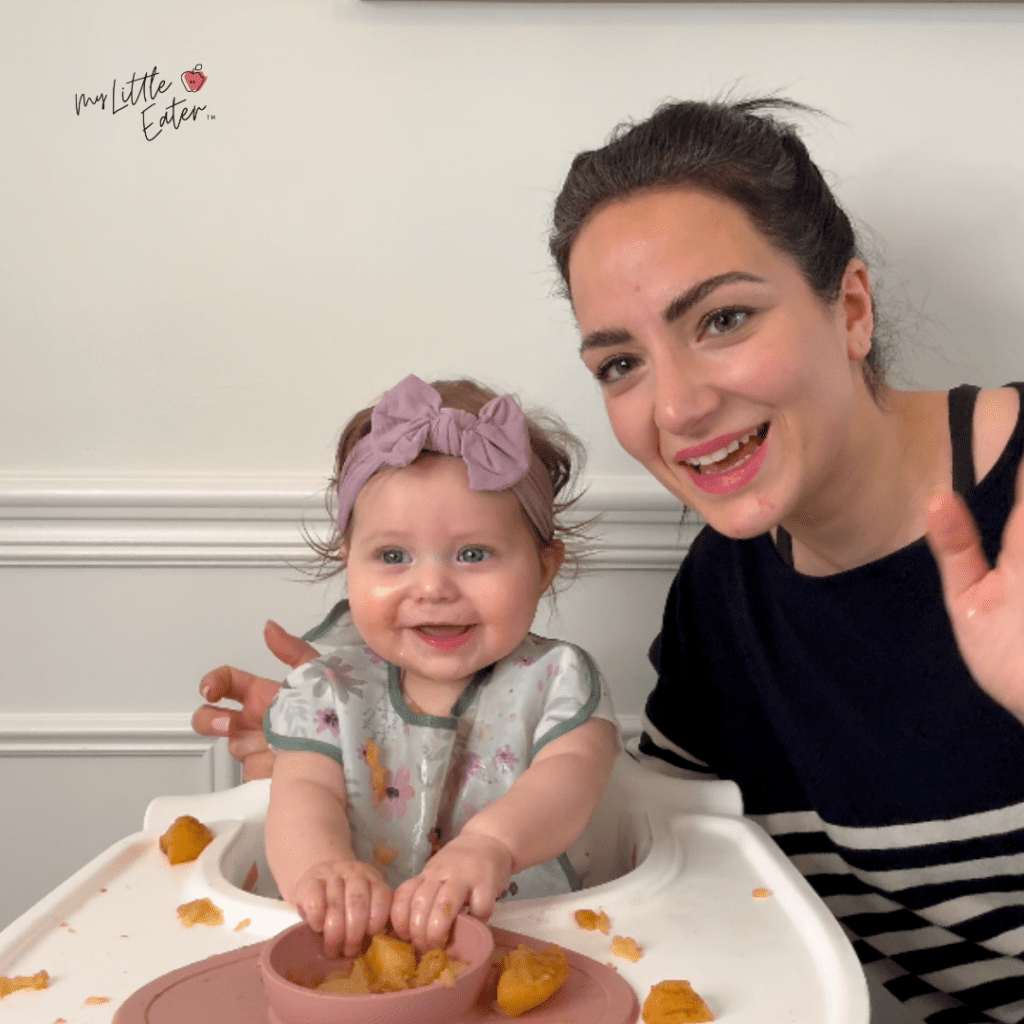
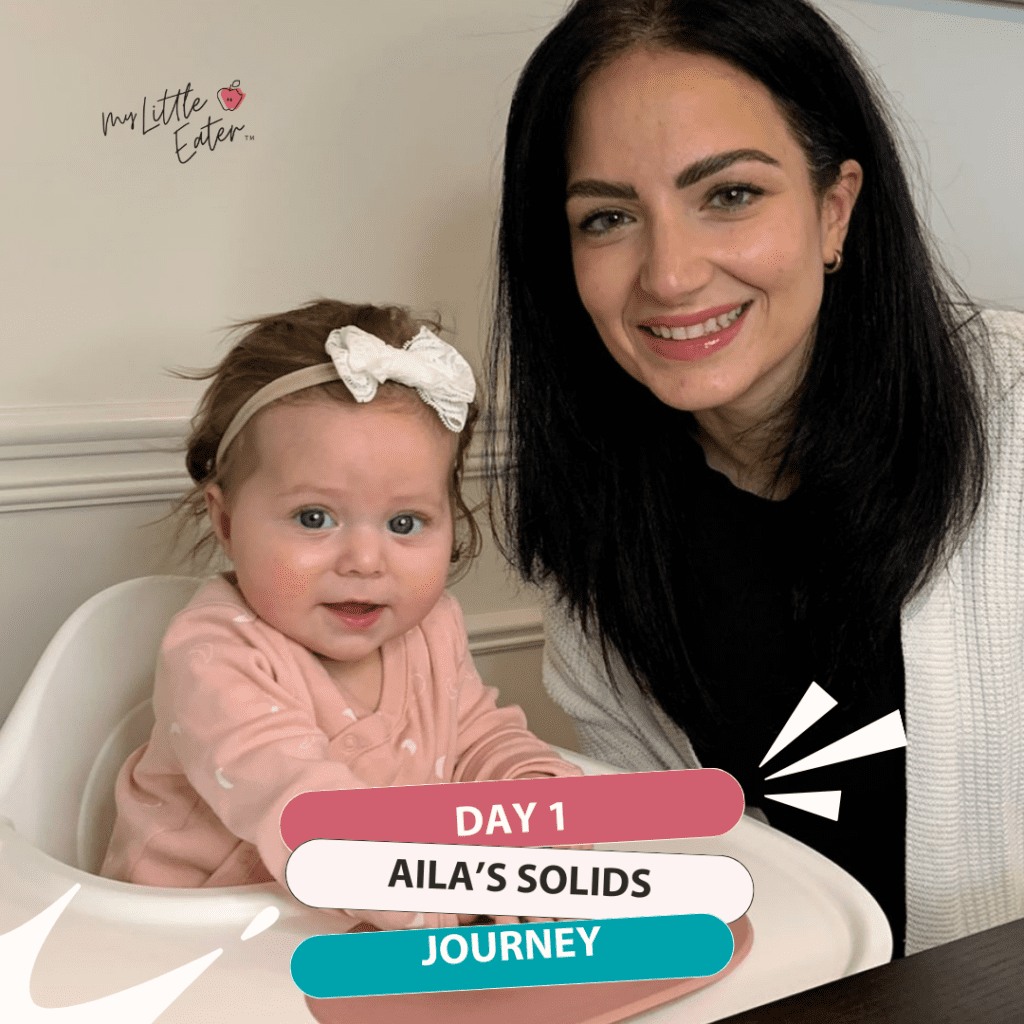
As a registered dietitian whose boys are now grown teenagers, I’ve been eagerly waiting for my niece, Aila, to start solid foods. Feeding babies (and teaching about feeding babies) is my favorite thing in the world, and my sister (Aila’s mom) was kind enough to let me take the reins on the first 30 days of her starting solids journey.
Aila is her first baby, so she didn’t have any experience in introducing solid foods. While she was super excited to start, she (like many other parents I’ve worked with), had LOTS of feelings about how this would go. A mix of excitement, curiosity, dread around having to plan and cook instead of just nursing or bottle feeding, and even a bit of fear around certain solid foods – particularly meat!
In this blog, I’ll be sharing a detailed glimpse into Aila’s first week of starting solids with baby led feeding, with the hopes that it helps you learn what to expect and how to approach the first 7 days the way a pediatric dietitian would. You’ll also get to see the real emotions, and ups and downs of her mom, who was going through the experience for the first time with her baby.
I’ll walk you through the mealtime setup, her feeding schedule, the solid foods we offered her, the skills she gained, and so much more!
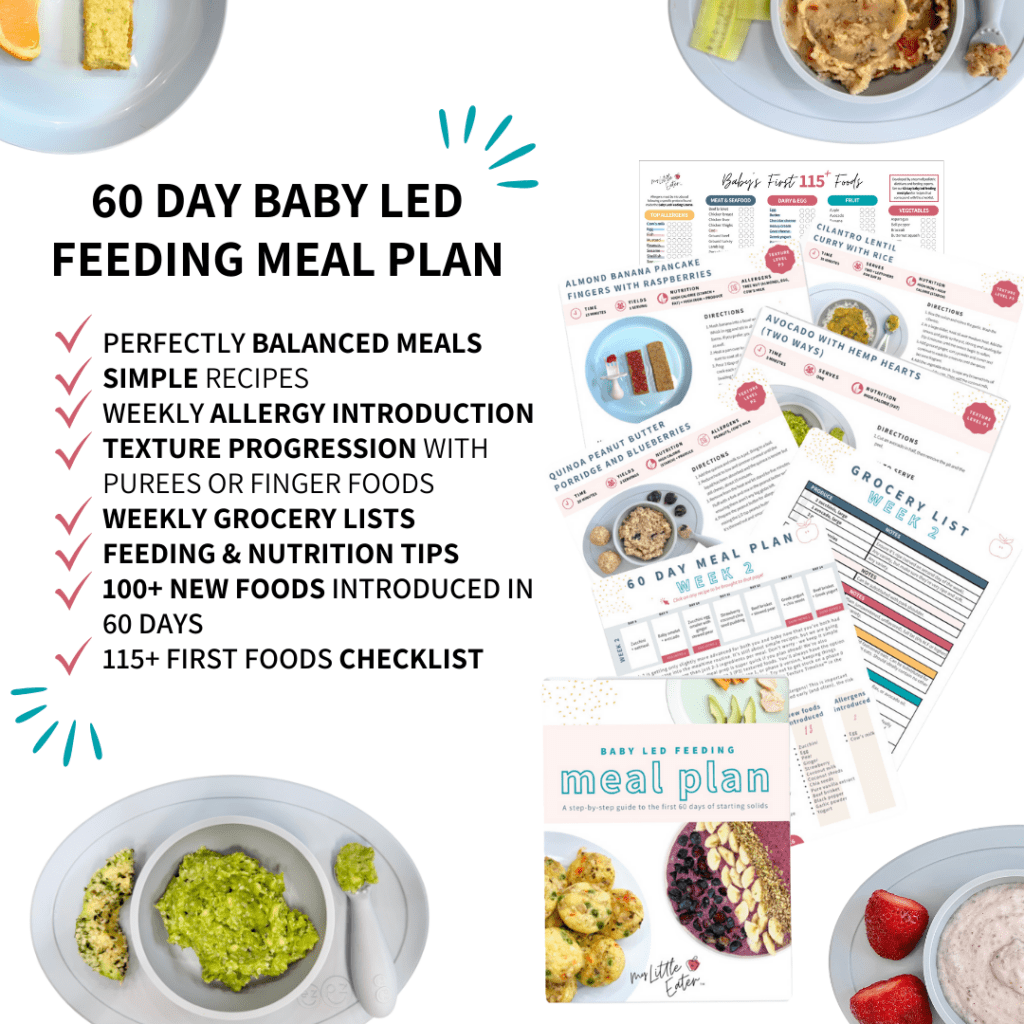
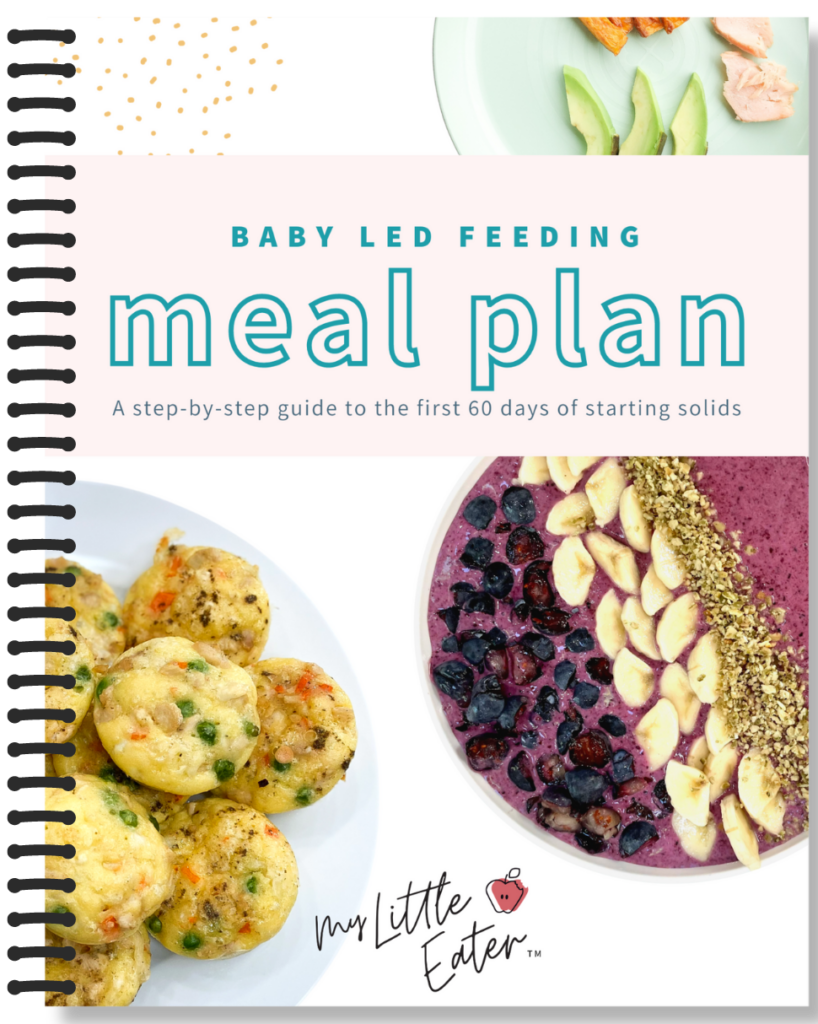
We followed our 60 Day Baby Led Feeding meal plan throughout the journey. This made it super easy to know that we were introducing Aila to a variety of simple and healthy foods that are ideal in the first week of solids.
Since it comes with detailed instructions for how to serve the solid food, nutrition tips, grocery lists, storage info, and more – it made Aila’s mom’s life SO much easier during this week. As a result, she could focus on enjoying mealtimes with her baby, rather than stress over what to serve and how.
Aila’s mom was open to starting with both purees and finger foods, so of course we followed our Baby Led Feeding approach! This approach is all about starting with either purees or finger foods, with a conscious effort to progress in textures according to ourTexture Timeline™.
We also encourage self-feeding from day 1, so that baby brings the spoon or the finger food to their mouth themselves. Of course, if you want to spoon-feed your baby for the first week or two as you both get used to things, that’s also fine! Just be sure to let go of this control and hand it over to your baby to learn how to do this themselves – sooner rather than later – so they can be in charge of the process and won’t develop an expectation of you feeding them.
What signs of readiness for solid foods did we look for?
We had been monitoring Aila’ssigns of readinessfor solid foods since 4 months of age. Just like we preach, she developed only some (but certainly not all) of the readiness signs at 4 months – hence – why werecommend waiting until closer to 6 months to start. By 5 months, we saw another sign emerge, and almost like clockwork, she successfully showed all readiness signs for solid food the week she was about to turn 6 months old!
Here’s a little snapshot of how the signs progressed:
4 months old: She was mouthing objects, she had a diminished tongue thrust reflex, and she had great head and neck control. While she could bring large objects like teethers or toys to her mouth, we would only see this while she was lying down, leaning on something, or otherwise had core support.
We wanted her to be able to bring objects to her mouth while simultaneously being able to use her core independently. Otherwise – she couldn’t feed herself!
5 ½ months old: Aila showed a HUGE interest in solid foods, which is a great priming step. She was so much more sturdy in her highchair than before (especially her hip to torso position). That being said, she still required a bit of support on one side and she wasn’t sitting upright on the floor independently.
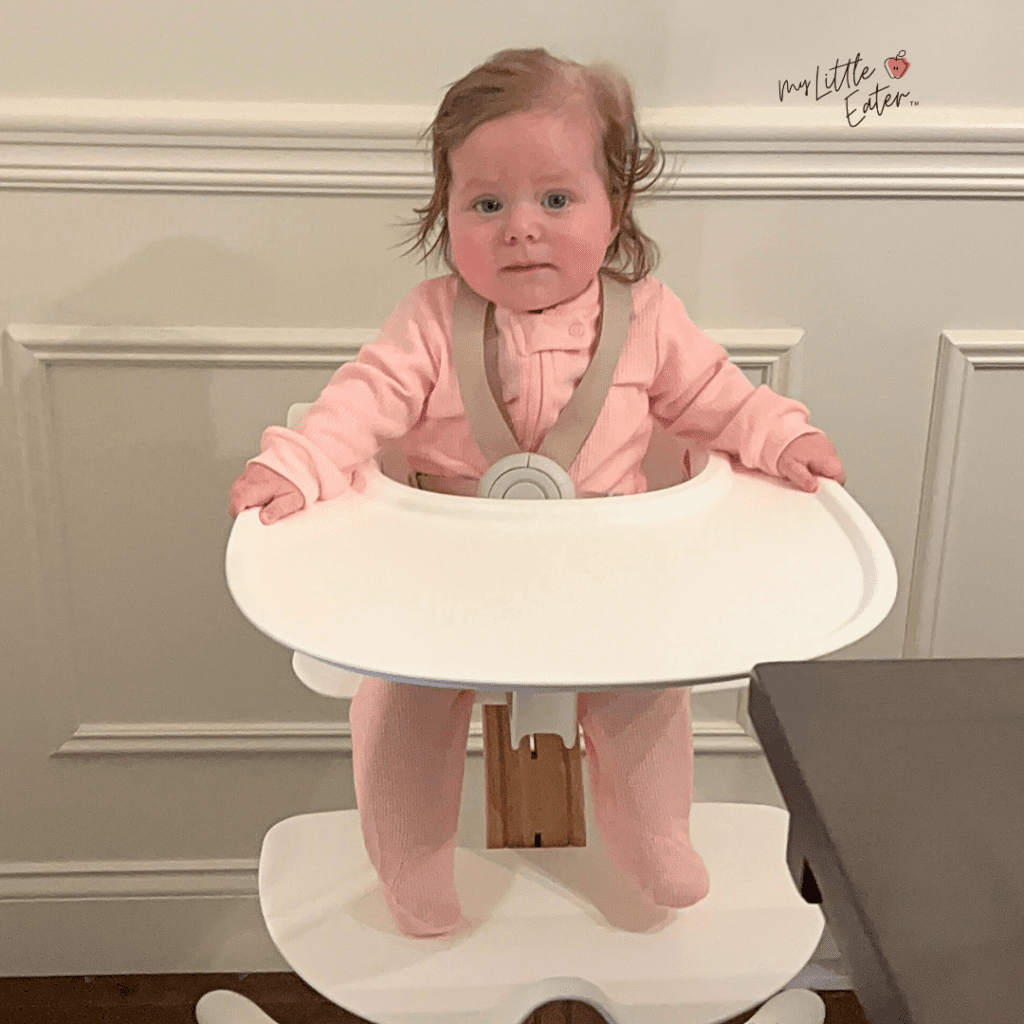
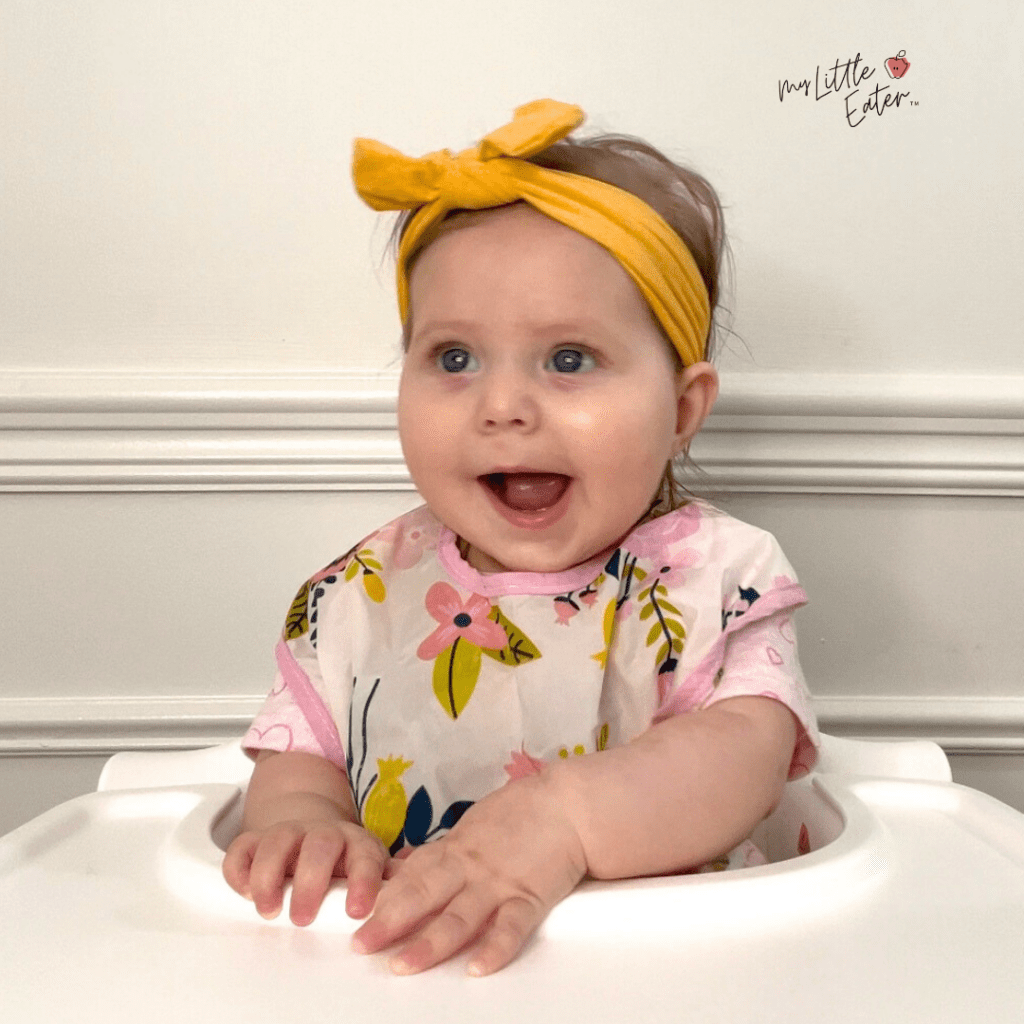
6 months old and 1 day: She finally could sit upright independently and in her highchair with no support! Her hands could move freely and she was ready to eat successfully and safely.
Remember – we want to see ALL readiness signs present before baby starts solids, not just a select few.
Mealtime set up
You really don’t need many products to feed your baby, but these are the ones we swear by that made feeding Aila so much more successful, safe, and easy!
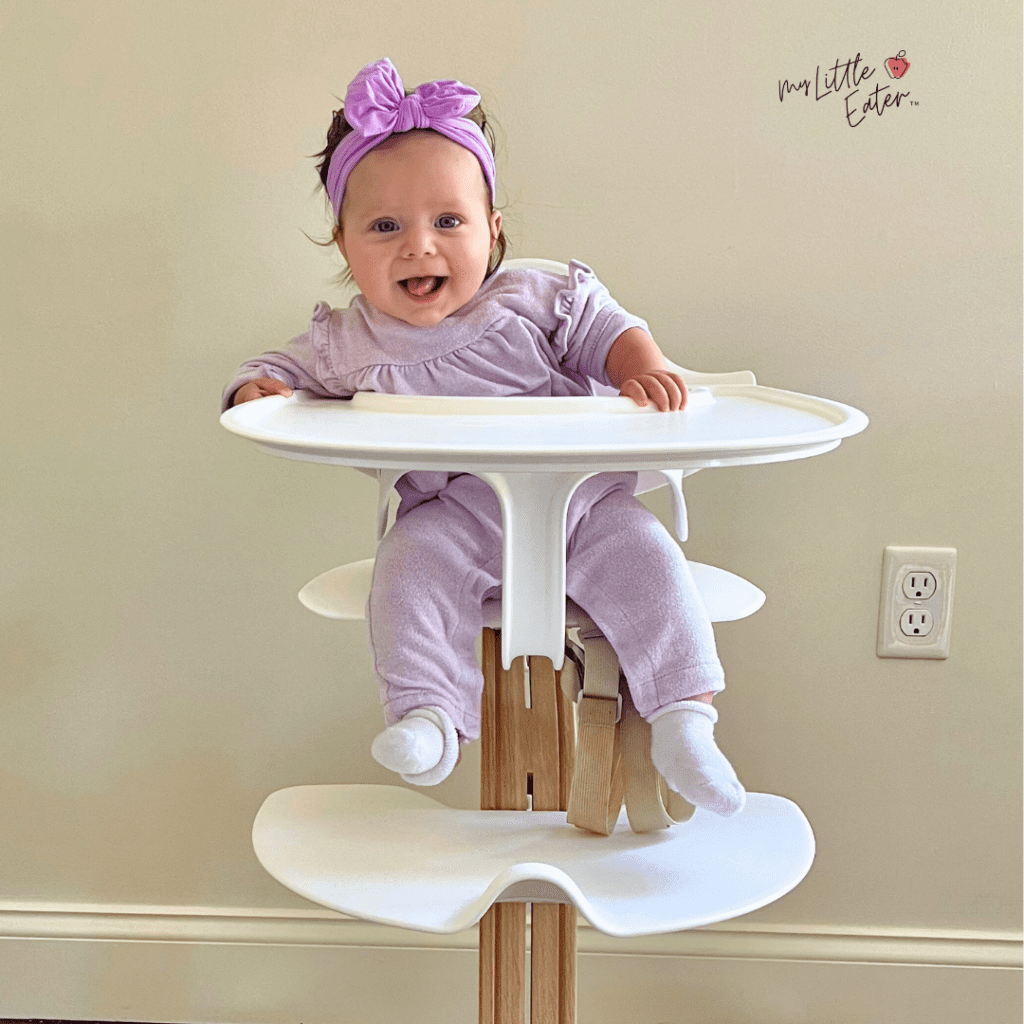
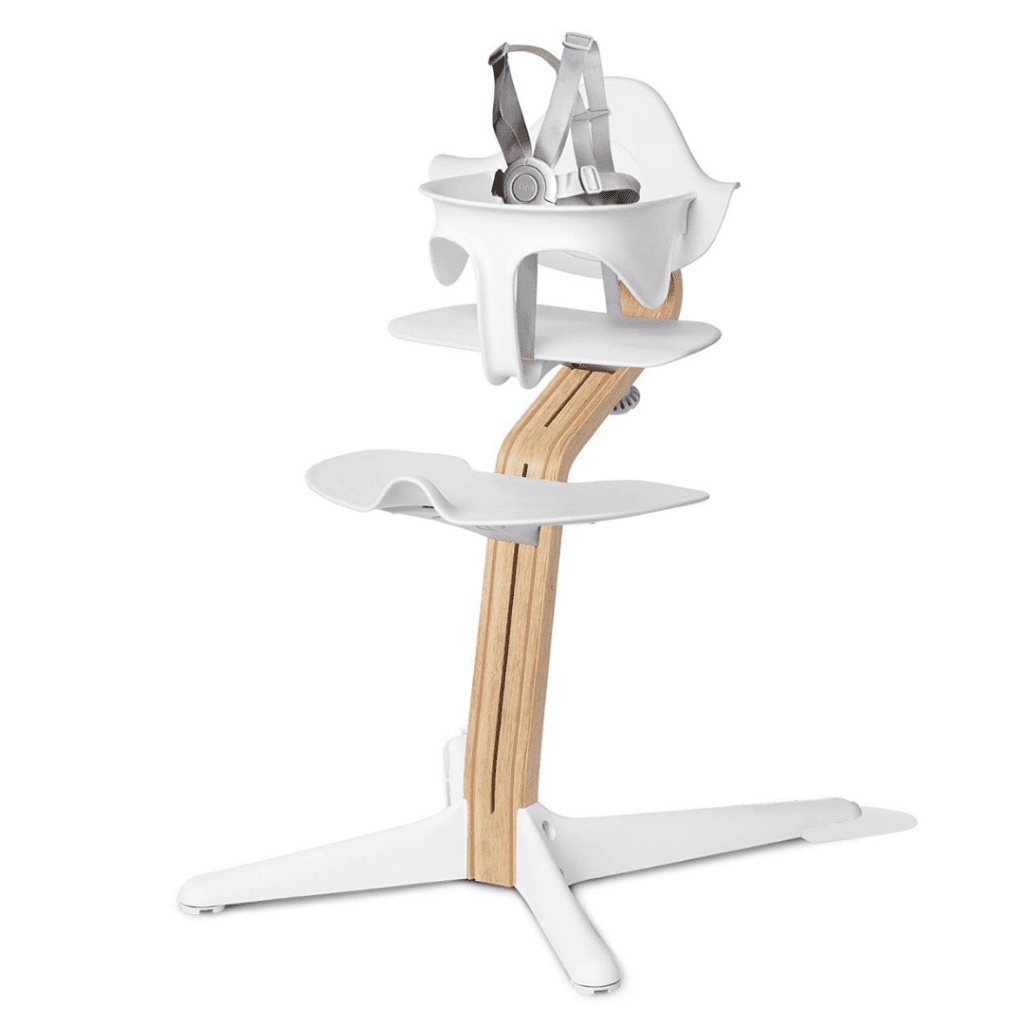
Nomi Highchair – This is one of my favorite highchairs because it has an adjustable footrest, is easy to clean, promotes a 90-degree position at the hips, and it looks pretty sleek too!
To add, you can remove the tray and the design of the legs makes it so that you can push it up to an adult dining table and have them eat off the table surface, just like the rest of the family!
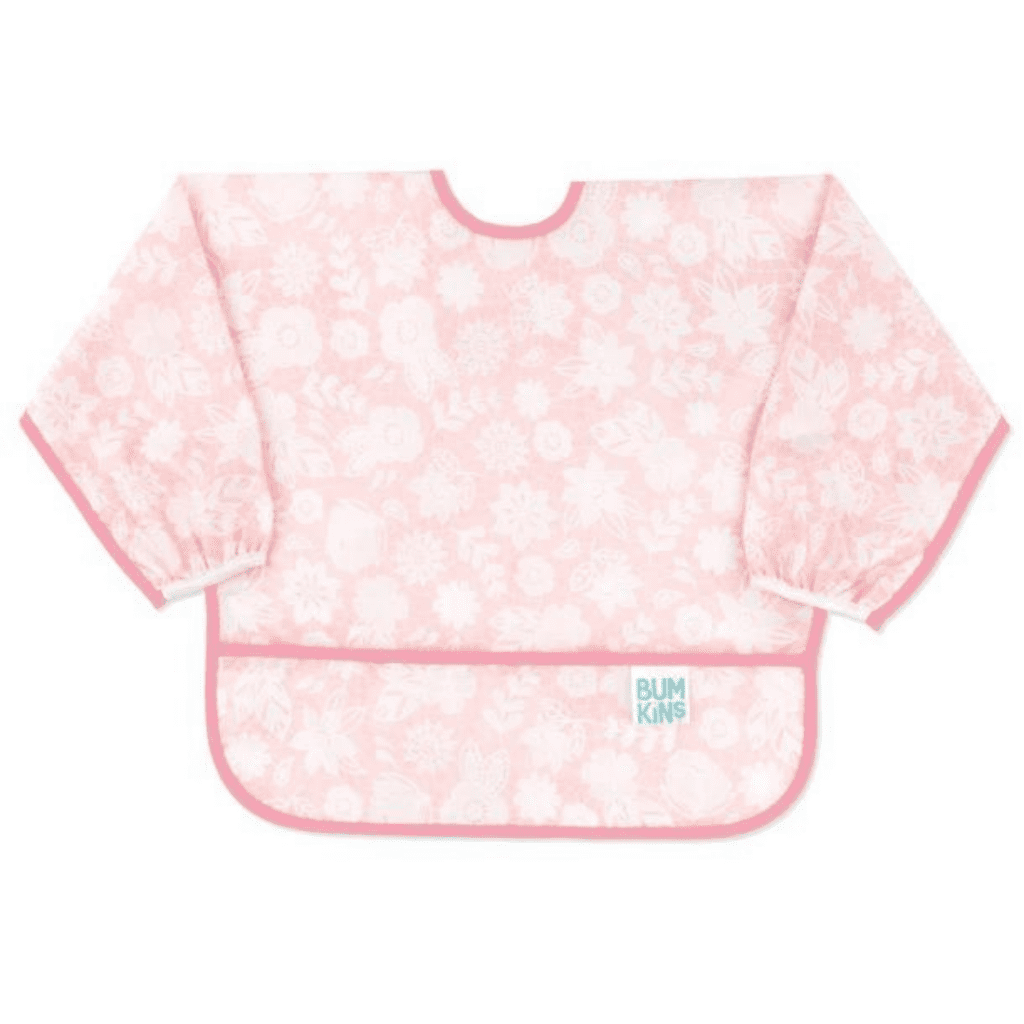
Long Sleeve Bibs – We did rotate through a variety of bibs, including long sleeve bibs, full highchair coveralls, small silicone bibs, frontal coverage sleeveless bibs – you name it.
Ultimately, what we still liked the best was long sleeve bibs that offered full upper body coverage. It made clean up so much easier knowing that food didn’t get on any of her clothes underneath.
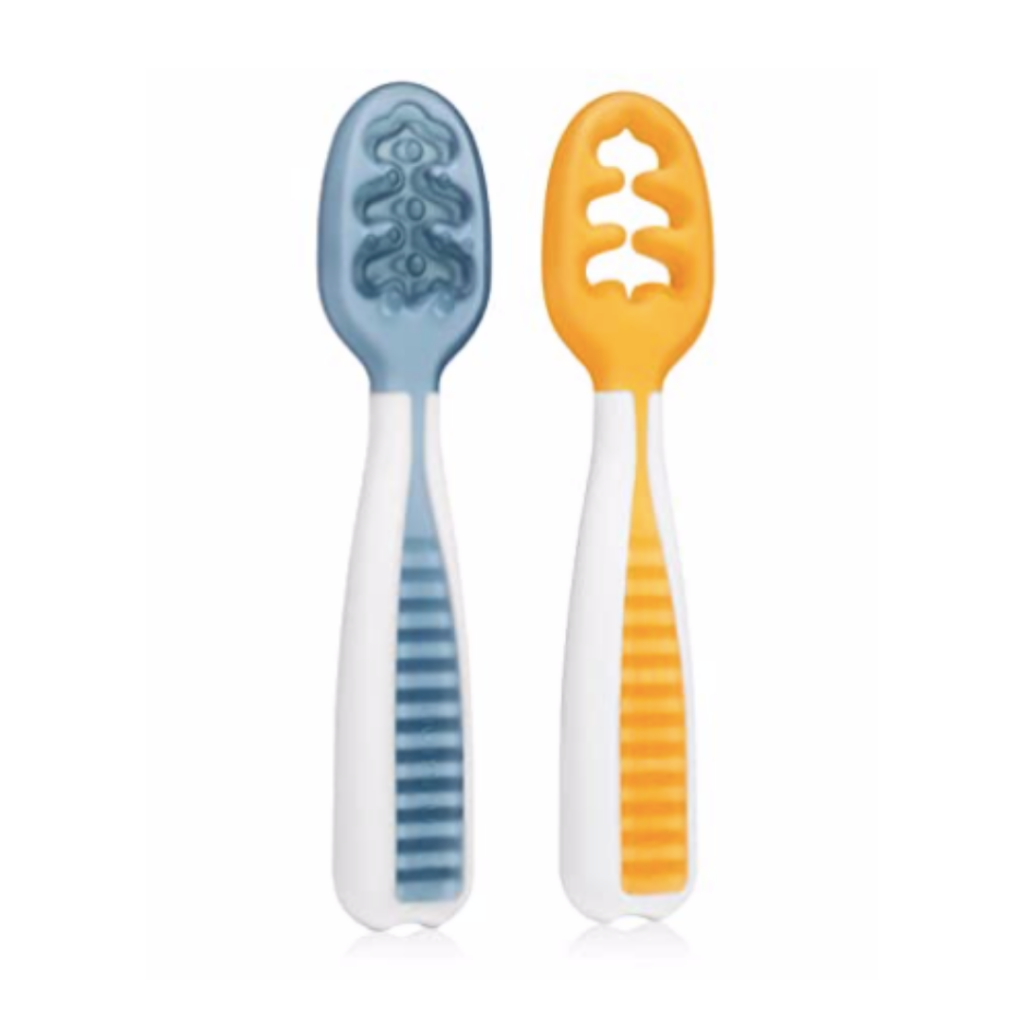
Num Num Gootensils – These spoons are a must-have in my opinion. They’ve got short handles that make it easy for your baby to aim and control, the grooves make it easy for solid food to stick and stay on without it easily falling off, and they can be placed in the mouth in any direction.
My advice is to have at least 2-4 of these spoons ready to go at every meal!
I never used to recommend this before, thinking it wasn’t needed, but after feeding Aila I realized that spoons are being dropped and need replacing way too frequently. Also, to get her to drop one out of her hand, I had to continually have a new one to offer her that was preloaded and ready to go!
When only one was available, she would get so upset when I’d try to take the baby spoon from her hand to preload it, and the pace of the meal ended up too slow, even for her.
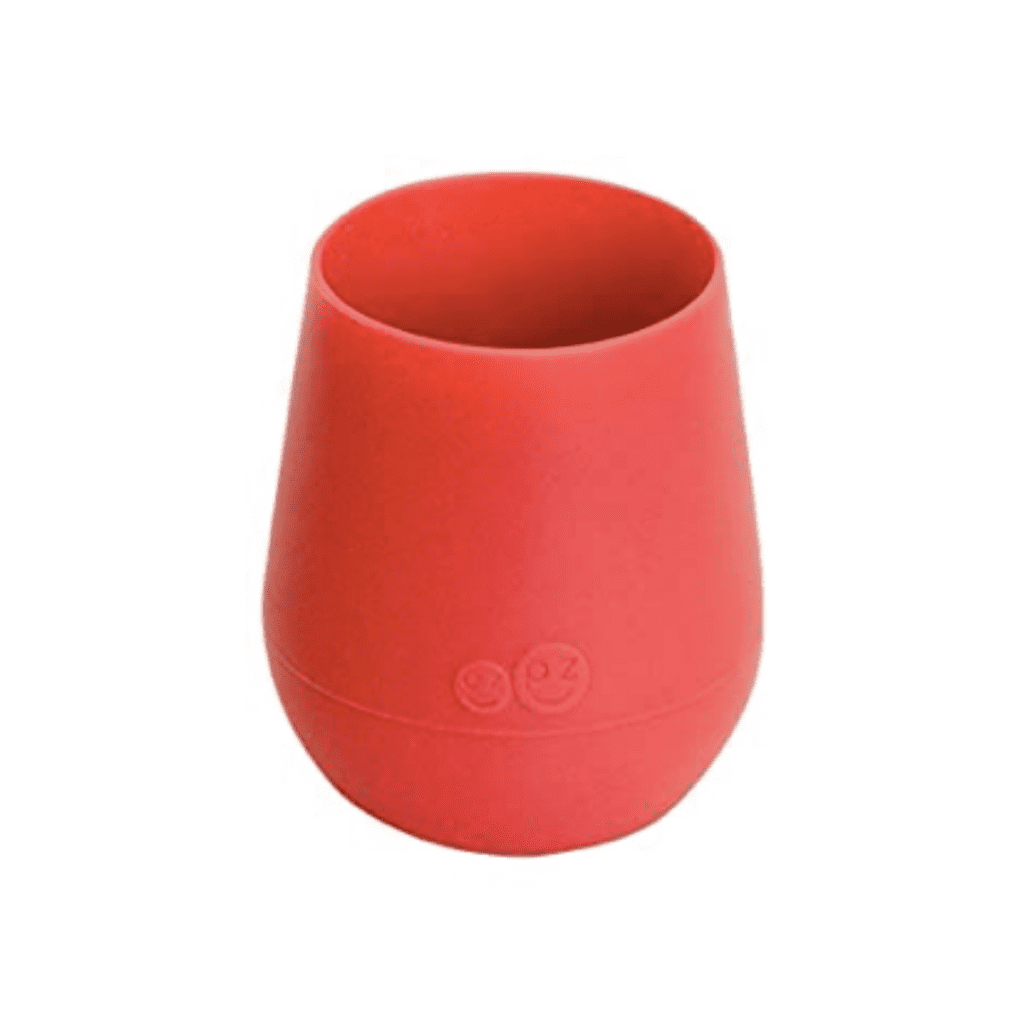
EZPZ open cup – You can choose any cup that’s small in size and easy for baby to hold, but we ultimately have a preference for the EZPZ tiny cup.
It’s made of food-grade silicone, is SO tiny so baby can wrap their hands around it easily, and it’s available in super cute colors!
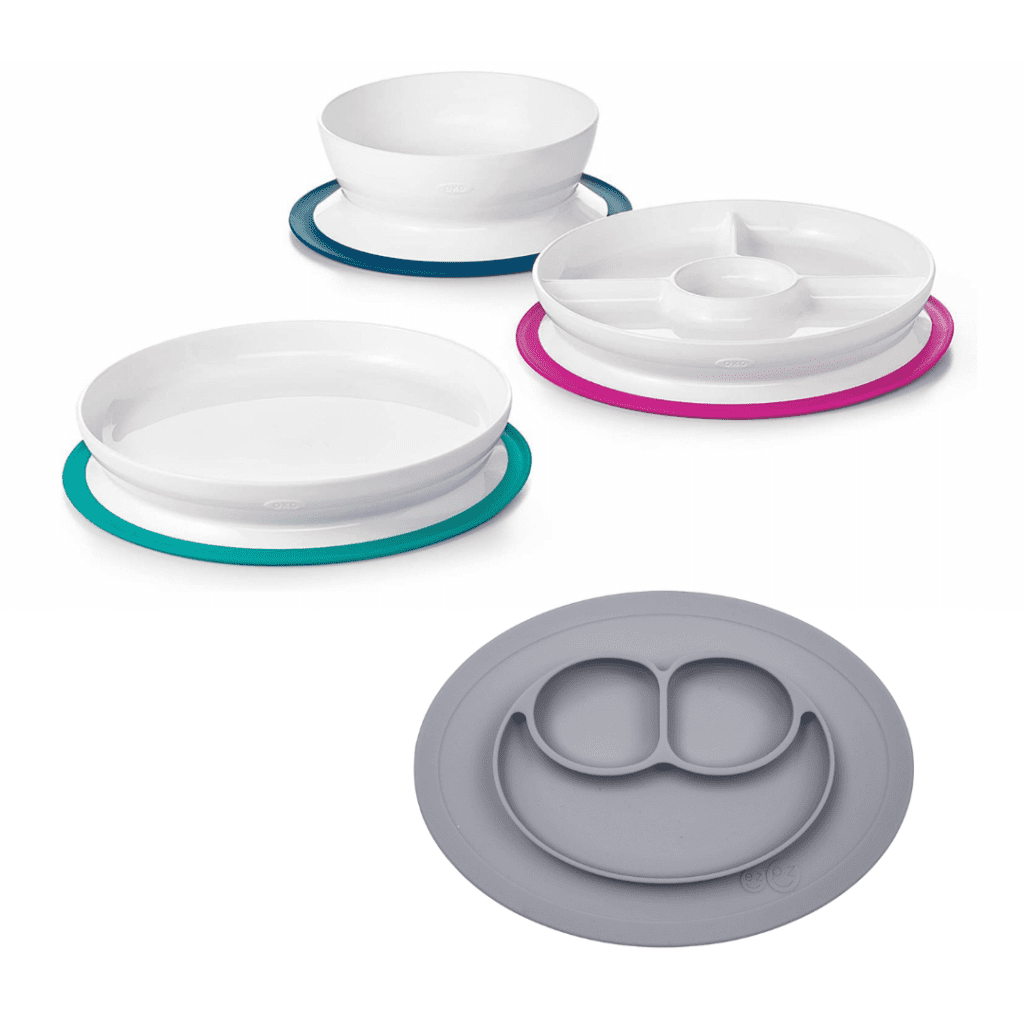
Suction plate with high rims – We used the EZPZ mini mat, but truth be told, any suction plate with high rims is perfect.
The high rims (whether it’s a divided plate or not) made it easier for Aila to scoop the solid food against, helping her bring it up into her palm. This was so much easier than food sliding all around her highchair tray.
The suction on the EZPZ mini mat isn’t the best, butOXO Tot has a great one that we eventually switched to using exclusively!
What’s funny is that Aila’s mom thought she could prevent a lot of the mess in the beginning and would place a garbage bag under the highchair before mealtime started. Three days in, and that whole idea was out the door!
The mess was inevitable, the effort of spreading the bag under the highchair felt like too much, and the main focus ended up being to cover her fabric dining chairs so as not to stain them if she threw solid food or spilled something on them.
Timing and frequency of solid food meals
We started with one meal a day, which has always been our recommendation for the first month of starting solids. It allows parents to ease into preparing solid food for their baby without getting too overwhelmed and gives your baby a good experience with what mealtime is and how eating works.
Because we don’t want breast milk or formula quantity to drop at this point, keeping it to one meal per day also ensures that they don’t fill up too much on solid food.
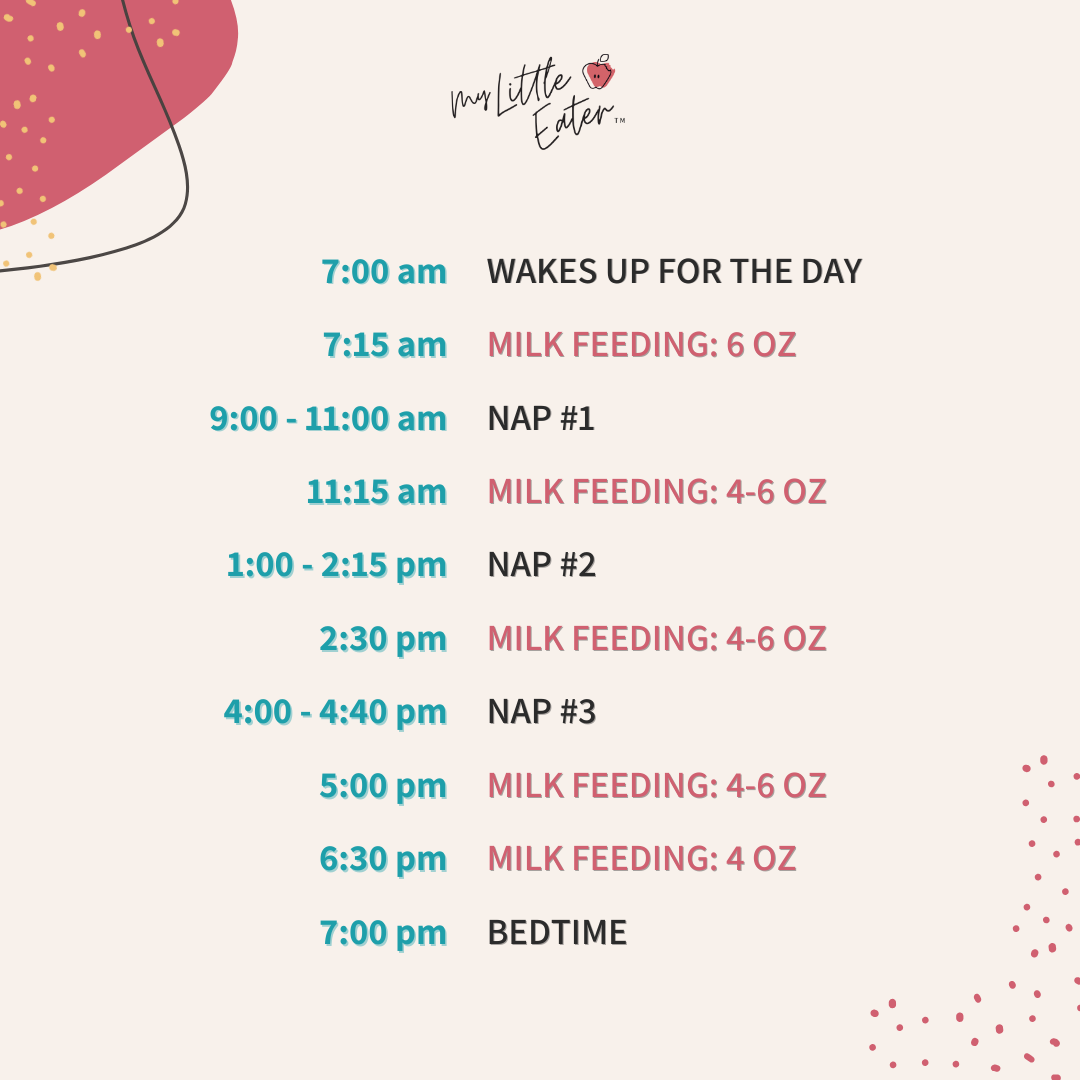
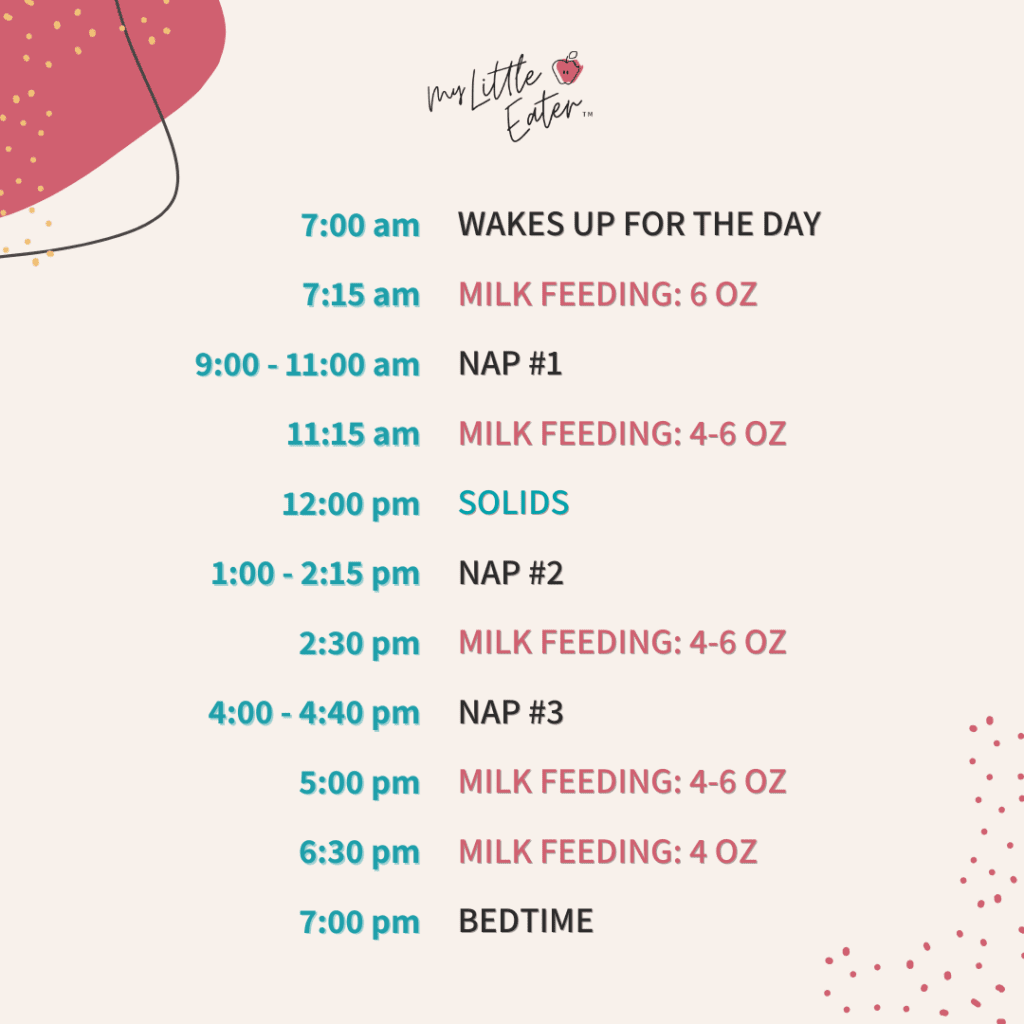
Aila’s mom knew from our Baby Led Feeding course that solids were to be offered somewhere between 30-90 minutes after a milk feeding (ie. breast milk or formula). She wrote down Aila’s nap and milk schedule and we worked off of that.
Here is what she was working with:
We decided to offer her solids around 11:45 am (30 minutes after her mid-morning bottle). It seemed to go ok for the first few meals, but then a couple more days in, we realized that she wasn’t as interested in solid foods right away when being put in her highchair.
It would take her about 15 minutes to warm up and start eating, so we decided to get ahead of it and delay offering the meal by another 15-20 minutes (a total of 45-50 minutes post-milk feeding). This worked beautifully!
Here was her official solids schedule:
You might go through some trial and error to modify when you offer solid food based on your baby’s mood, how much breast milk or formula they’ve had, etc. – that’s normal!
You also may have to adapt on days when sleep doesn’t go as expected – we recommend being flexible with your schedule as best as you can. Don’t feel like you have to follow this example schedule exactly, customize it to be what works for your baby and family situation.
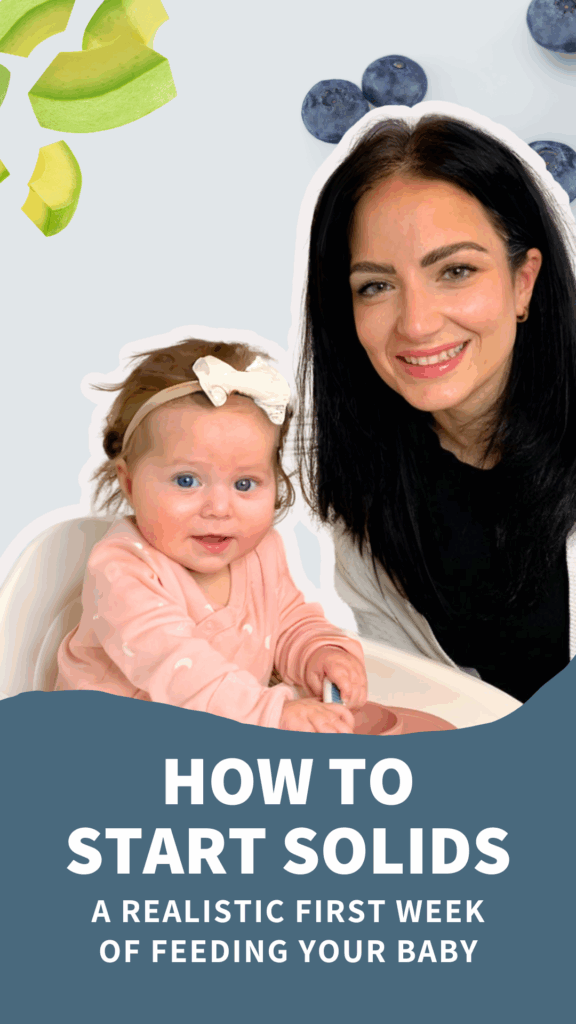
If you’re feeling overwhelmed about starting solids and you’re not sure where to begin, join our FREE workshop – How to start solids: A realistic first week of feeding your baby. This workshop is for parents ready to feel confident and prepared to start solids—without all the guesswork.
Learn exactly what to feed, when to feed it, and how to do it—step-by-step—with expert guidance from pediatric dietitian, Edwena Kennedy. Plus, get a FREE 5 day meal plan just for attending!
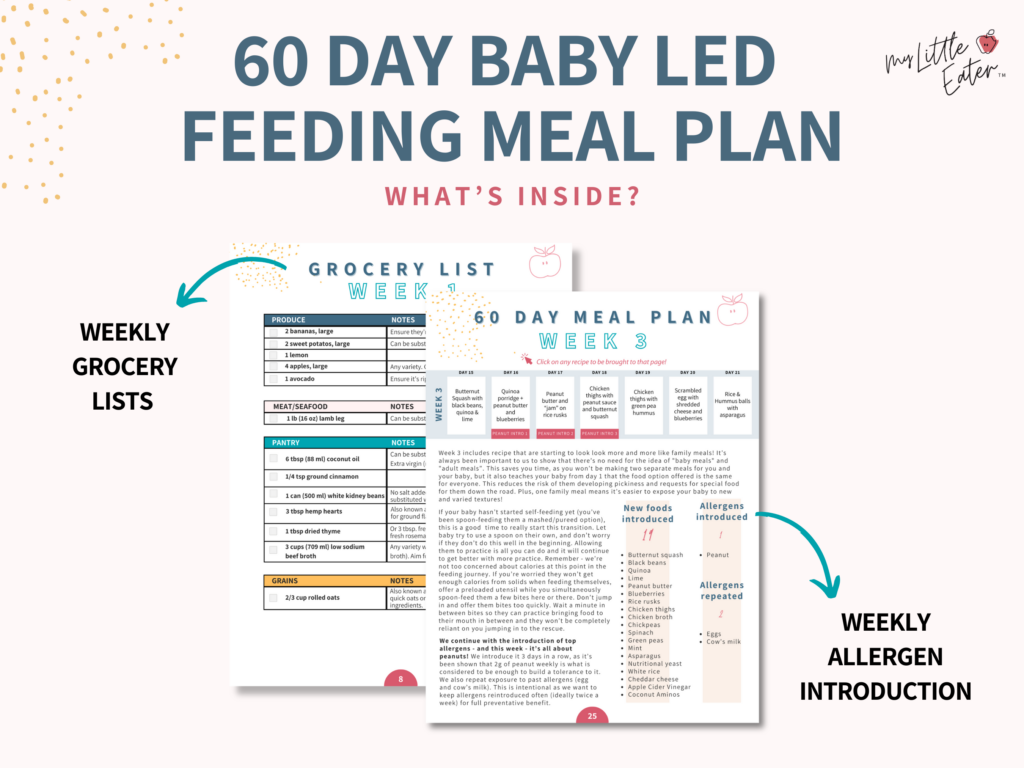
We followed our 60 Day Baby Led Feeding Meal Plan because we knew we wanted to take the guesswork out of planning food options and meals for Aila that would be ideal nutritionally and for her skill level. The meal plan starts with super easy foods that require very little prep, and the menu (created by our team of dietitians) looks at a balance of nutrients and food types.
Even though it starts with only one or two ingredients per meal, it gives options for the addition of high-iron and high-fat foods to boost your baby’s nutrition. Plus, the week is planned to include a good variety of fruits, vegetables, meat, and grains.
Even better? It reuses ingredients so you’re not buying a whole bunch of random ingredients and having a huge grocery bill!
The meal plan also starts with easy phase 1 textures from the Texture Timeline™ and gradually progresses along to more advanced textures (along with options to go down in texture if needed). It’s a no-brainer to follow the plan because it comes complete with a grocery list for the week and videos on how to prepare solid food!
Allergens are strategically introduced starting in week 2, so this first week is just about easing in without worrying about there being a high chance of your baby reacting to anything specific.
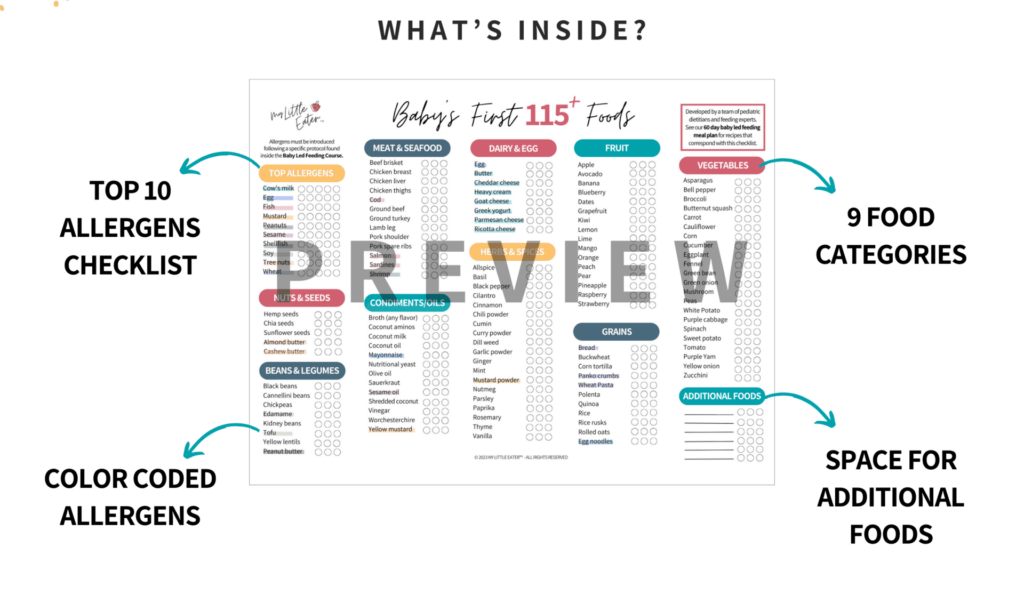
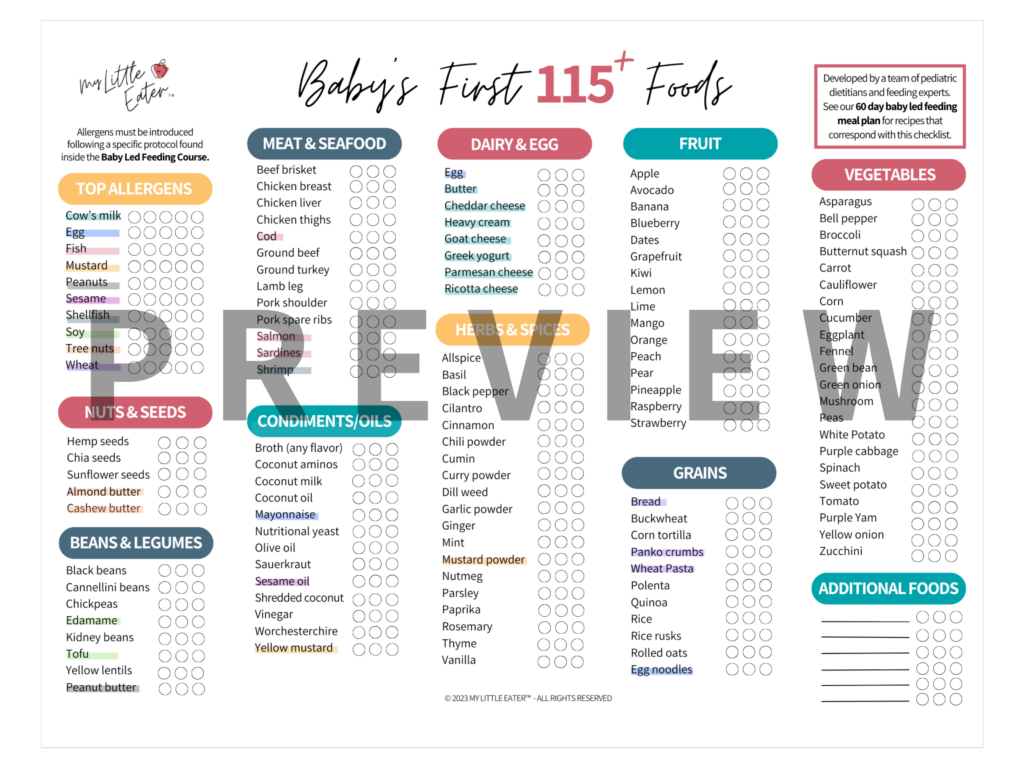
Aila’s mom checked off each solid food from our115 First Food List as it was served. This list is based on all the ingredients we introduce in our60 Day Baby Led Feeding Meal Plan. She hung the checklist on her fridge so she could easily track and visualize what foods she had been introduced to. It even has a spot to add additional foods that aren’t part of the meal plan.
Aila’s mom couldn’t believe how fast she was able to go through foods! When you can easily see it, it’s super motivating to keep introducing more. Plus, you can track how many times your baby has been exposed to a food. So even though she may have been introduced to a food once, Aila’s mom was reminded to re-offer it a few times at some point within the first year to keep up a tolerance to it and reinforce her liking for the food.
In the first week, Aila was introduced to 13 new foods, which is amazing!
Here’s the full list:
Banana
Sweet potato
Coconut oil
Rolled oats
White beans
Lemon
Apple
Cinnamon
Avocado
Hemp hearts
Lamb
Thyme
Beef broth
It’s a total myth that you’re only supposed to introduce one new food per day. The logic behind this outdated rule was to be able to watch for any symptoms of an allergic reaction and identify what food it came from.
However, we know that the risk of having food allergies to foods not on the list of top allergens is extremely low (like rice or chicken). We also know the benefit of introducing as many new foods and textures before age 1 is huge! It’s the key to preventing pickiness and teaching them how to eat, chew, and love a wide variety of foods.
So – we don’t recommend following this whole“3 day wait rule” when introducing new foods. Instead with Aila, we focused on broadening her palate and building her foundations for a variety of foods!
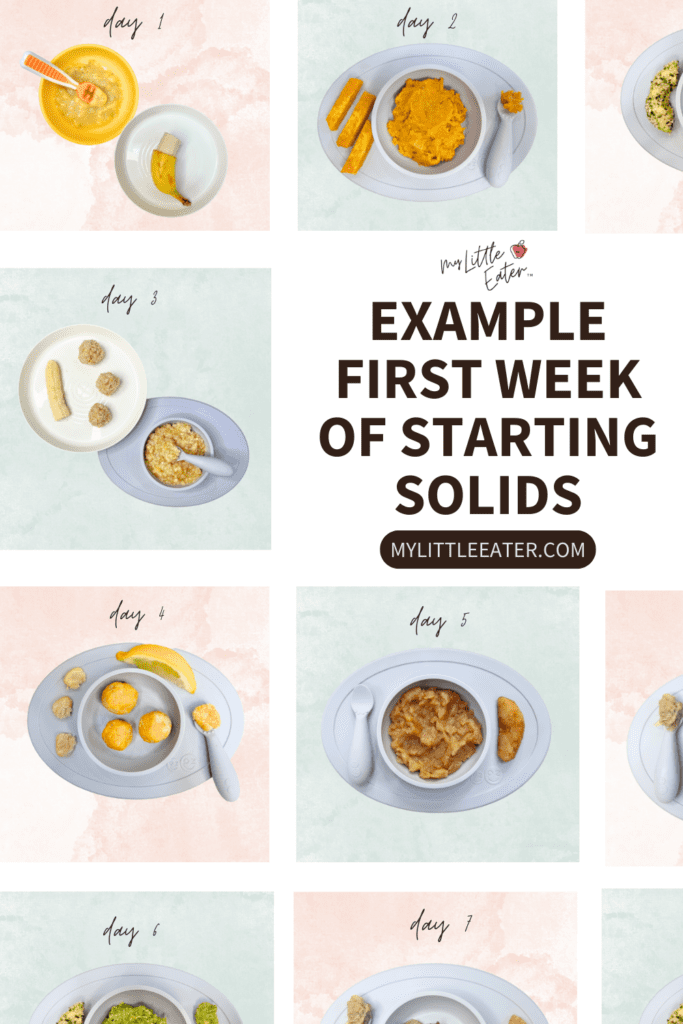
Let’s go through the meals day by day – feel free to follow along when you’re ready to introduce solid foods to your baby too!
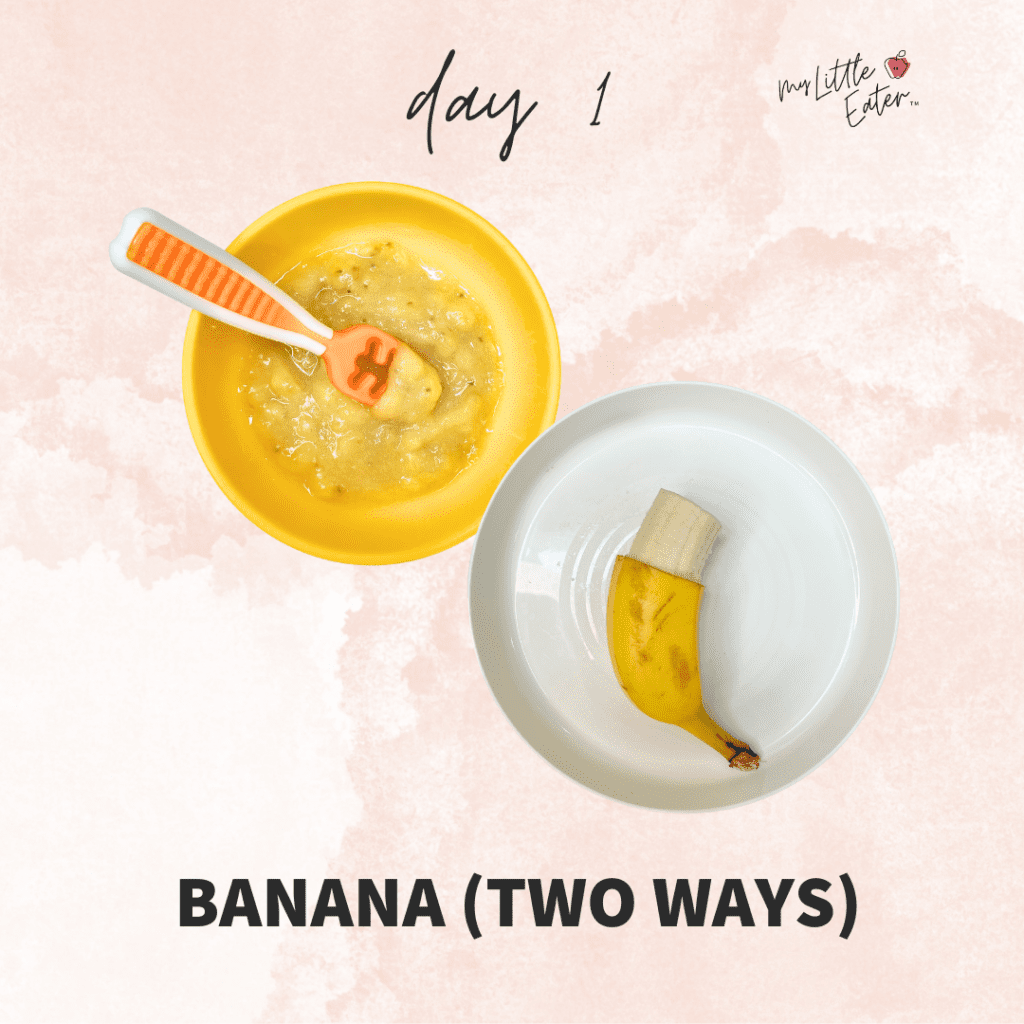
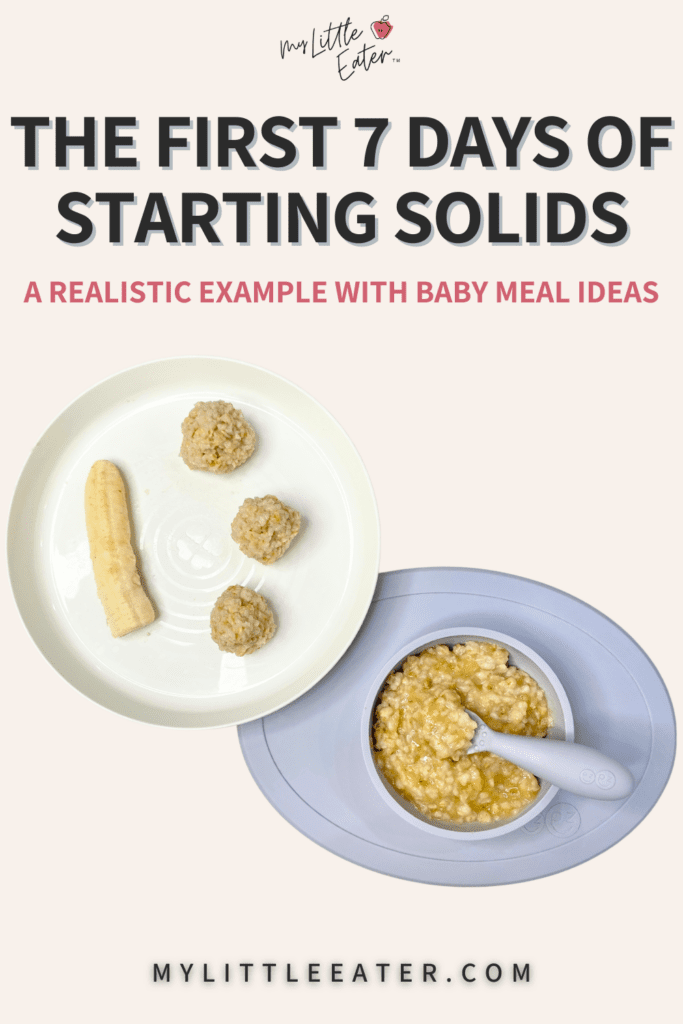
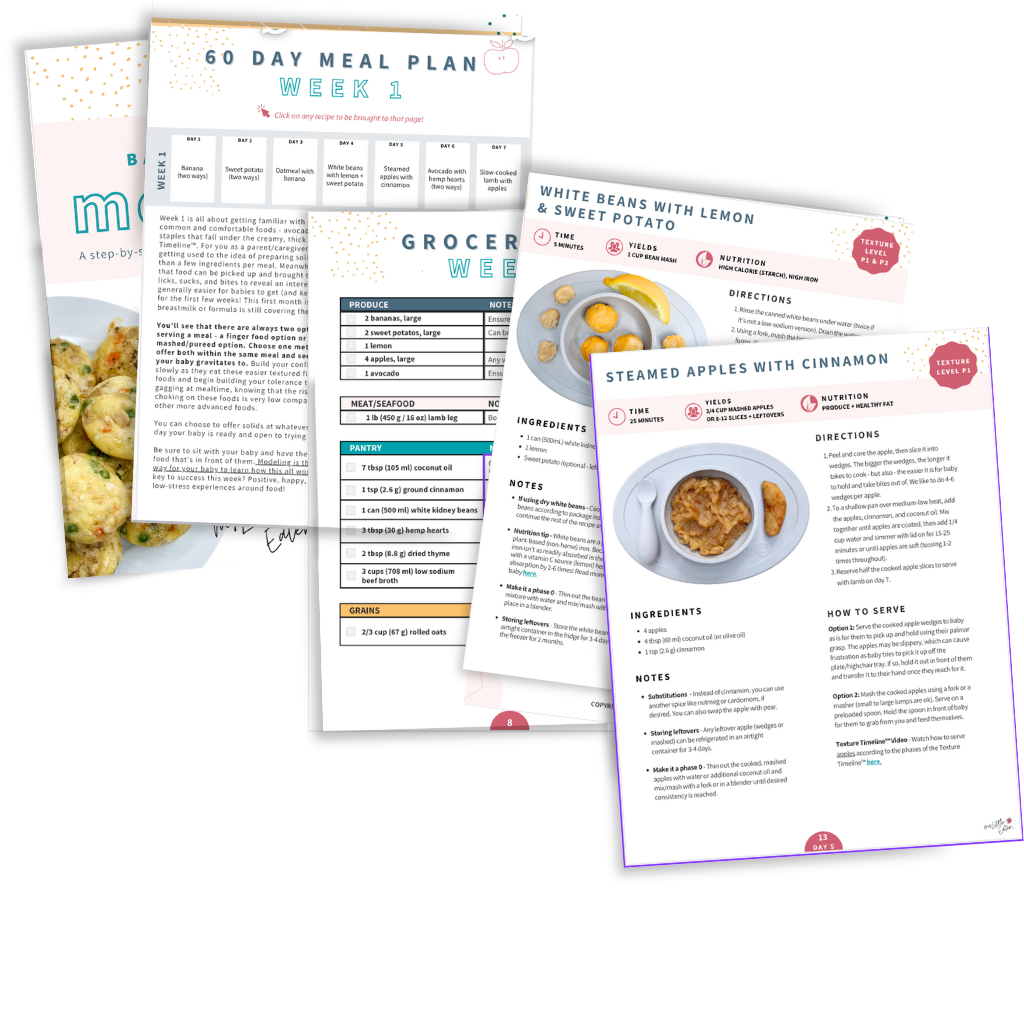
Day 1: Banana (two ways)
Nutrition: High-calorie (starch) Texture Phase: Phase 1 on the Texture Timeline™
Banana was chosen first in the meal plan because it’s a no/low prep food, can be made into a mash or a finger food easily, and it’s a great phase 1 texture on ourTexture Timeline™. Remember – phase 1 textures are thick, creamy textures that don’t require heavy chewing, but provide a good mouthfeel that requires some tongue movement.
This is a great place for most babies to start (you don’t have to go with phase 0 thin and smooth purees!). We like having lumps for texture stimulation and a good kickstart to oral motor skill development.
That being said, with our version of baby led feeding, you can start wherever you and baby are most comfortable. If that means thinning the banana down further (and blending it to become perfectly smooth) – go for it! Just be sure to move up in texture phases once your baby masters that texture (usually within a few days to a week).
Nutrition tip – Add 1/2 tbsp. of hemp hearts mixed into the banana mash and/or dip the top of the banana pop into the remaining 1/2 tbsp. of hemp hearts to serve as a coating. Hemp hearts offer a good boost of iron and protein. They’re also a complete protein – meaning it has all the essential amino acids required for proper health.
Note: Hemp hearts are the hulled version of hemp seeds (meaning, the outer shell has been removed). This makes it easier to digest and serve to babies and toddlers.
Directions
Scrub the outside of the banana with a clean brush under water. This may seem odd, but because one of the ways we’re serving the banana is with the peel still on part of it, we want it as clean from any pesticides or dirt as possible, in case baby takes a lick of the peel.
Cut the banana in half. Take one half and peel it. Mash that peeled banana half with the back of a fork until you get a thick puree (small lumps are ok).
With the other half of the banana, we’re going to make a banana pop. Take one-half of the banana, starting about ⅓ of the way down, and score around the perimeter of the banana. Only cut through the peeling. Make one vertical slice (cutting through the peeling only) through the scored section of the banana. Remove the peeling from the section of the banana that has been cut. This method makes it easier for baby to hold the banana (a lot less slippery) and it also prevents overstuffing of the mouth (only a small amount of banana is exposed at a time).
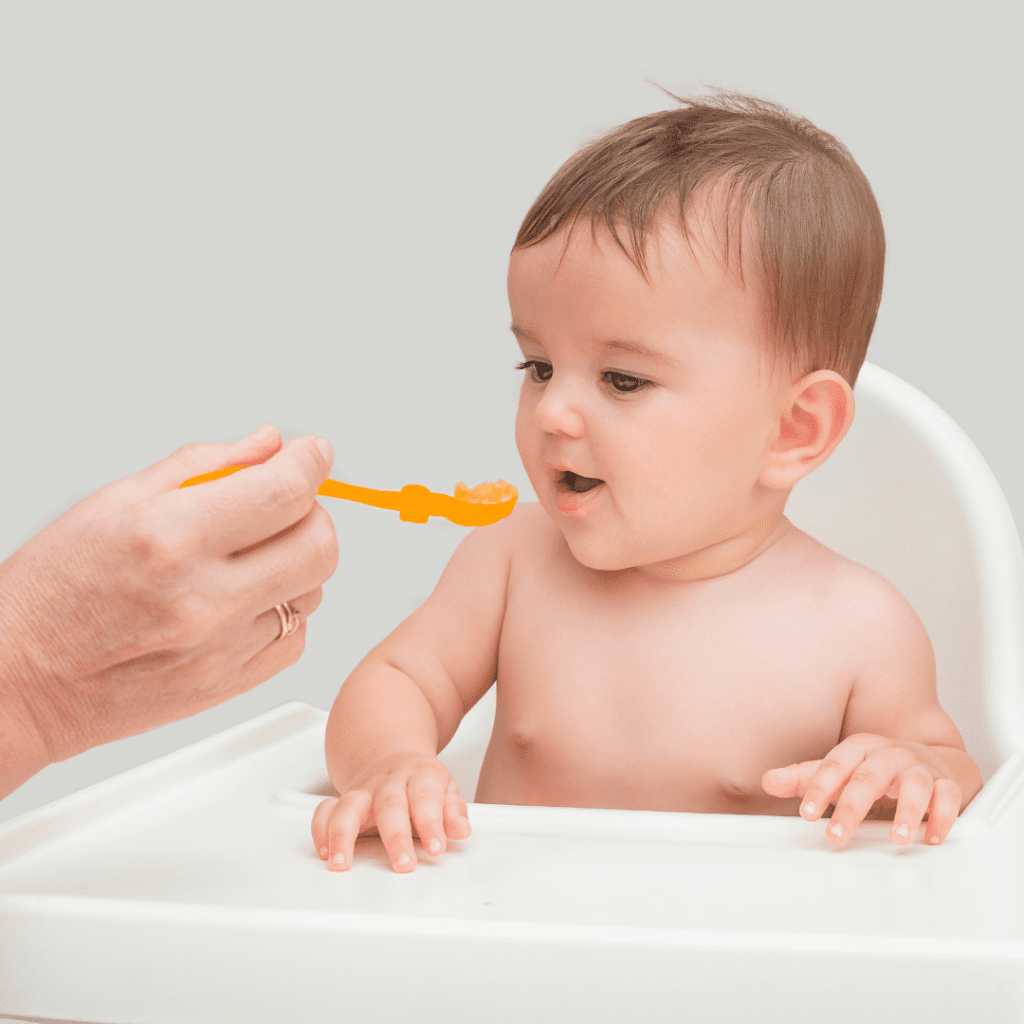
Option 1 – Serve the mashed banana on a preloaded spoon (you can either spoon-feed your baby or hold it in front of them for them to grab the spoon from you to try feeding themselves).
Option 2 – Offer the banana pop for your baby to hold with one or two hands. Let them take their time figuring out what’s edible and what’s not. They may just lick it or gum on it or take a bite right away!
Texture Timeline™ Video – Watch how to serve banana according to the phases of the Texture Timeline™.
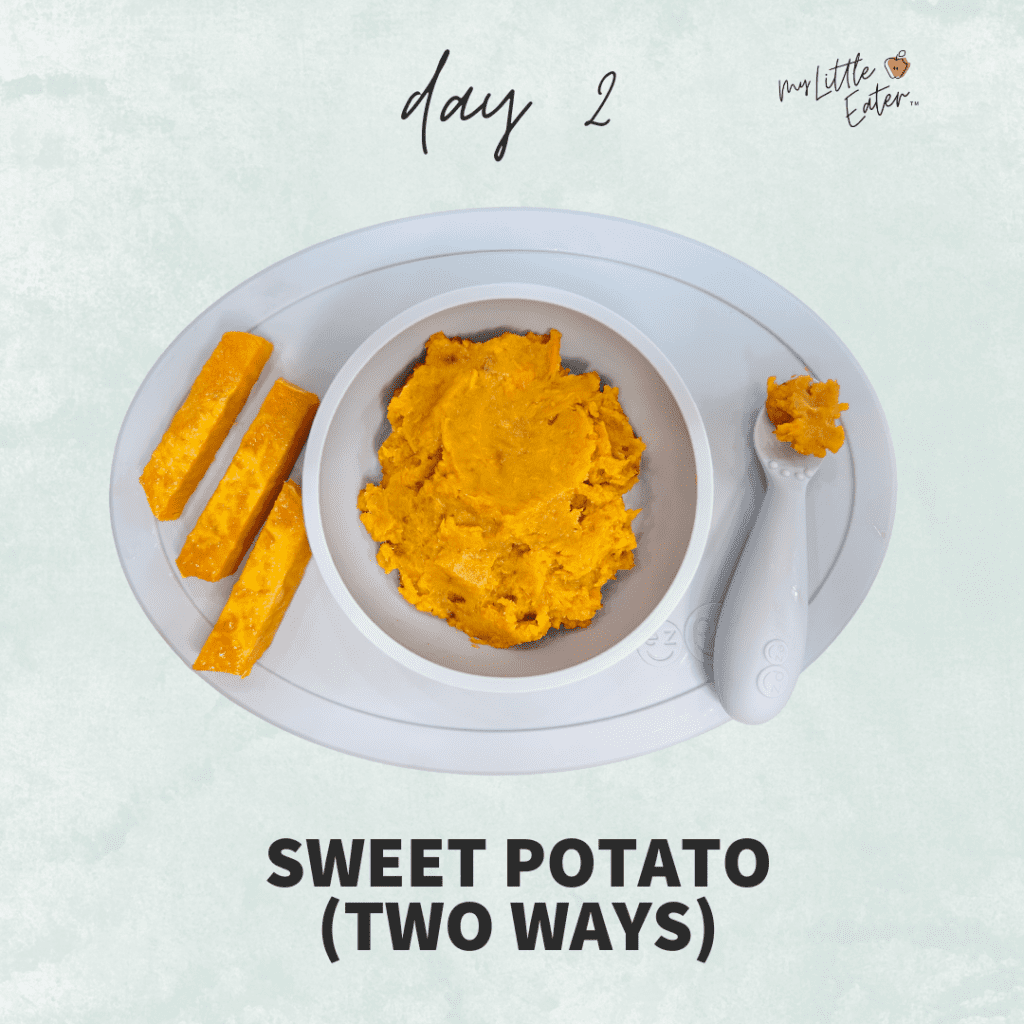
Day 2: Sweet potato (two ways)
Nutrition: High-calorie (starch & healthy fat) Texture Phase: Phase 1 on the Texture Timeline™
On day 2, we roasted sweet potatoes with coconut oil and mashed some for a pureed version as well as cut some into finger shapes for a finger food version. Both options provide a phase 1 texture experience, but we really encourage you to let your baby self-feed with either option!
Directions
Preheat oven to 425ºF (218ºC) and line baking sheet(s) with parchment paper.
If coconut oil is solid at room temperature, microwave it for 20-30 seconds to liquify it.
Peel each sweet potato and slice them horizontally into 1-inch thick rounds.
Add the coconut oil to the sweet potato rounds and gently toss. Arrange the rounds onto your baking sheet, being careful not to crowd the pan. Bake for 17-25 minutes, flipping halfway through. Every oven is slightly different so aim for it to be cooked until soft enough to squish – but not burned.
After letting the rounds cool, cut 3/4 of them into thick finger shapes. Set aside 1/2 of them for day 4’s meal. *Note: The reason we suggest rounds instead of finger shapes right from the beginning, is we find finger shapes crisp up on the edges quickly compared to rounds.
Mash the remaining 1/4 of the cooked sweet potato rounds with the back of a fork for the mashed puree version.
Spice it up – Add your choice of seasonings after tossing the sweet potato with coconut oil. You can use cumin, paprika, garlic powder, and/or onion powder. Read more about why we encouragespices for babies.
Option 1 – Serve the mashed sweet potato on a preloaded spoon (you can either spoon feed your baby or hold it in front of them for them to grab the spoon from you to try feeding themselves). Small lumps are ok for a phase 1 food.
Option 2 – Offer the sweet potato fingers for baby to hold with one or two hands.
Texture Timeline™ Video – Watch how to serve sweet potato according to the phases of the Texture Timeline™.
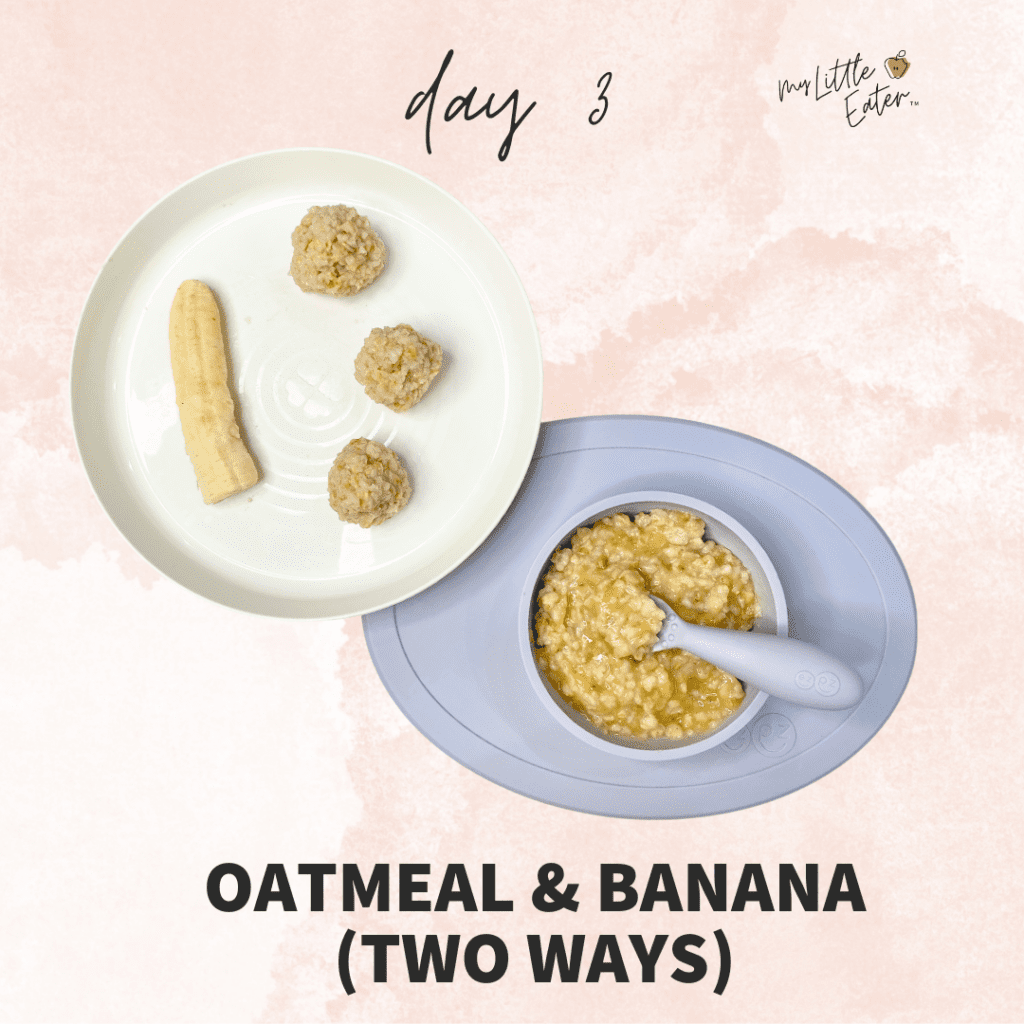
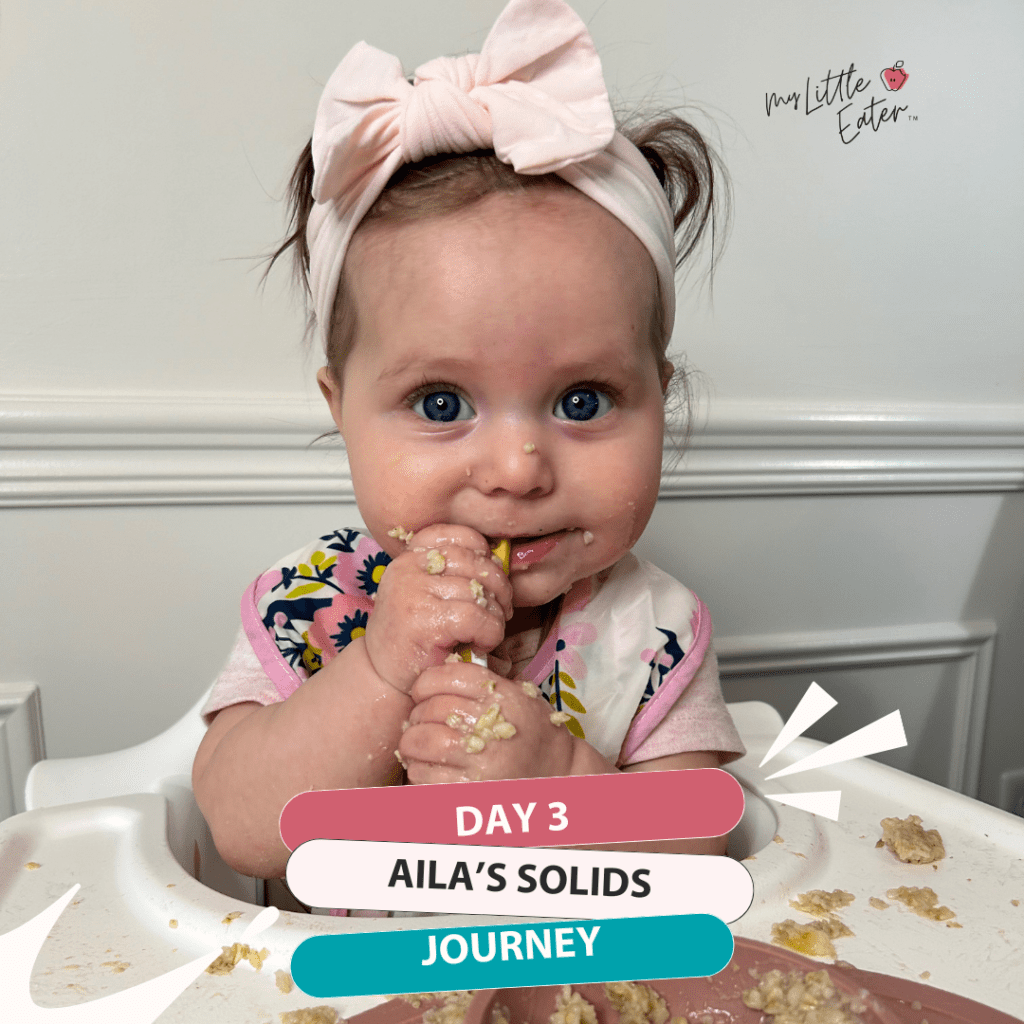
Day 3: Oatmeal with banana
Nutrition: High-calorie (starch) Texture Phase: Phase 1 and Phase 2 on the Texture Timeline™
Rolled oats offer a phase 2 texture experience that is great to move into after a couple of successful meals. Phase 2 textures are much more lumpy and require a light chew or manipulation in baby’s mouth.
Oats are also a great alternative to rice cereal which can cause arsenic overload if offered too frequently. Learn more about the research behind our recommendations onrice for babies.
If you’d like to stick to a phase 1 or phase 0 texture, start with instant oat cereal. You can purchase an iron-fortified baby cereal, or you can serve “adult” instant oatmeal (no sugar added) and thin it out with liquid to the desired texture.
Directions
Add the oats and water to a saucepan and bring it to a boil. Cover with a lid, and reduce the heat to a steady simmer. Cook, stirring occasionally, for about 5 minutes or until oats are tender and most of the water is absorbed.
Remove from heat and set aside for the oats to cool (about 10 min).
Meanwhile, peel the banana and cut it in half horizontally. Drive your index finger through the top of the banana to create three perfect segments your baby can hold using their palmar grasp.
Option 1 – Once the oatmeal is cooled, you can scoop about 2 tbsp. of oatmeal into the palm of your hand and roll it into a ball for your baby to hold using their palmar grasp. Offer the banana fingers as well for baby to hold and feed themselves using their palmar grasp.
Tip: Roll the banana pieces in leftover hemp hearts from day 1, or in infant cereal, for added protein or iron, respectively! You can also sprinkle leftover hemp hearts right into the oatmeal mixture.
Option 2 – Mix the banana into the oatmeal after it’s been cooked and slightly cooled. Offer the oatmeal banana mixture in a bowl with a preloaded spoon. Hold the spoon in front of your baby for them to grab from you and feed themselves, if possible.
Texture Timeline™ Video – Watch how to serve oats according to the phases of the Texture Timeline™.
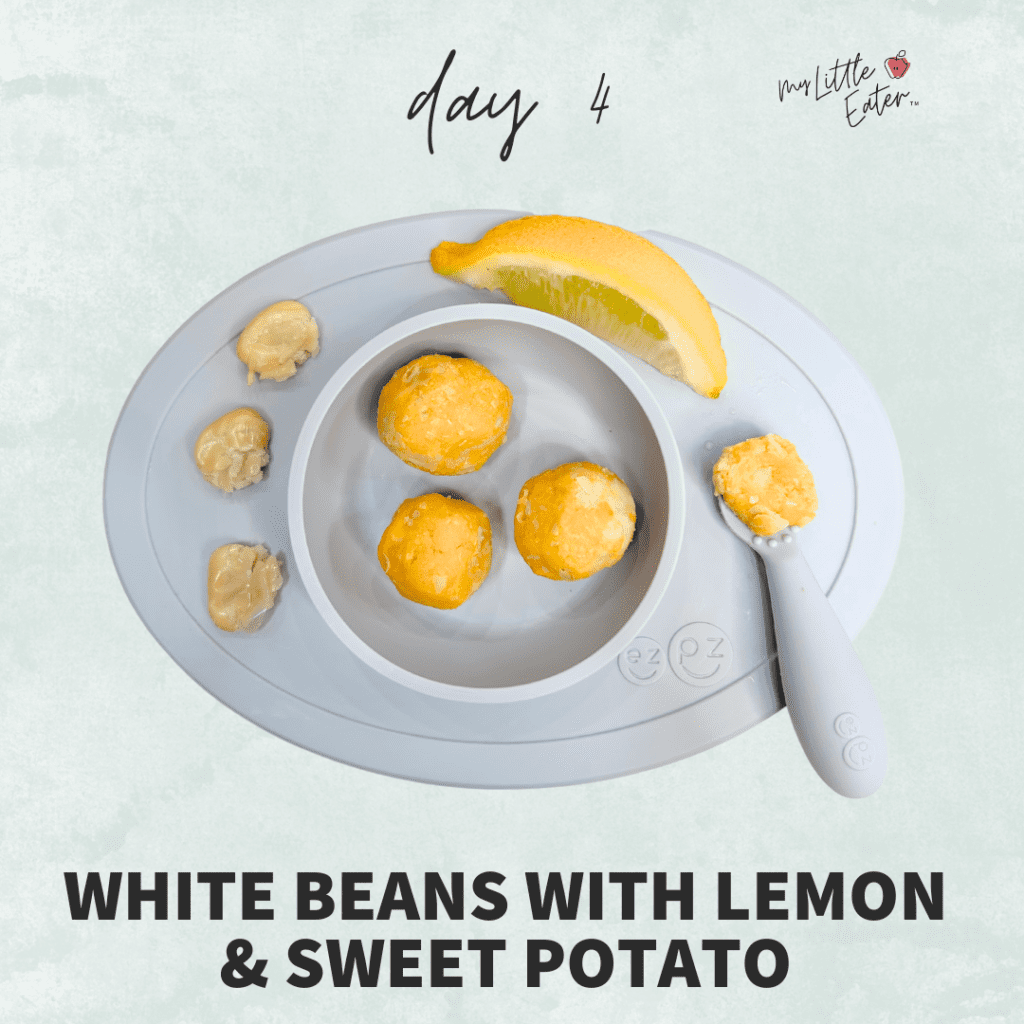
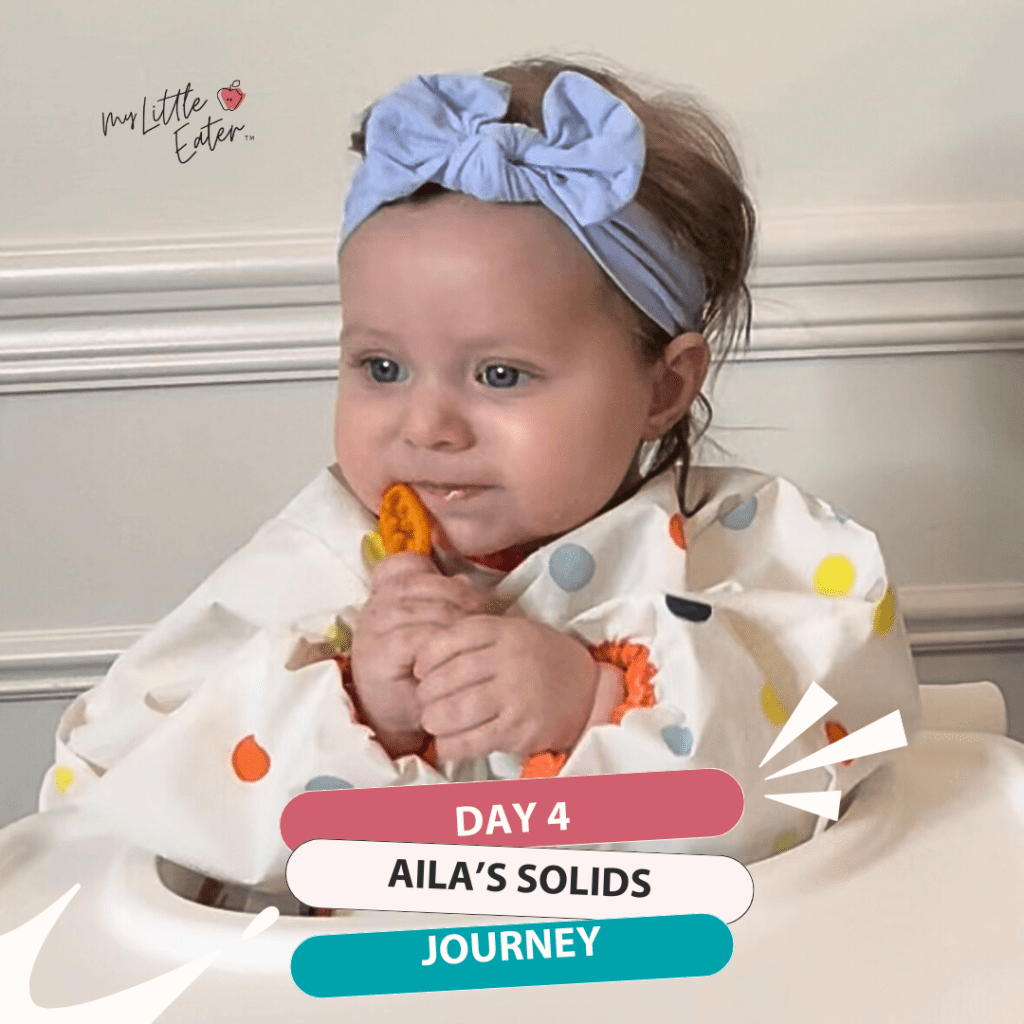
Day 4: White beans with lemon and sweet potato
Nutrition: High-iron & high-calorie (starch) Texture Phase: Phase 1 and Phase 2 on the Texture Timeline™
Day 4 includes the strategic introduction of a high-iron food – white beans! Iron is so important to incorporate daily in a baby’s diet because iron stores begin to deplete around 6 months of age. This means that babies need supplemental iron through their diet to reach the amounts they need.
Since we’re just starting out with solid food, it’s ok that we don’t have high quantities in every single meal. But – we do want to get the ball rolling by exposing baby to a variety of iron-rich foods. This way, by the time their iron stores deplete completely, they are loving and know how to eat high-iron foods in every meal, every day.
White beans are a non-heme (plant-based) iron source. That means it’s not as easily absorbed in the body as an animal source of iron. That’s why the meal plan incorporates a vitamin C source – lemon – in the recipe, which boosts the absorption of iron found in the white beans.
Directions
Rinse the canned white beans under water (twice if it’s not a low-sodium version). Drain the water.
Using a fork, mash the beans until a lumpy puree forms. A lumpy texture and skin are ok, as long as the whole bean shape doesn’t remain.
Juice 1/2 a lemon and mix the juice into the white bean puree.
Cut the remaining lemon in half (yielding 2 quarter wedges).
If you have leftover sweet potato from day 2, stir leftover mashed sweet potato into the lemon white bean mixture until well combined (go for a 1:1 ratio of beans to sweet potato). Roll mixture into 2 tbsp-sized balls.
Option 1 – You can serve the white bean and lemon juice mash on a preloaded spoon. Hold the spoon in front of your baby for them to grab from you and feed themselves, if possible.
For a finger food option, serve the quartered lemon wedge for baby to hold with one or two hands and experience the sour taste of lemons. Don’t shy away from this taste exposure – a lot of babies love this!
Option 2 – Serve the sweet potato + bean balls to baby as is for them to hold using their palmar grasp.
Option 3 – If your baby is older and has developed their pincer grasp (8-9 months+), they can use that to pick up the lightly smushed beans (between their thumb and forefinger). Squeeze a little lemon juice on top before serving. Alternatively, you can preload them on a baby-safe fork for baby to self-feed.
Adult meal – Make itmore appropriate for adults by adding salt and spices, forming the bean + sweet potato mixture into a patty, and cooking on a pan over low heat for 7-8 min (flipping halfway) until lightly crisp on the outside. Serve in burger buns.
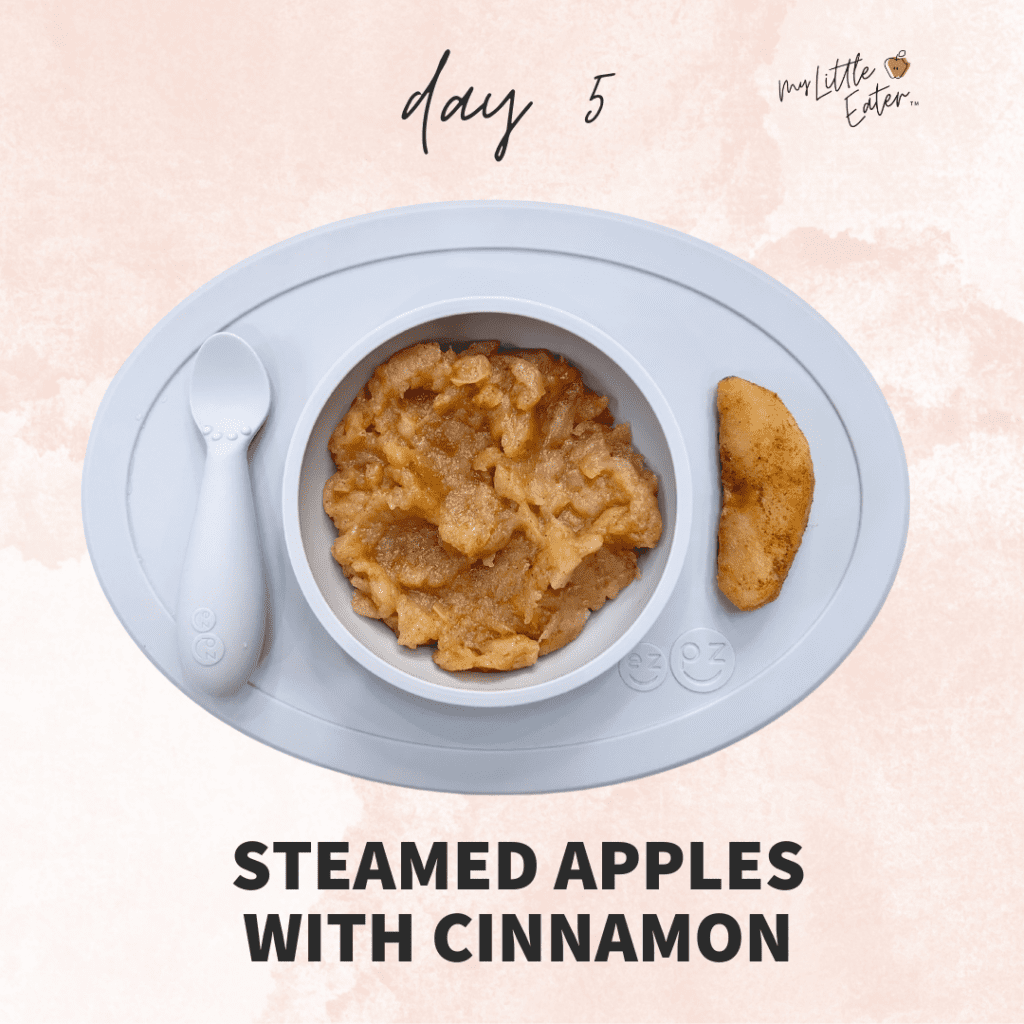
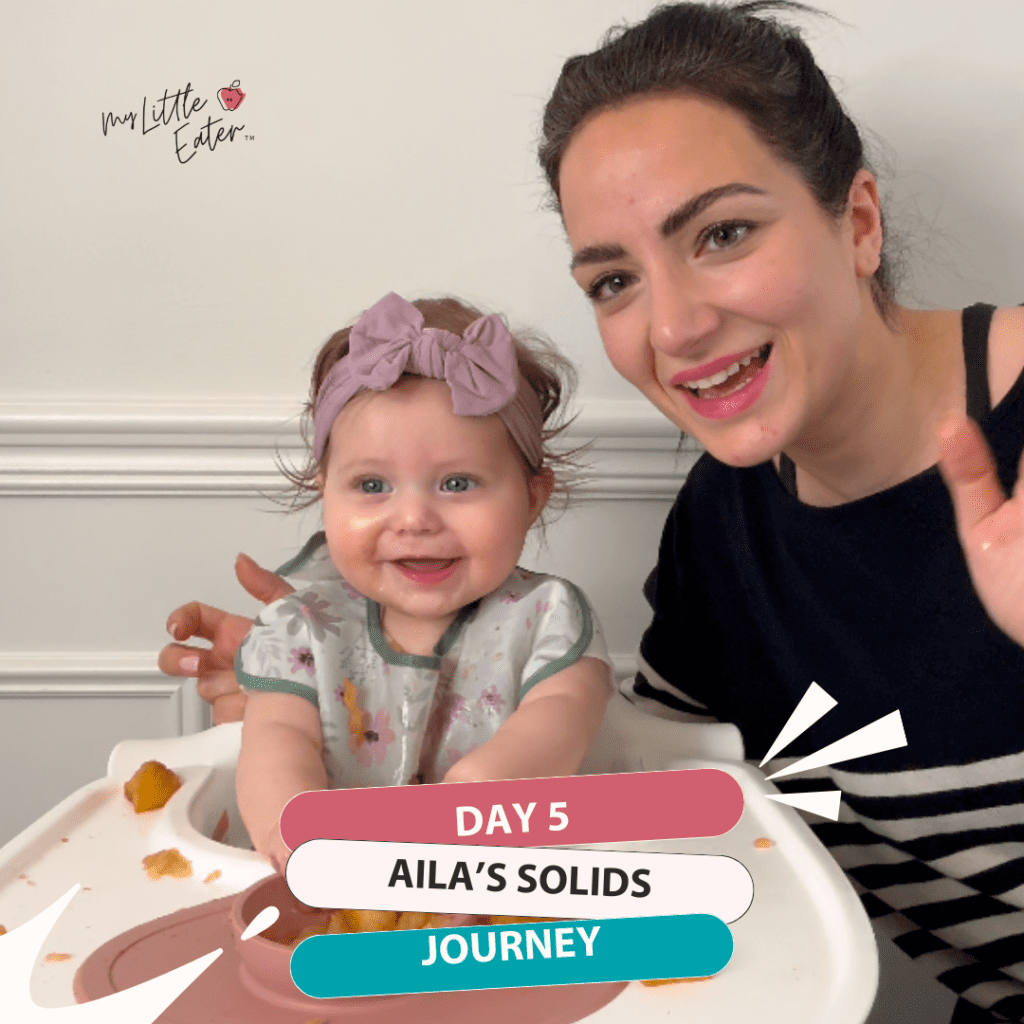
Day 5: Steamed apples with cinnamon and coconut oil
Nutrition: High-calorie (starch & healthy fat) Texture Phase: Phase 1 on the Texture Timeline™
On day 5, we served steamed apples cooked in a lot of coconut oil. This takes a simple fruit and boosts the calories and hormone/brain growth benefits by adding lots ofhealthy fat. The recipe also has a good amount of cinnamon, a new spice that imparts a little extra “sweetness” and of course, provides a new flavor exposure.
Because it’s cooked nice and soft over the stovetop, it’s a phase 1 food that’s again – creamy and soft with small lumps. Very easy and yet, a good challenge for only being five days into starting solid foods!
Directions
Peel and core the apple, then slice it into wedges. The bigger the wedges, the longer it takes to cook, but also – the easier it is for baby to hold and take bites out of. We like to do 4-6 wedges per apple.
Add apples, cinnamon, and coconut oil to a shallow pan. Mix together until apples are coated, then add 1/4 cup of water and simmer with the lid on for 15-25 minutes, or until apples are soft (tossing 1-2 times throughout).
Reserve some apple slices (or mash for a puree) to serve with lamb on day 7.
Substitutions – Instead of cinnamon, you can use another spice like nutmeg or cardamom, if desired. You can also swap the apple with a pear.
Option 1 – Serve steamed apple wedges to your baby as is for them to pick up and hold using their palmar grasp. The apples may be slippery which can cause frustration as your baby tries to pick them up off the plate or highchair tray. If so, hold it out in front of them and transfer it to their hand once they reach for it.
Option 2 – Mash the cooked apples using a fork or masher until more cohesive (small to large lumps are ok). Serve on a preloaded spoon. Hold the spoon in front of baby for them to grab from you and feed themselves, if possible.
Texture Timeline™ Video – Watch how to serve apples according to the phases of the Texture Timeline™.
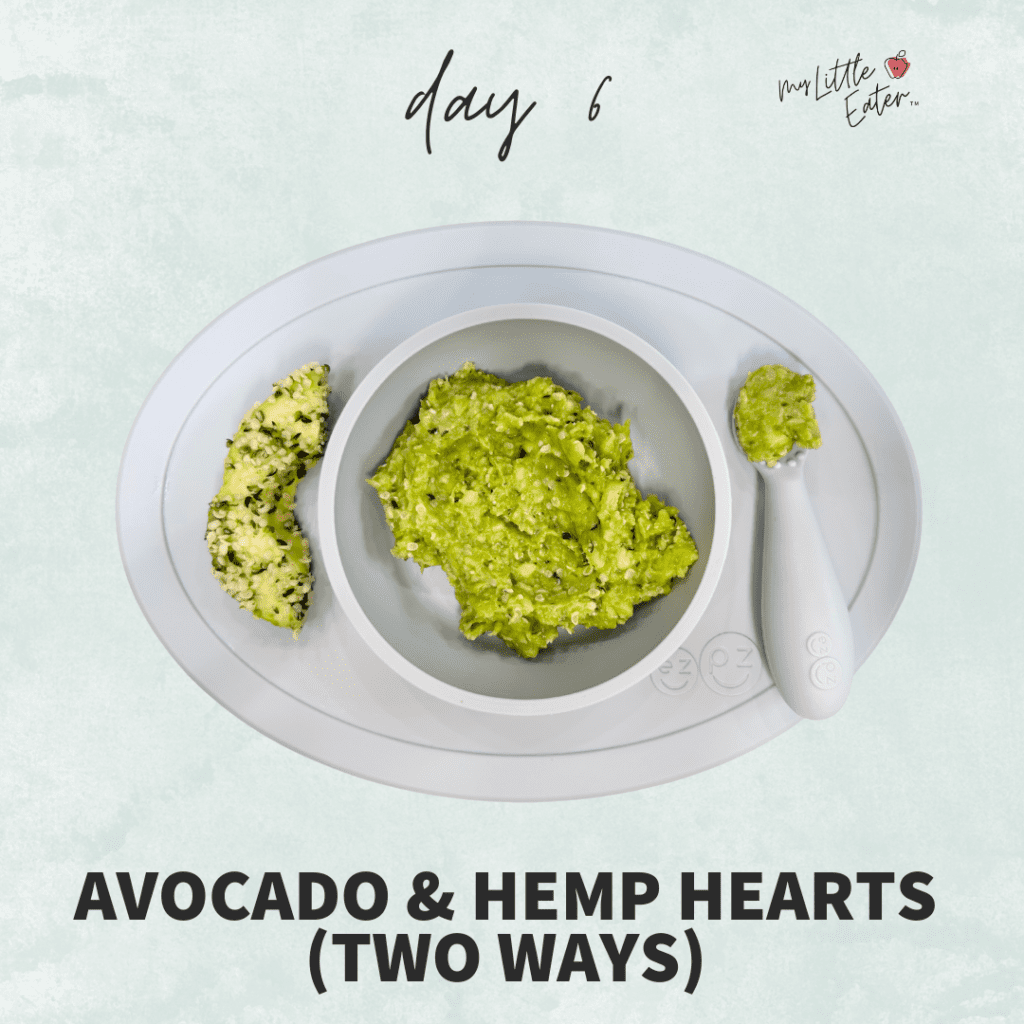
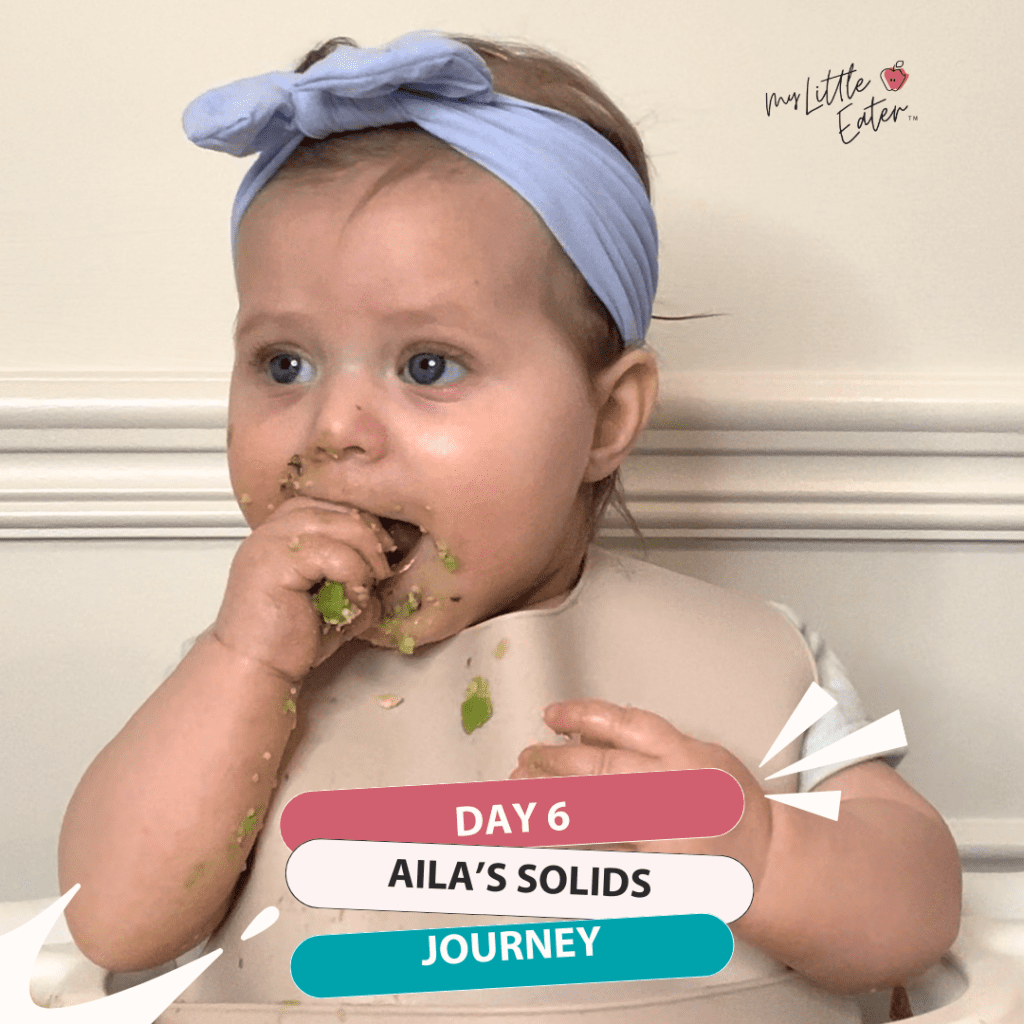
Day 6: Avocado with hemp hearts (two ways)
Nutrition: High-calorie (healthy fat) Texture Phase: Phase 1 on the Texture Timeline™
Day 6 is when we introduce one of the most commonly offered foods in the first week of starting solid foods – avocado! They’re great because of the high-fat content – offering lots of nutritional bang-per-bite. Of course, it’s another food that’s easy to mash or offer as a finger food, depending on what you feel ready for and what your baby is interested in.
We like trying both ways!
To add extra protein, a bit of iron, and to reuse ingredients from earlier in the week, the recipe has hemp hearts incorporated into it.
Directions
Cut an avocado in half, then remove the pit and the peel.
How to serve:
Option 1 – Mash 1/2 the avocado into a lumpy puree, then stir in the hemp hearts. Serve on a preloaded spoon. Hold the spoon in front of your baby for them to grab from you and feed themselves, if possible.
Option 2 – Slice avocado into wedges, then roll them into hemp hearts to improve their grip on thisslippery food and provide a boost of nutrition. Hold in front of your baby for them to grab or allow them to practice picking it up off a plate or tray and feeding themselves.
Texture Timeline™ Video – Watch how to serve avocado according to the phases of the Texture Timeline™.
Texture Timeline™ Video – Watch how to serve hemp hearts according to the phases of the Texture Timeline™.
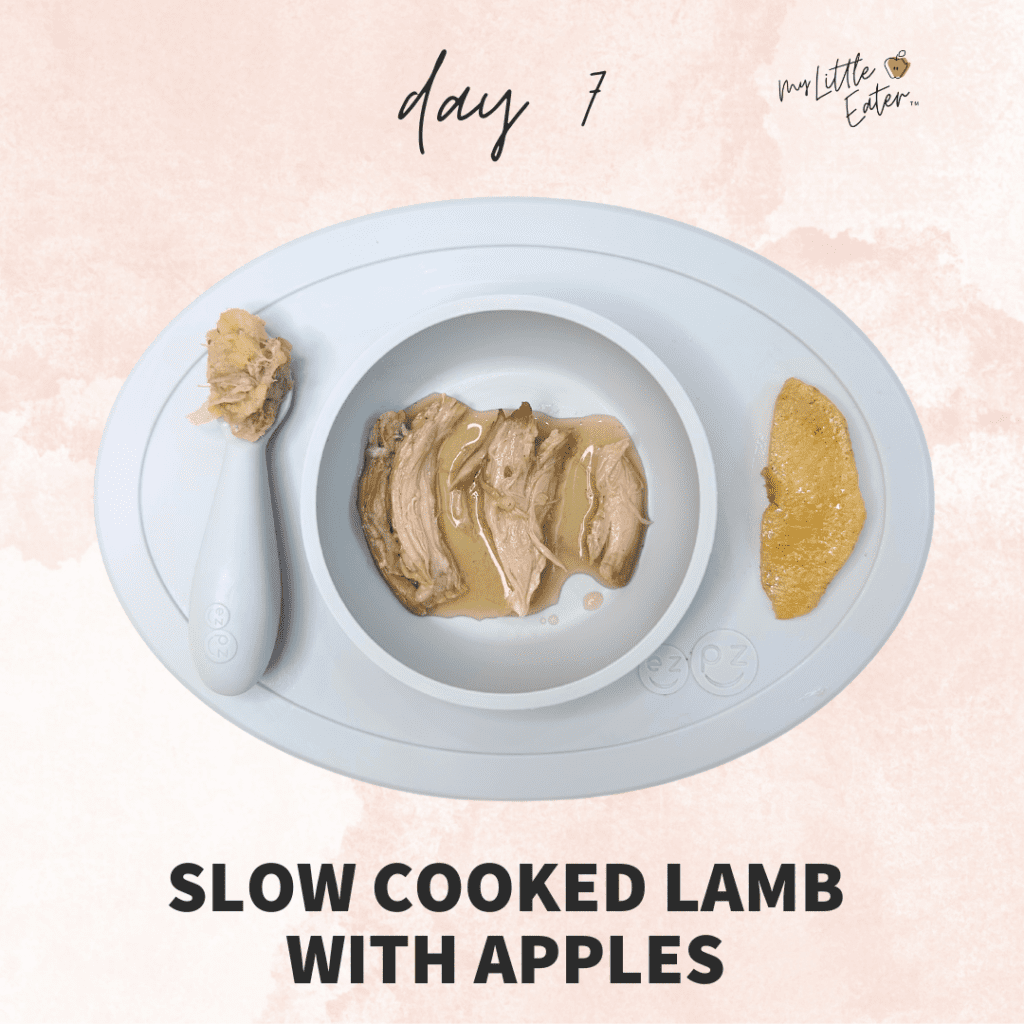
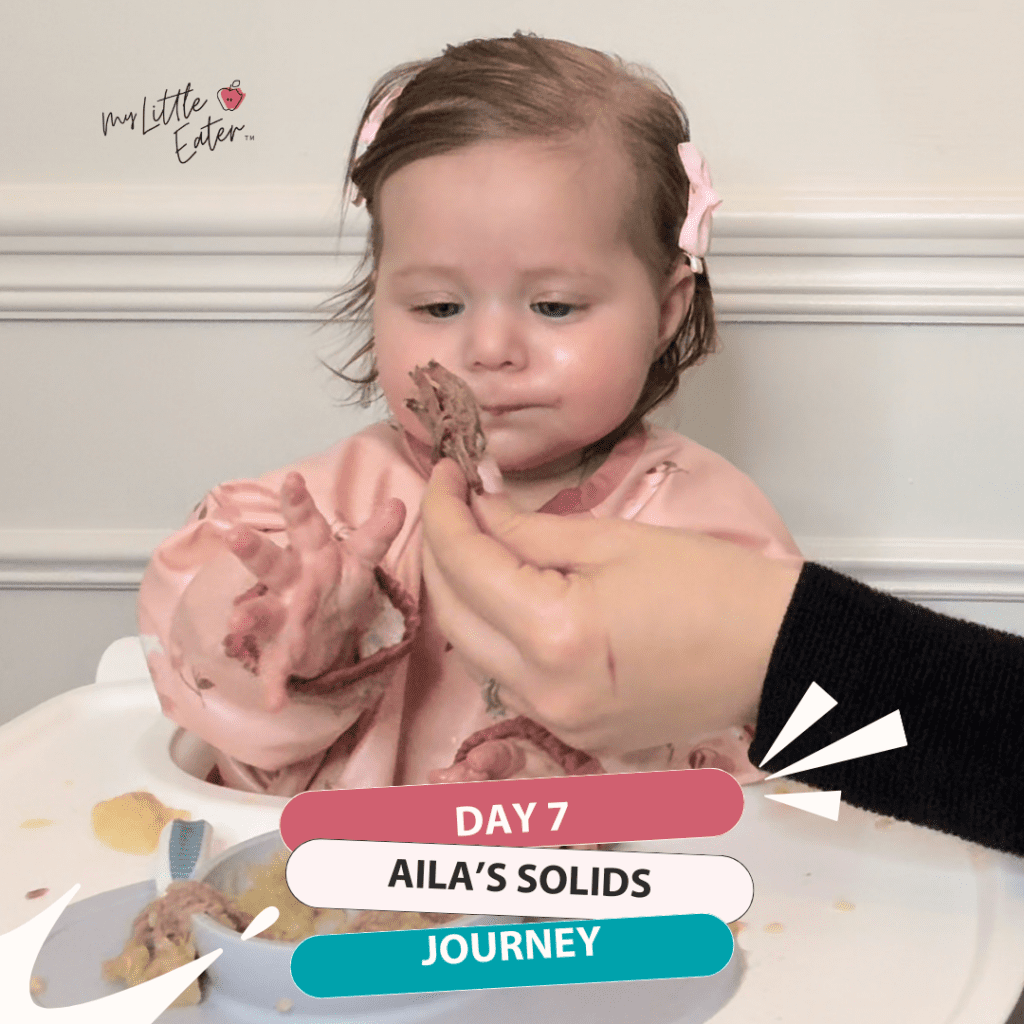
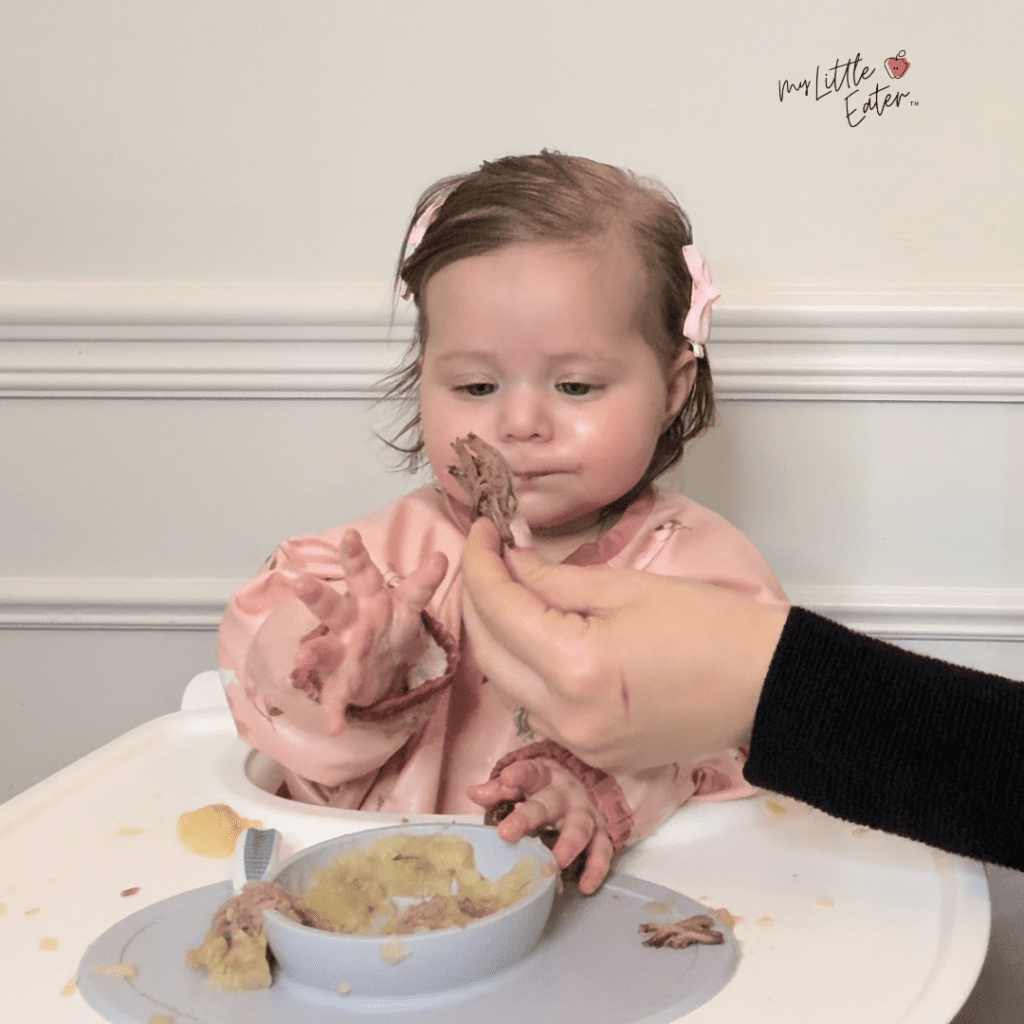
Day 7: Slow-cooked lamb with apples
Nutrition: High-iron and high-calorie (starch) Texture Phase: Phase 1 and Phase 3 on the Texture Timeline™
Day 7 is when we finally introduced meat for the first time! It was important to me, as a dietitian, that Aila gets a heme (animal) source of iron early. I wanted her to get used to the taste and texture so she could hopefully come to love it and eat it often!
Aila’s mom was admittedly a little nervous about it. She couldn’t picturehow to safely serve meat and how Aila could safely chew it. This is a pretty common feeling to have, especially before your baby has teeth or before you actually see a baby eating it in action!
Because it’s such a common fear, we chose the softest, most tender, and juicy way of preparing the lamb – in a slow cooker with lots of broth. We also made sure to choose one ofthe most tender cuts of meat, lamb leg, so it was extra safe and easy for Aila to manipulate.
Directions
Add lamb roast into a slow cooker, then pour in 2-3 inches of low-sodium broth. Sprinkle thyme on top of the roast.
Cook on high for 4-5 hours, or on low for 7-8 hours (or overnight) until tender and an internal temperature of 160°F has been reached.
Make it gourmet – Add vegetables of choice into the slow cooker with the lamb roast (try carrots, potatoes, and onions).
Option 1 – Shred the lamb roast into finger-length chunks for your baby, and serve with broth on top to keep it moist. Offer leftover steamed apples on the side in finger food format.
Option 2 – Make the lamb easier to eat by thinly shredding the lamb roast and mashing it together with leftover apple, using the back of a fork. This helps to further moisten the pieces of lamb all in one bite.
Option 3 – Remove a portion of lamb roast and place it into a blender with leftover steamed apple (1:1 ratio of lamb to apple). Blend until pureed, adding sodium-free broth or water as desired to thin it out to the texture phase you’re working on.
How long did mealtimes last?
“Normal” mealtimes for a baby can last anywhere between 5-45 minutes.How long it takes a baby to eat a meal really depends on the day, the baby, their skill level, baby’s appetite at the time, etc.
Mealtimes for Aila in the first week of introducing solids lasted between 15-20 minutes, on average. This includes the time she spent sitting in her highchair, but not actively eating.
Here’s a breakdown of how long each meal lasted, day by day:
Day 1: 33 minutes Day 2: 19 minutes Day 3: 20 minutes Day 4: 23 minutes Day 5: 35 minutes (*This was a day where we put her in the highchair for 10 min and she didn’t bring much to her mouth, so we took her out and tried again after 15 min. She did better the rest of the meal, which lasted 20 min.) Day 6: 10 minutes Day 7: 17 minutes
Overall, she was really happy to just be in her highchair and was interested in what was in front of her. When she’d first get put in the high chair, we’d give her a spoon to hold and play with for 30 seconds to a minute, depending on if there were any last minute fixings needed for the meal at the table.
Generally speaking though, we tried to have every part of the meal ready to go and either pre-plated in her EZPZ plate or set to the side so we could quickly put food directly on her highchair tray.
When food would first be placed in front of her, she’d be interested and excited to see it, but she didn’t really know what to do or how to pick it up. Once we’d hold a piece of finger food or a preloaded spoon in the air in front of her, she would immediately get excited and grab it! It was so amazing to see.
Of course, it helped that Aila’s mom had given her the spoon to play with and hold since 4 months of age, so she really built up a positive association with it.
I’d generally know that Aila was done eating when she’d start making loud or more consistent noises, like blowing raspberries, happy screams, or other silly noises. She would also lose focus on bringing food to her mouth and instead would want to play with or swipe the food back and forth on her tray. Learn more about the varioushunger and fullness cues babies may show while eating solid foods.
Every day, we’d let her have a couple of minutes of strictly playtime with the food, even though we knew she was done eating. This is because she was really enjoying it, and we wanted her to keep forming positive associations with the food and with being in the highchair. Plus, we know the research shows that playing with food is a critical part of learning how to eat and love foods, and helps reduce the risk of picky eating.
How much solid food did Aila eat the first 7 days of starting solids?
If there’s one thing I tell parents (and warned Aila’s mom) over and over again, it’s that the amount of solid food eaten in the first month that you start solids really doesn’t matter! Some babies eat nothing (especially in the first week of starting solid foods), and others take to it right away and seem like they always knew what to do!
It’s all about learning how to eat (how to pick up solid food, bring it to their mouth, chew, swallow, etc), being consistent with mealtimes, and making mealtime an experience babies want to be a part of daily.
For the most part, Aila consumed around 1-2 tablespoons of food per meal. Keep in mind that these are estimates as it’s hard to quantify amounts that are actually swallowed when there’s so much mess that comes with baby led feeding!
Here’s a breakdown of quantities consumed, day by day:
Day 1: 1 tablespoon Day 2: 3 tablespoons Day 3: 2 tablespoons Day 4: ½ tablespoon Day 5: ¾ tablespoon Day 6: 2 tablespoons Day 7: 2 tablespoons
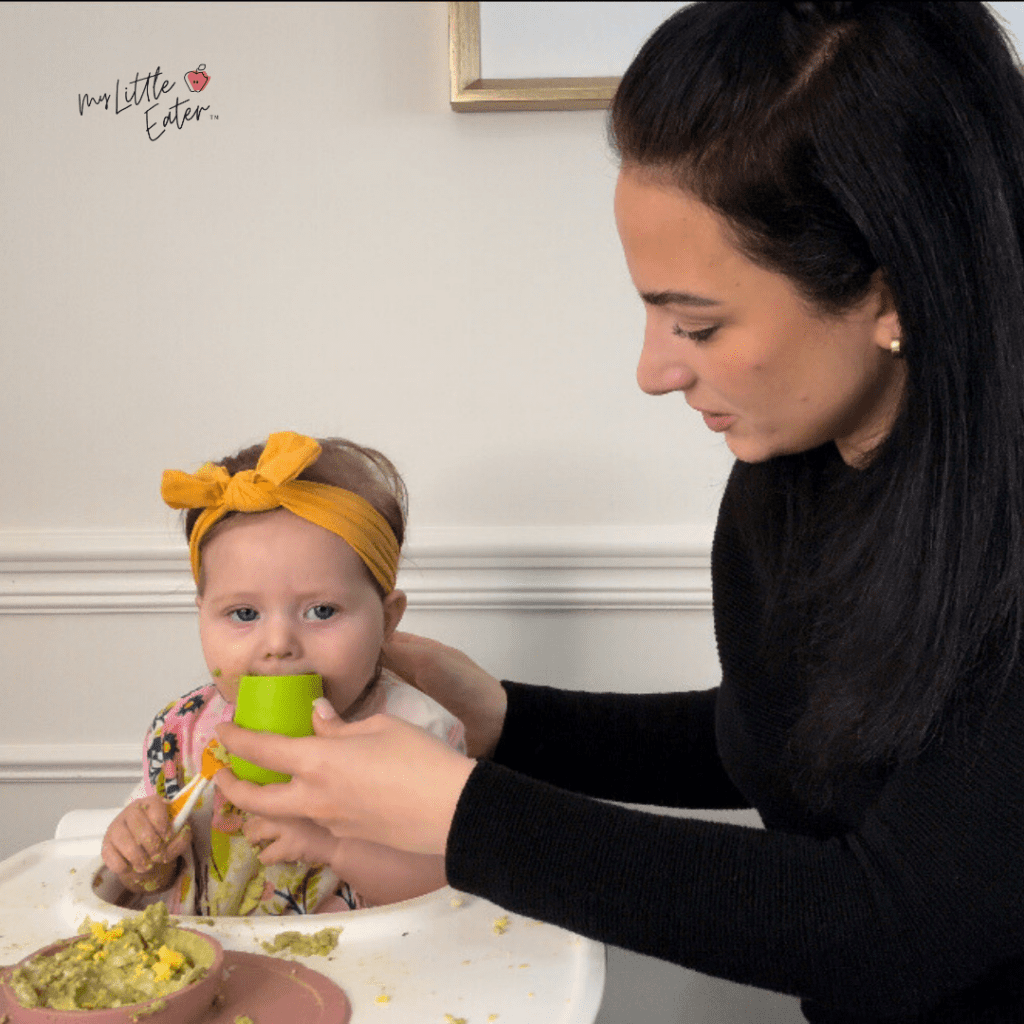
I also offered Aila a bit of water from anopen cup, starting on day 1 of solids! From the moment she tried it for the first time, she loved it! She even “drank” three times throughout the meal. By the third time, she seemed to know what it was and sort of what to do!
Of course, she spilled and a lot fell out of her mouth, but this was exactly what we expected the first week! The point is – she loved it and we were happy to see she formed good experiences around it already.
How well did she learn to chew? Was there any gagging?
I filmed the meals so you could see the detailed breakdown of how she progressed in her eating skills each day below.
Take a look and see how in the first couple of days she progressed from bringing the food to her mouth (but squishing it in her hand before it got there), to learning to adjust her grip so it didn’t get squished, to learning to suck on the food, to progressing to an up and down chewing motion – all within such a short time!
Overall, the gagging she experienced was pretty average for what we expected! Of course, having seen multiple videos of babies eating on our page before and having taken our Baby Led Feeding + Infant CPR course, Aila’s mom wasn’t as worried about gagging as she likely would have been without that experience.
That being said, she had about 2-3 gags in most meals, and had I not been there to reassure her that it was ok and to stay calm and positive, she did admit that some of them scared her. Her instinct on a couple of occasions was to want to take the food out of her mouth and stop the gagging. She would look over at me and repeatedly ask “Is this ok?” and “Are you sure??”…trusting me 95% of the way, with still 5% doubt.
These nerves are very normal to feel, but – you won’t have a dietitian there to remind you in the moment! You need to take the time before getting started to watch gagging videos, be up to date on infant CPR protocols so you know when it’s necessary to intervene vs. when intervention may cause more harm, and make a plan for when you get scared in the moment.
Some parents have something they repeat to themselves to feel confident that their baby’s ok (like “She’s coughing, so she’s breathing, she’s fine.”), some sit on their hands to remind them not to intervene during gags, and some tape the difference between choking and gagging up behind their baby’s highchair so they can read it while baby eats. Find what works for you!
And if you’re still nervous as you get started, that’s ok! In fact, seeing your baby gag on simple textures like phase 1 and phase 2 textures (which have very low choking risks), and getting used to that, is one of the best ways to overcome a fear or anxiety around gagging and choking.
Plus, it’s the only way your baby will learn how to handle textures and build skills to manage more advanced foods in their mouth. It’s in the practice and in letting them work through a gag that teaches them what to do (and decreases choking risk by keeping them in control). We talk all about how to overcome your fear of gagging, choking, and big bites in our hour-long FREE workshop called“Baby Led Weaning (but make it purees)”.
How to manage others feeding your baby in week one (and beyond)
One of Aila’s mom’s biggest fears was that other caregivers who may be around when Aila was eating, or who may be responsible for feeding her, wouldn’t follow the process we had been working with from day one.
Essentially, she was very concerned that others feeding Aila wouldn’t take the feeding “rules” seriously.
She worried that they would be quick to offer something they felt was ok (but maybe wasn’t) without checking with her first, or that they’d offer her sweet foods (her goal is toavoid added sugar until 2+ years), or that they would spoon-feed her when we knew Aila could feed herself (and loved to!).
This is a struggle so many parents have!
Here’s how my sister handled it…
She printed off the resources from theBaby Led Feeding Course and created the “SOLIDS BIBLE” as she calls it – everything she’d want to know at her fingertips in one book for quick reference.
She made sure to be there during feedings for the first while so she could supervise and provide tips or feedback as necessary.
She modeled checking the “solids bible” before doing anything or offering any food to Aila. She knew that if she did it, they would see that using the resource book was really important to her, and would follow along to make her feel at ease.
She also decided to focus on her two most important goals and ensure those were clearly communicated to other caregivers. They were: 1) before serving any food, always do the squish test and 2) keep things baby led. Once everyone agreed to follow those two rules, she knew the likelihood that the feeding would go the way she wanted it to was high, whether they were offering finger foods or purees.
Finally, she decided to let go of everything else for those one-off meals knowing that what happens at home has the most impact in the long run.
If you’d like to get your hands on a copy of the “solids bible” check out ourBaby Led Feeding Online Course. You’ll get access to all of the resources that you need to print your own how-to guide to bring with you wherever you go. Plus, with lifetime access, anytime we update a resource or add something new you can update your resource book!
Founder and lead Registered Pediatric Dietitian at My Little Eater Inc., creator of The Texture Timeline™, and mom of two picky-turned-adventurous eaters.
Founder and lead Registered Pediatric Dietitian at My Little Eater Inc., creator of The Texture Timeline™, and mom of two picky-turned-adventurous eaters.
Hi Vinod! Absolutely, we always recommend consulting your baby’s pediatrician if there are any growth or health concerns whatsoever. However, once babies show all of the developmental signs of readiness to start solids, we recommend including high-calorie foods as one part of a balanced plate as babies grow more quickly during their first year of life compared to any other time, therefore, they need enough calories and nutrients to support this period of rapid growth and development!
Registered pediatric dietitian, mom of two picky-turned-adventurous eater, and the creator of the Texture Timeline™ – an exclusive tool to help move your baby through easy to more advanced purees and finger foods to prevent picky eating.


2 Comments
Consult a pediatrician before introducing high-calorie foods to ensure they meet your baby’s growth and health needs.
Hi Vinod! Absolutely, we always recommend consulting your baby’s pediatrician if there are any growth or health concerns whatsoever. However, once babies show all of the developmental signs of readiness to start solids, we recommend including high-calorie foods as one part of a balanced plate as babies grow more quickly during their first year of life compared to any other time, therefore, they need enough calories and nutrients to support this period of rapid growth and development!