The ultimate guide to buying the best meat for baby

Navigating the meat aisle at the grocery store can feel overwhelming, especially when you’re trying to figure out the best cuts of meat to buy for your little one. With so many different options, it’s hard to know where to start!

From beef brisket to lamb chops, there’s a lot to consider regarding which is best for your baby to eat safely. Well, you came to the right place! We’re here to guide you through the ins and outs of how to choose the best cuts of meat for baby led weaning.

The original cut of meat doesn’t matter as much if you’re pureeing it. But when you serve meat as a finger food, you definitely need to make sure it’s safe enough for your baby to chew and swallow.

We’re – of course – proponents of both options and want you to start solids with whichever method feels most right to you. But within the first few weeks of starting solids, we ideally want to see you start your transition onto finger foods, including…MEAT!  

We know this can be nerve-wracking, so if you’re feeling scared to make this transition, jump on our free workshop “Baby Led Weaning but make it purées!” to learn how to move from purées to finger foods – without the fear! Gradually progress in textures, and work your way up to serving your baby meat as a finger food when both you and your baby are ready.

Free baby led weaning workshop by My Little Eater.

Table of Contents

What kind of meat should I feed my baby?

You can offer your baby any unprocessed meat. Lamb, beef, chicken, turkey, pork, and bison (among others) are all great options for your baby. However, it’s important to note that some cuts of meat are much more tender than others, which is important if you’re offering it as a finger food. This makes them easier and safer for new eaters. We’ll give you all the details below! 

Baby eating meat using his palmar grasp to hold a chicken drumstick for baby led weaning.

Meat offers essential nutrients required for baby’s optimal growth and development. Different types of meat offer varying nutrients. In general, meat is a good source of zinc and B12, both required for brain growth and development, immune function, and maintaining healthy red blood cells. 

Meat is also a great source of iron, an essential nutrient required for proper brain development in babies. There are two types of iron, heme sources and non-heme sources. Heme sources of iron are found in animal products such as meat, fish, and poultry. Non-heme iron comes from plant sources like soy, lentils, eggs, and beans.

Heme sources of iron found in meat are more easily absorbed in humans compared to non-heme sources. Additionally, some meat provides more iron – particularly dark meat. Think chicken and turkey thighs or drumsticks in comparison to the white meat from chicken or turkey breast (1).

It also doesn’t matter if the meat you buy is organic, grass-fed, or conventional meat. Although grass-fed and organic will have a better fat profile, it’s not a big deal if you can’t afford it (2).

Green divided baby plate with fully cooked meat, including a chicken drumstick, meatball, and strips of meat.

We also want to address the common misconception that red meat isn’t as healthy as white meat and should be avoided because it’s “cancer-causing”. This is simply not the case!

Red meat in general includes fresh lamb, beef, pork, and veal, which hasn’t gone through additional processing to change the nutritional composition of the meat. To date, there’s no concrete evidence, or thoroughly conducted studies, that identified unprocessed, good-quality red meat as causing any harm (3). Therefore, it’s safe to be serving your baby unprocessed red meat, and isn’t something that we worry about!  

The most tender cuts of meat for baby

There are cuts of meat that are much more tender and safe for your baby, assuming they’re cooked appropriately.

Baby picking up small pieces of shredded meat using their pincer grasp.

In general, fattier cuts of meat with a lot of connective tissues are more tender, making them a great option for baby. This connective tissue must melt during cooking for the meat to become tender, which doesn’t happen until at least 160°F. This means that meat needs to be cooked slowly for many hours, depending on the thickness of the cut, for it to become tender and safe for baby. 

Although cuts of meat like sirloins and tenderloin can be tender, they’re also very lean, meaning they have minimal fat and connective tissue. This means they don’t soften up as well and can sometimes end up drying out, even when using slow and moist cooking methods. 

The image below shows the most tender cuts to choose from when buying meat for your baby. Make sure you download the image, pin it to Pinterest, or take a screenshot so you always have it to refer to!

Note: When it comes to ground meat, always choose regular, full-fat as opposed to lean or extra lean. Regular ground meat will be much juicier and less likely to dry out while cooking. For poultry, purchase skin-on when possible to keep the meat moist during cooking. You can simply remove the skin after the poultry is cooked before serving it to your baby.

How to keep less tender cuts of meat safe for baby led weaning

You do not have to avoid all cuts of meat that are considered to be slightly less tender for your baby. 

Just know that less tender cuts of meat may be more difficult for new eaters. This is especially true when meat is not prepared in an ideal way for baby, such as by using slow and moist cooking methods.

Slow-cooked lamb on a baby plate shown in strips for baby led weaning, mixed with mashed apple on a preloaded spoon, and with cooked apple on the side.

Some cuts of meat are more difficult to cook correctly for baby than others. You may take lots of time to prepare and cook a delicious meal, but find out that the meat turned out too tough and dry. Then you have a meal that you can’t serve to your baby.

Cuts of meat that are less tender but can still be safe for your baby when cooked appropriately include… 

  • Chicken or turkey breast: These can become dry and tough. To ensure it’s moist and safe for your baby, try using slow cooking methods, poaching, or steaming. 
  • Liver (chicken, turkey, lamb, beef, and pork): Can dry out when cooked on high heat very quickly and the outside may become tough. Use slow and moist cooking methods to ensure it stays tender.
  • Ground chicken and turkey: These tend to be less fatty than regular ground beef, pork, or lamb. You can still serve them to baby, but if they end up being dry after cooking, mix them with a dip, sauce, or other pureed food to add moisture. 
  • Steak, drumstick bone, or rib bones: These are not at all tender but can certainly be offered as a phase 0 food for babies who don’t have teeth yet! These whole, hard resistive foods are a great way for your baby to begin to explore their mouth, as well as new flavors and textures with reduced risk of choking. Learn more about the different phases and how to gradually advance in textures using the Texture Timeline™.  

If you’re concerned about introducing meat that may not be the most tender for babies, let’s go over what you can do when you’re preparing and serving it to make it safe for your baby. 

1. Use slow cooking methods

Slow cooked roast in a baking dish; a perfect way to prepare meat for baby while keeping meat tender.

Meat can be a choking hazard for babies, and even adults, due to its sometimes dry, chewy, and hard texture. To reduce the risk of choking, use slow, moist cooking methods whenever possible. 

We recommend that you brown any meat on all sides first at a high temperature in a cast iron pan or grill. Then, cook it to completion using low, slow heat whether that be in the oven, in a slow cooker, or braised/stewed over the stove. This will break down the collagen in the meat and tenderize it.

Learn more about how to serve meat to babies safely.

2. Keep meat moist during cooking

Cooked chicken drumsticks with the skin on and juice at the bottom of the baking dish.

Try and maintain as much juice and fat on the meat as possible during cooking. It will not only keep it moist, but the fat is also beneficial for your growing baby. We recommend keeping the skin on drumsticks, breasts, and chicken thighs when cooking them. The fat from the skin drips onto the meat, keeping it moist and juicy. Remove the skin before serving it to your baby as it’s considered a choking hazard.

Learn more about how to serve meat to babies safely.

3. Serve meat with broth, sauce, dip, or mixed in with other foods

If the meat is a bit dry after cooking, or you want to be extra safe, please feel free to add a sauce, dip, or broth before offering it to your baby. This will make it easier for your baby to manage in their mouth and safer to swallow!

9 different dips and sauces that you can add when you prepare meat for your baby to keep it moist and safe.

Examples include tomato sauce, plain regular or Greek yogurt, pesto, guacamole, and applesauce. You can also just mix minced or shredded meat right into a puree, like plain yogurt, and serve it to your baby on a preloaded spoon!

What to consider when buying meat for baby

There are a few factors to consider when buying your baby meat. These include the grade, the appearance and texture, and the freshness of the meat. Let’s get into the details!

1. Understand the different grades of meat

Meat is graded based on industry standards and government recommendations (4). Trained meat graders visually assess the whole carcass of the animal. They assign a grade based on specific criteria, which is different for each type of animal (4).

Different cuts of fresh, bright red, raw beef that can be included in baby's diet.

Quality grades measure different factors to reflect the meat quality. Characteristics measured that influence the quality of the meat include (4): 

  • Maturity: the age of the animal affects the tenderness of the meat. 
  • Sex: masculinity in animals affects meat color and palatability. 
  • Muscle: the amount of muscle influences the meat yield.
  • Fat: the color and texture of fat. Fat should have a hard texture and be bright white as opposed to yellow. 
  • Other meat characteristics: the color of the meat and the texture. Marbling indicates juiciness and tenderness. The more marbling, the better!

When buying meat for your baby, we recommend purchasing the highest grade of meat when possible. These cuts of meat will be the juiciest and most tender, making them safest for baby. The table below lists the best grades for each type of meat in Canada and the United States (4, 5, 6).

The best grades of meat for US and Canada.

2. What does it look and feel like?

When buying meat for baby, take your time to inspect the meat closely. Pick up the package of meat and ensure that it’s cold to the touch. Look at all parts of the packaging to ensure there’s no damage, rips, or tears.

Bright red, fresh beef roast with lots of white marbling.

The color of meat matters in terms of freshness and determining if meat has spoiled:

  • Lamb should be pink-red with white marbling (fat). Gray in color indicates spoilage.
  • Beef should be bright red. Brown spots would indicate spoilage.
  • Chicken and turkey should have a pink hue and the fat should be white. Yellow or gray in color indicates spoilage.
  • Pork should be bright purple-pink. Green or gray spots indicate spoilage.

3. When was it packaged?

A hand placing a well sealed package of fresh meat in the refrigerator.

When you buy meat at the grocery store, make sure to take a look at the date of packaging. If you purchase meat that has been sitting in the store for some time already or has a discounted sticker on it, you’ll want to cook it that day or freeze it right away. 

Don’t rely on the best before date on the packaging. Use the following recommendations for refrigeration times before cooking or freezing to ensure you and your baby’s safety (6):

  • Poultry: 2-3 days
  • Fish (cod, salmon): 3-4 days
  • Ground meat and shellfish: 1-2 days 
  • Lamb, beef, and pork: 2-4 days

FAQs on buying meat for babies

There are many great options of meat cuts to choose from. If we had to choose just one, our top would be chicken thighs. In general, chicken is easily accessible and not as expensive as beef and lamb. It’s easy to prepare and serve to a baby. And most parents already have some experience with cooking chicken. Also, dark meat from chicken thighs or drumsticks provides your baby with lots of iron. 

It’s important to get babies used to the taste of chicken and other meat early on. They also need to practice chewing the complex texture of chicken. This helps them learn how to consume it in decent quantities before their natural iron stores are completely depleted.

You’ll want to avoid offering baby all types of processed meats, including deli meat. Since deli meat is typically soft, it may seem like a good option for babies. However, there is clear evidence that consuming processed meat can lead to health concerns. These concerns include cancer, heart disease, and type 2 diabetes (2).

Processed meat includes any type of meat that has gone through processing. This can include salting, smoking, and curing. Chemical preservatives, like nitrates and nitrites, are also added to extend the shelf life of the product. This includes foods like hot dogs, bologna, pepperoni, deli meats, bacon, jerky, and commercial sausage.

You’ll also want to avoid offering pre-seasoned meat to baby as it’s typically very high in salt

Meat is rich in essential nutrients, particularly iron, which babies need a lot of early on. You can serve different varieties of meat to your baby daily. Meat isn’t the only source of iron for your baby, but it is a source of heme iron. This type of iron is the most easily absorbed in your body. Non-heme sources of iron are found in various plant-based foods like beans, tofu, spinach, etc. 

Be cautious when offering liver because it contains very high levels of vitamin A. This nutrient is important for developing the immune system, eyes, and skin of babies. However, there’s a small risk of overloading on too much vitamin A. For this reason, we don’t recommend serving liver to your baby more than once per week.

Yes, only serve your baby fully cooked meat. No pink/raw parts should remain after cooking, but you also don’t want to cook it so long that it’s dry and hard. 

Aim to cook chicken and pork to 145°F and beef and lamb to 160°F (use a meat thermometer to check!) and ensure that any bacteria is killed off by having a holding time of 8.5 minutes before cutting into it (8, 9). It’s okay for a steak to be a little undercooked. It can have a touch of pink inside if the steak hasn’t been poked with a fork, and the outside is well-cooked.

Despite popular belief, babies don’t actually need teeth to eat meat or other finger foods! Their gums are incredibly strong which allows them to mash up food using a munching up and down motion. You can use the squish test as a way to gauge whether a food will be soft enough for your baby to eat.

The squish test is simply when you put a piece of food between your thumb and forefinger and squish it. If you can easily smush it and it breaks down, then your baby’s gums will be able to do the same (actually baby’s gums are much stronger so this is a conservative test!).

You can also introduce meat like steak to your baby in thick, resistive strips before your baby has teeth. Without any teeth, your baby can’t take bites out of the food. This will be a very low choking risk when the steak is thick enough, at least 2 finger widths in size. Loose meat and fat must be removed before serving.

Even though they can’t take any bites, baby can pull and gnaw on the meat, extracting a lot of iron and other beneficial nutrients. This helps them work on jaw strength, munching motions, and mouth mapping. 

We show you how to serve steak safely this way (plus tons of other foods!) in our Texture Timeline™ Food Video Library inside our Baby Led Feeding online course. We also give you step-by-step instructions so you know, without a doubt, you’re introducing meat safely!

Once baby has developed their pincer grasp around 9 months of age, you can serve very thinly shredded, small pieces of meat. You’ll want to avoid serving cubed or chopped meat to baby because this could block their airway. Cubed, large chunks of meat are a high-risk choking hazard for children under age 4. 

Note: Once your baby has mastered their pincer grasp, it doesn’t mean you have to stop offering finger-shaped foods for baby led weaning. It’s best to alternate how foods show up. This way, you can ensure baby is being exposed to familiar foods in different shapes and sizes.

If you’re still feeling anxious or worried about offering meat to your baby – don’t forget about our free workshop – “Baby Led Weaning (but make it purees!) How to progress from purées to finger foods…without the fear!”.

In the workshop, we teach you about our signature Texture Timeline™ which allows you to introduce foods gradually, either purees or finger foods, at a pace that works for you and your baby so you can eliminate any fear of gagging, choking, or big bites. Spots are limited, so reserve your seat now!

Free baby led weaning workshop by My Little Eater.

Slow cooker chicken recipe

As we mentioned above, chicken is one of the easiest types of meat you can buy, prepare, and offer to your baby. These chicken thighs are tender, juicy, and paired with a sauce to ensure it’s extra safe for your little one. Try out the recipe below and let us know what you think!

Note: This recipe contains peanuts – a top allergen. If your baby has not been exposed to them yet, please be sure to review the protocol for introducing top allergens and monitor for symptoms of an allergic reaction.

Baby plate showing cooking chicken thigh with peanut sauce served as a finger food, chicken and butternut squash mash on a preloaded spoon, and a slice of cooked butternut squash.

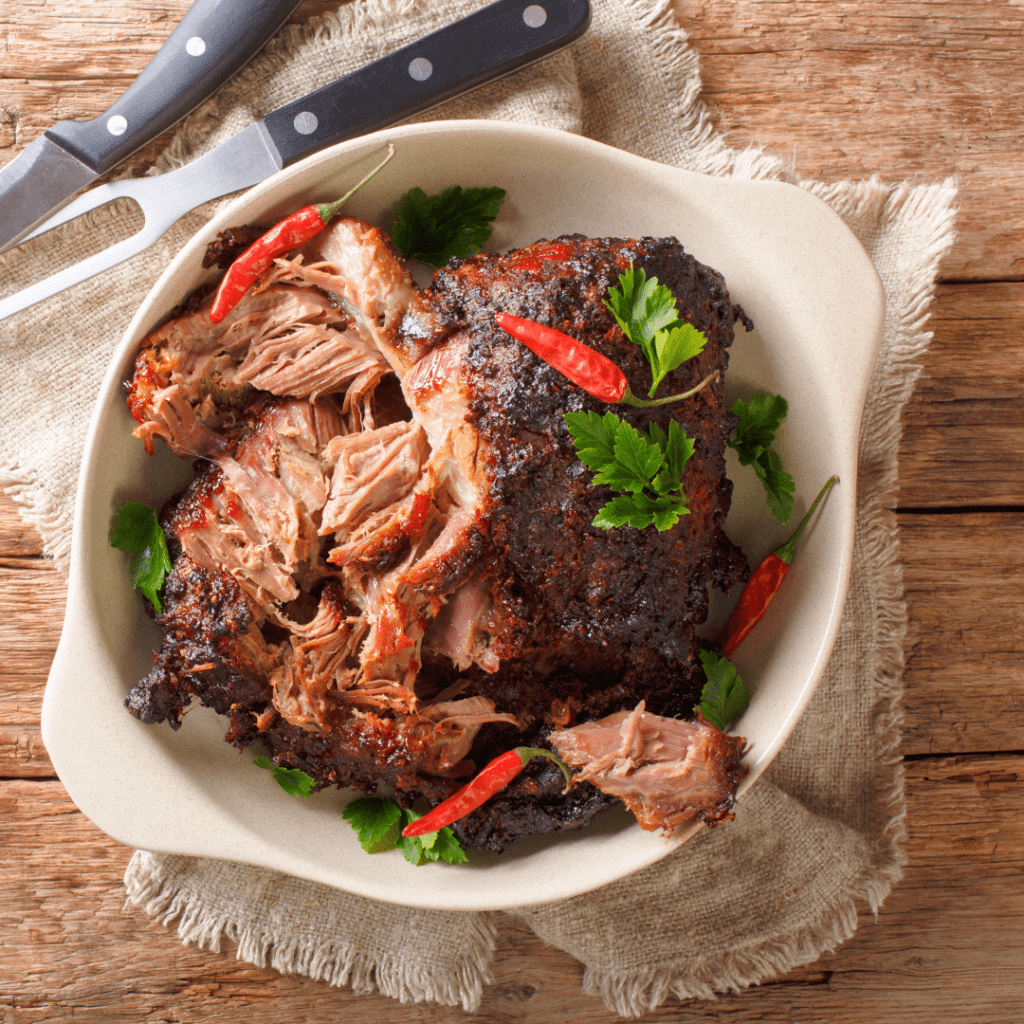
Chicken Thighs with Peanut Butter Sauce and Butternut Squash

Delicious, baby-friendly recipe that the whole family can enjoy!
5 from 1 vote
Prep Time 15 minutes
Cook Time 8 hours
Total Time 8 hours 15 minutes
Course Main Course
Cuisine American
Servings 2 servings

Equipment

  • 1 Slow cooker
  • 1 sheet pan
  • 1 mixing bowl (small)

Ingredients
  

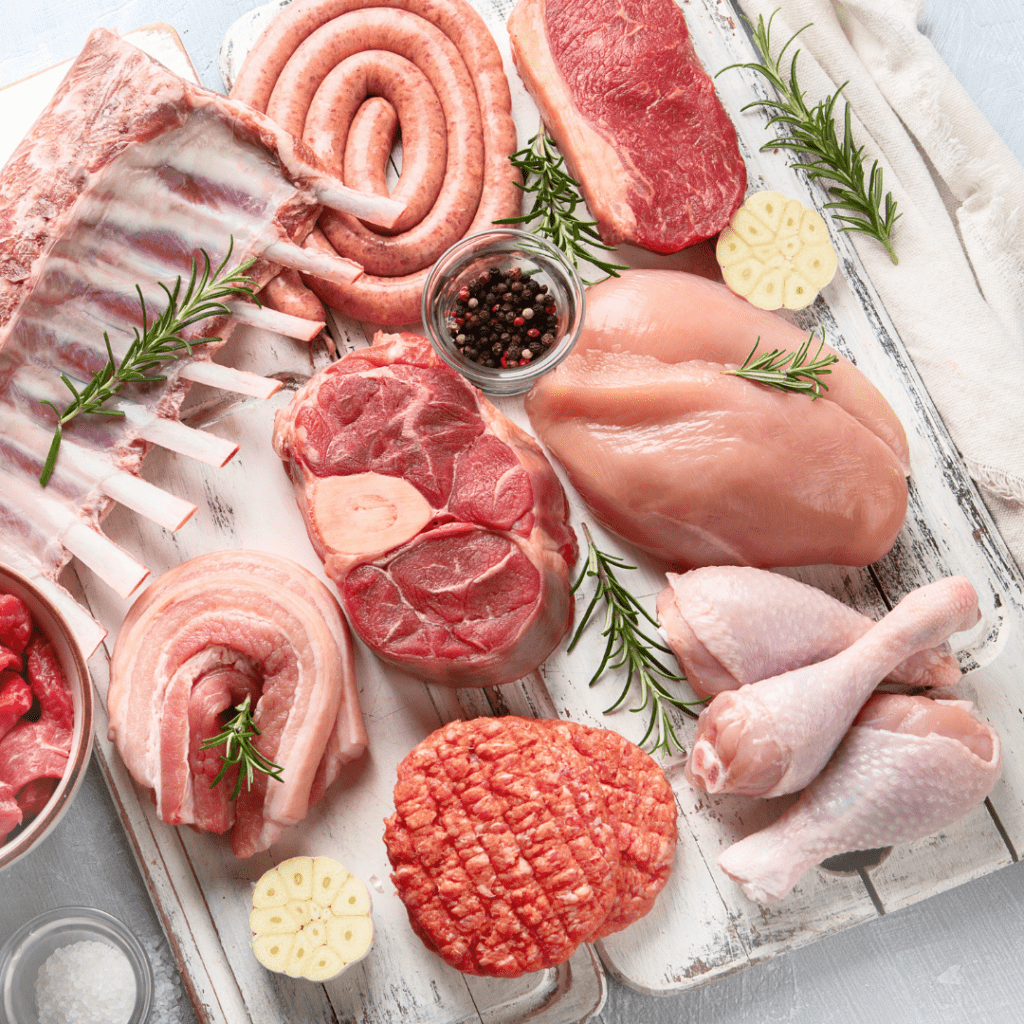
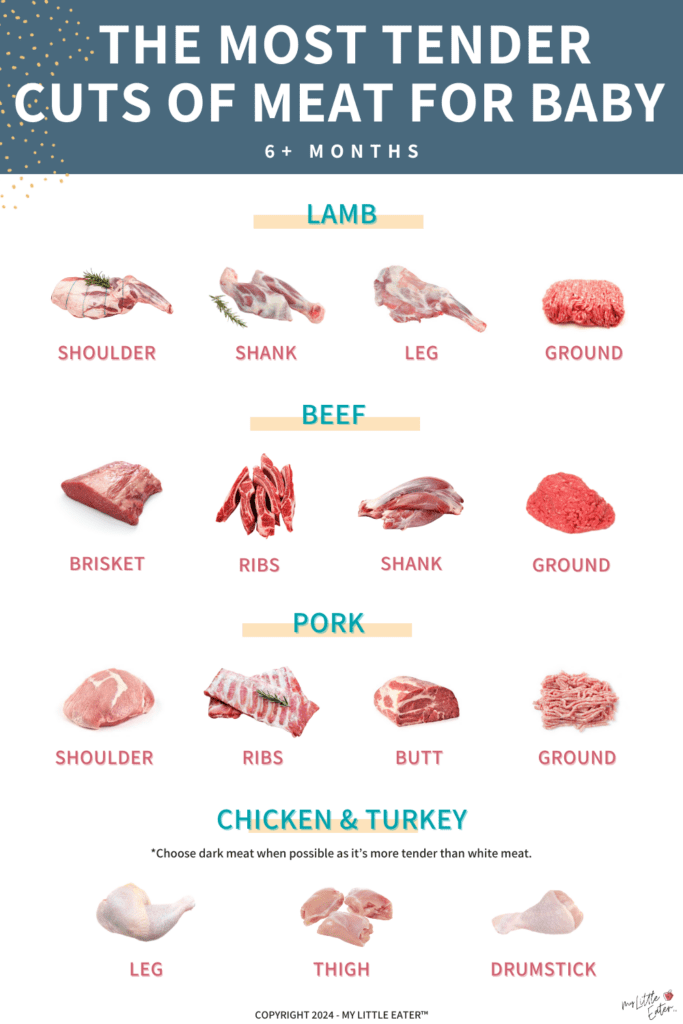
  • 2 lbs chicken thighs (boneless, skinless)
  • 2-3 cups low-sodium chicken broth
  • 1 tbsp peanut butter
  • 2 tbsp water
  • 1 tsp apple cider vinegar
  • 1 tsp coconut aminos
  • 1/4 tsp garlic powder (or 1 garlic clove, minced)
  • 1 butternut squash
  • 2 tbsp olive oil

Instructions
 

  • Add the chicken thighs to the crockpot along with chicken broth (enough broth to cover the chicken thighs by about 2 inches). Cook on high for 3-4 hours, or on low for 6-8 hours until chicken is tender and moist. Chicken should reach an internal cooking temperature of 165°F.
  • About 30 minutes before the chicken is done, preheat oven to 375°F.
  • Place the squash on a cutting board and slice off both ends. Remove the skin with a vegetable peeler. Slice the butternut squash in half horizontally. Then slice both halves vertically down the center. Using a spoon, scoop out the seeds and stringy parts in the center of each of the 4 individual pieces. Slice each of the 4 pieces into half-moon shapes/wedges, approximately 1 inch thick.
  • Place the butternut squash on a lined sheet pan and drizzle with olive oil. Roast for approximately 20-25 minutes, or until it’s soft enough to squish between your fingers.
  • Remove the thighs from the slow cooker and rest on a chopping board for 5-10 minutes, so the juices have time to reabsorb, keeping the chicken juicy.
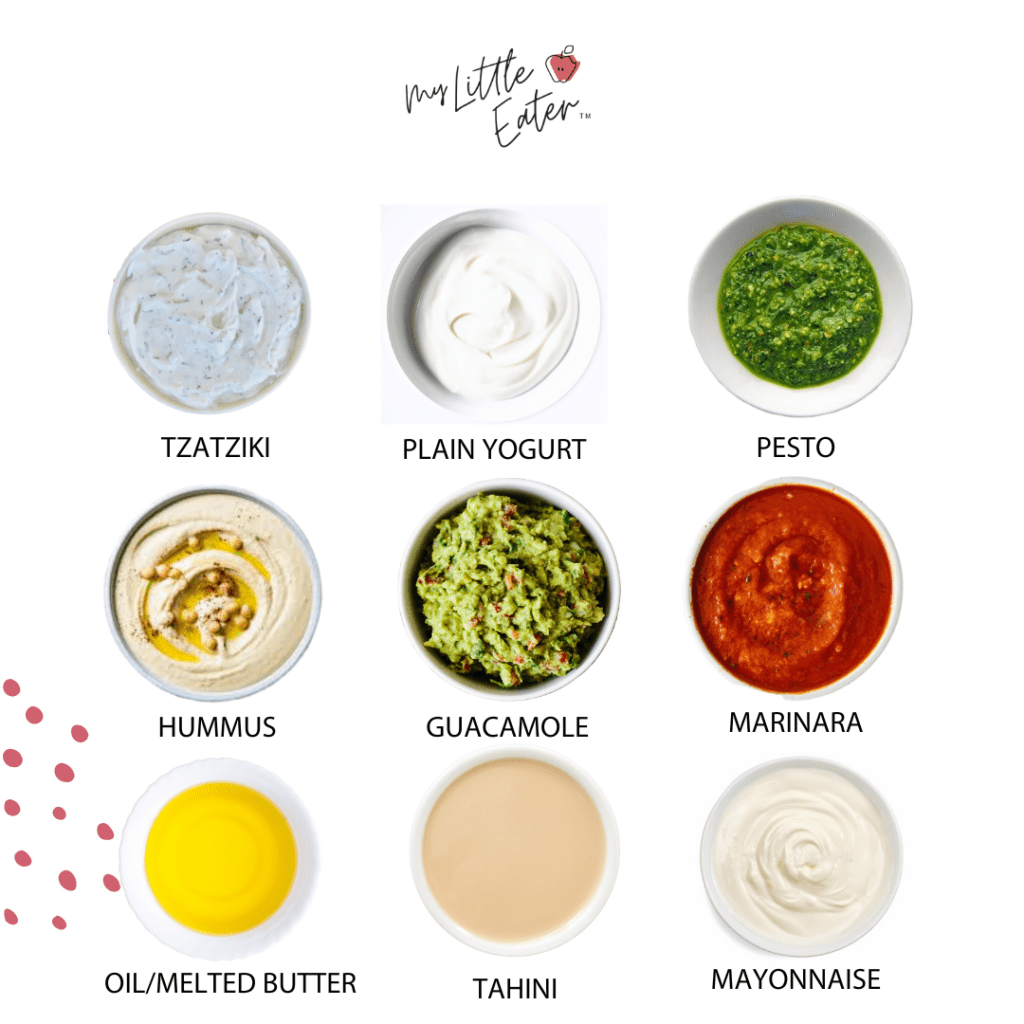
  • While the chicken rests, make the peanut butter sauce by adding peanut butter, water, apple cider vineger, coconut aminos, and garlic powder into a small bowl. Whisk together until smooth, and well combined. It should drip easily off of a spoon. If the consistency is too thick, add more water.
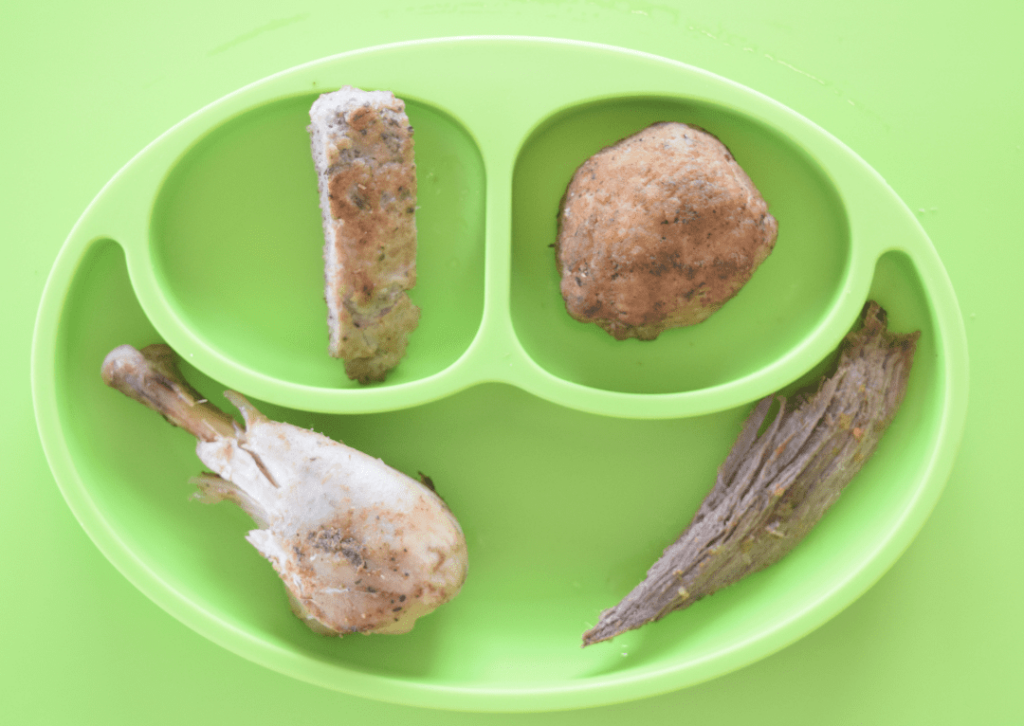
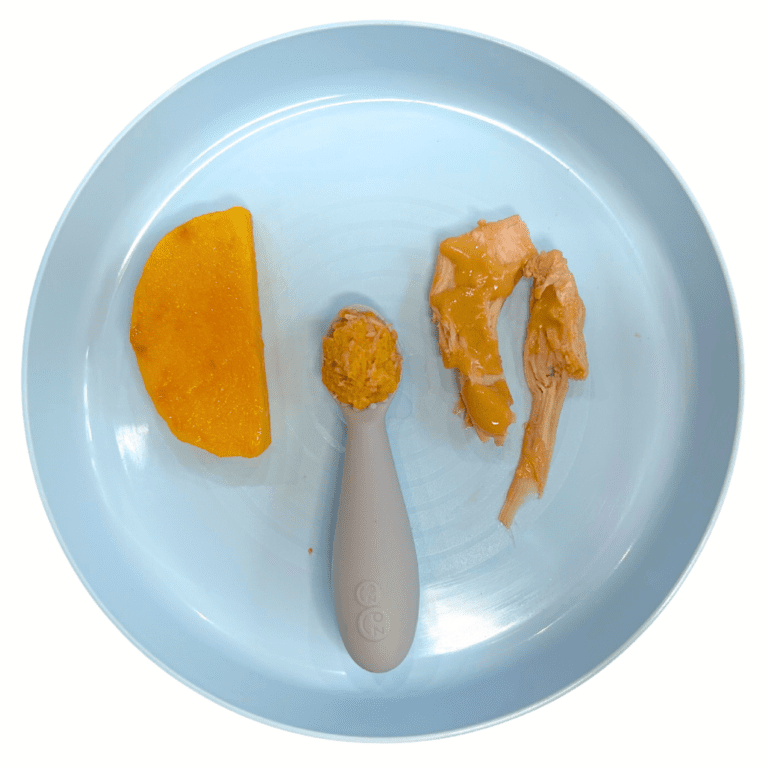
  • Plate the chicken and squash together, drizzling the sauce on top of the chicken. See the notes section below for how to serve this to babies depending on the texture phase your baby is ready for.

Notes

  • Storing leftovers - Chicken, broth and sauce can refrigerated in an airtight container for 3-4 days or frozen for 3-4 months.
  • Substitutions - If your baby has a peanut allergy, swap peanut butter for sunflower seed butter or omit the sauce. Swap the chicken thighs for chicken breast.
  • Adult meal - Add salt to your chicken after cooking. Serve yours over a bed of rice, cauliflower rice, asian slaw or stir-fried veggies
 
How to serve:
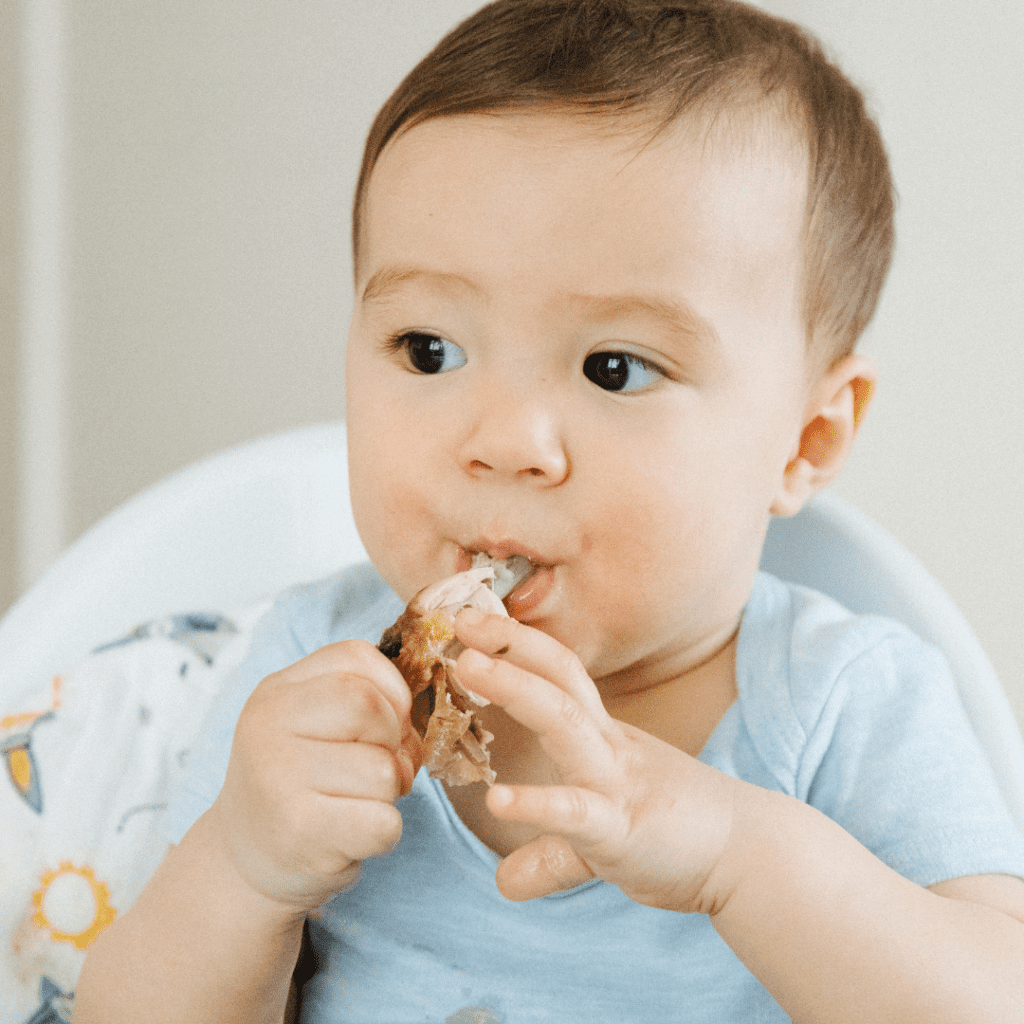
  • Option 1: Shred the chicken thighs into wide finger-length pieces with a fork or between your fingers then drizzle 2 tsp peanut sauce on top. Serve alongside leftover roasted butternut squash. If you feel the chicken is hard to chew or needs more moisture, top up each piece with more chicken broth (can do this multiple times throughout the meal).
  • Option 2: Shred the chicken into tiny pieces between your fingers or finely chop it with a knife. Mash the roasted butternut squash well and mix together with the chicken shreds and 2-3 tsp of peanut sauce, providing added moisture and a way for the chicken to stick to a spoon. Add broth as needed to the mixture for even more moisture. Serve on a pre-loaded spoon and let baby self-feed.
Keyword baby friendly, baby led weaning recipe, crockpot meal, family meals, high fat, high iron, high protein
Tried this recipe?Let us know how it was!

References:​

  1. Bushway, A. A., & Serreze, D. V. Differences in the pH and Iron Content of Chicken White and Dark Meat that Effect the Action of Nitrite Against Aerobes. Canadian Institute of Food Science and Technology Journal, 17(4), 214-217, 1984.
  2. The Organic Center. The Benefits of Organic Meat. Retrieved from https://www.organic-center.org/sites/default/files/publication_files/meatstudy-final_05_14_0.pdf 
  3. De Smet, S., & Vossen, E.  Meat: The balance between nutrition and health. A review. Meat Science, 120, 145-156 (2016).
  4. Beef cattle research council. Carcass Grading. Retrieved from https://www.beefresearch.ca/topics/carcass-grading/ 
  5. U.S. Department of Agriculture. Grades and Standards. Retrieved from https://www.ams.usda.gov/grades-standards 
  6. Government of Canada. Livestock and Poultry Carcass Grading Regulations. Retrieved from https://laws-lois.justice.gc.ca/eng/regulations/sor-92-541/20060322/P1TT3xt3.html 
  7. Government of Canada. Safe food storage. Retrieved from https://www.canada.ca/en/health-canada/services/general-food-safety-tips/safe-food-storage.html 
  8. Salmonella Compliance Guidelines for Small and Very Small Meat and Poultry Establishments that Produce Ready-to-Eat (RTE) Products. June 2017. Retrieved from https://www.fsis.usda.gov/sites/default/files/import/Salmonella-Compliance-Guideline-SVSP-RTE-Appendix-A.pdf?ref=%7Binstagram%7D
  9. Government of Canada. Safe Cooking Temperatures. Retrieved from https://www.canada.ca/en/health-canada/services/general-food-safety-tips/safe-internal-cooking-temperatures.html

IS THIS HELPFUL? PIN IT TO SAVE FOR LATER!

Picture of CHELSEY LANDRY, RD

CHELSEY LANDRY, RD

Community Dietitian at My Little Eater Inc., and bunny-mom to Hickory. Chelsey offers one-on-one counselling to parents of babies and toddlers that need more customized support. Learn more by booking a free discovery call with her today!

Picture of CHELSEY LANDRY, RD

CHELSEY LANDRY, RD

Community Dietitian at My Little Eater Inc., and bunny-mom to Hickory. Chelsey offers one-on-one counselling to parents of babies and toddlers that need more customized support. Learn more by booking a free discovery call with her today!

MORE BLOGS LIKE THIS...​​

SHARE THIS POST

Leave a Reply

Your email address will not be published. Required fields are marked *

Recipe Rating


meet edwena

Registered pediatric dietitian, mom of two picky-turned-adventurous eater, and the creator of the Texture Timeline™ – an exclusive tool to help move your baby through easy to more advanced purees and finger foods to prevent picky eating.

You may also like...

115 first foods list for baby

Baby's
115 First Foods
Checklist

60 Day Baby Led Feeding Meal Plan

MLE app preview

My Little Eater App (for apple/android)

scared to transition to finger foods?

Join the FREE workshop

Baby led weaning...but make it purees!

Get our proven, step-by-step plan for transitioning your baby from Purees to Finger Foods, texture by texture, so you can ease your fears about choking and gagging, all while helping your little eater develop their eating skills and an adventurous appetite.

Plus get The Texture Timeline™ Starter Guide for free when you stay until the end of the workshop. This tool breaks down the 4 phases, what kinds of foods to safely feed your baby during each phase, and when to progress to the next phase.

Scroll to Top