Turkey, a type of poultry, is an excellent food to introduce to babies! It’s nutrient-dense and provides what your baby needs to grow and thrive like protein, iron, and B vitamins (1)!
Meat in general poses a slightly higher choking risk than some other foods, so it’s important to follow proper preparation instructions for serving it to babies. That said, it is still safe to offer and can be an important food in many family traditions!
Table of Contents
When can babies have turkey?
Babies can have turkey when they’re showing all the developmental signs of readiness to start solids, which happens around 6 months old. It’s actually a great food to introduce because of its high-iron content – something babies need a lot of.
Watch Brinley & Hannah enjoy turkey!
Watch Brinley & Hannah enjoy turkey!
Brinley is 7.5 months old and mouthing a turkey drumstick with the meat still attached.
This is Brinley again, at the same age, eating turkey in large pieces as a phase 3 on the Texture Timeline™.
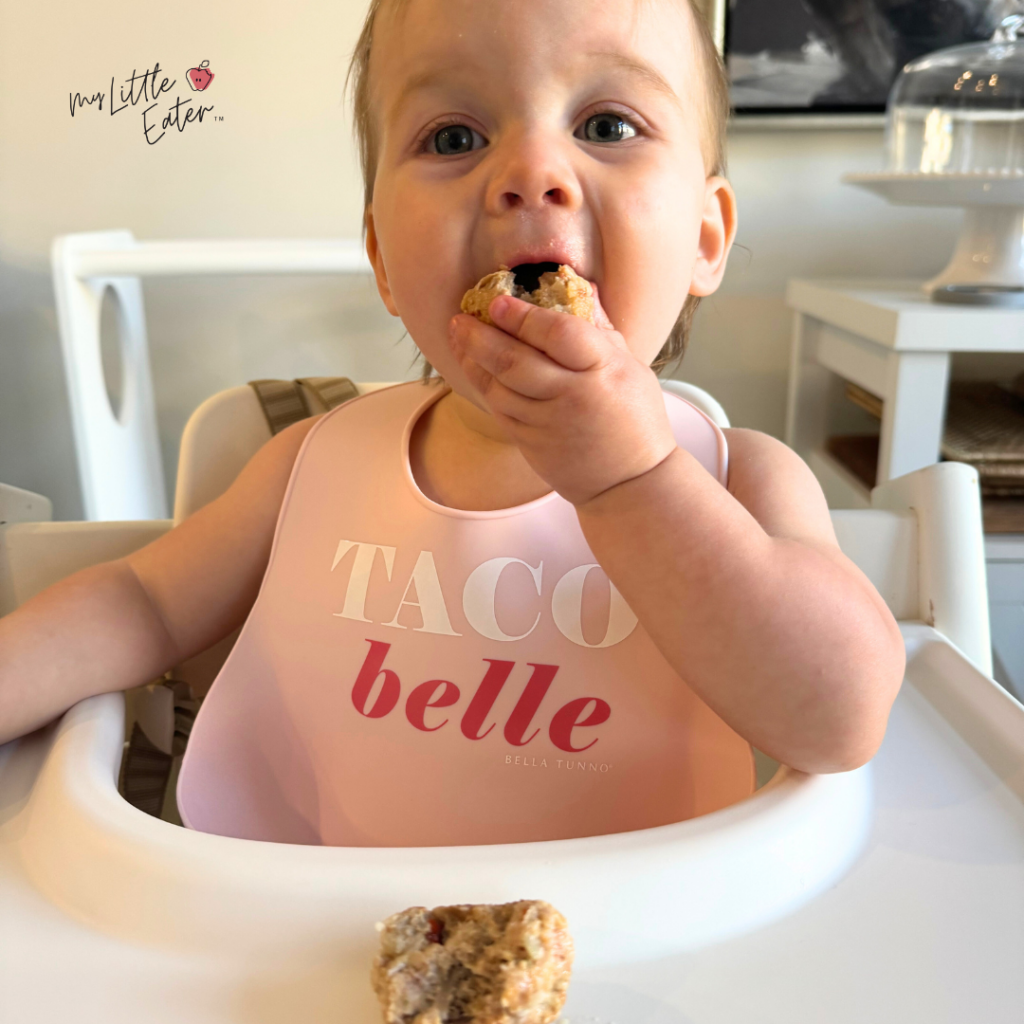
Hannah is 13 months old and self-feeding on delicious turkey meatballs.
Is turkey a choking hazard for babies?
That depends on the cut of turkey being served!
Cuts of turkey such as thighs, breasts, and legs (along with other types of meat) can be a choking hazard for babies. This is especially true when the meat is dry because that makes it more difficult for babies to chew and swallow.
To minimize the risk of choking, use a slow cooking method to ensure that the meat is cooked until tender and serve it with sauce, or in its own juices, to keep the meat moist.
Turkey that’s cut into small cubes (less than ½ inch in size) can also increase choking risk, as this size and shape can block a baby’s airway. Following the instructions outlined below will ensure you’re offering turkey in the safest way possible for your baby.
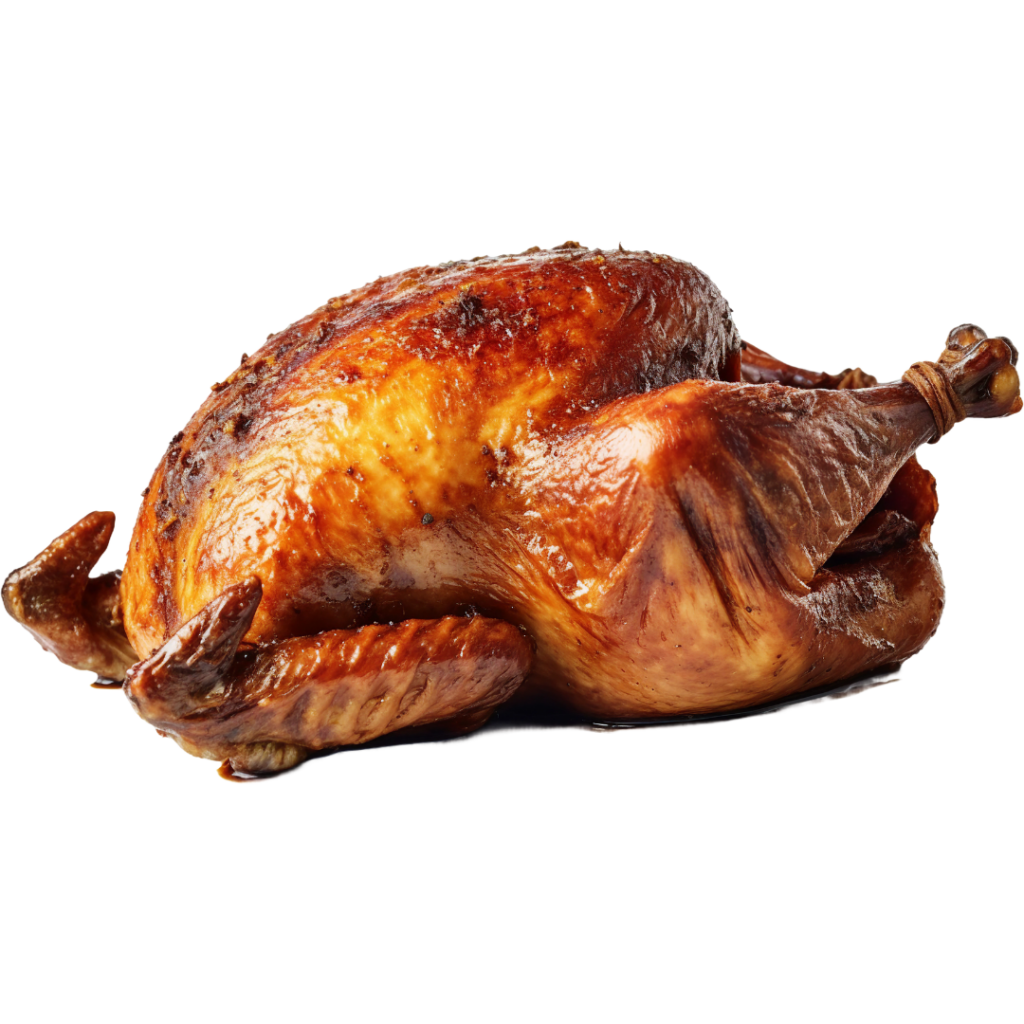
Ground turkey, on the other hand, is not a common choking hazard for babies. However, it is still important to follow the instructions outlined below for safe serving practices. Keeping ground turkey moist and tender, just like with other cuts of turkey, can help to ensure that you’re serving it to your baby safely.
Check out our blog on how to serve meat to babies and toddlers for more information.
Always make sure you’re offering your baby appropriate foods based on their skill level and ability to chew their food thoroughly.
Choosing the right cut of turkey for babies
In general, we recommend choosing dark meat over light meat because it tends to have higher levels of iron, which is a crucial nutrient for babies. This means we recommend that you choose thighs and legs over breasts, when possible.
The other benefit is that dark meat typically stays more moist than white meat which can dry out quickly, especially if over-cooked. Meat that has a higher fat content will hold up better to higher temperatures and turn out more moist (even if overcooked) than a cut with lower fat content.
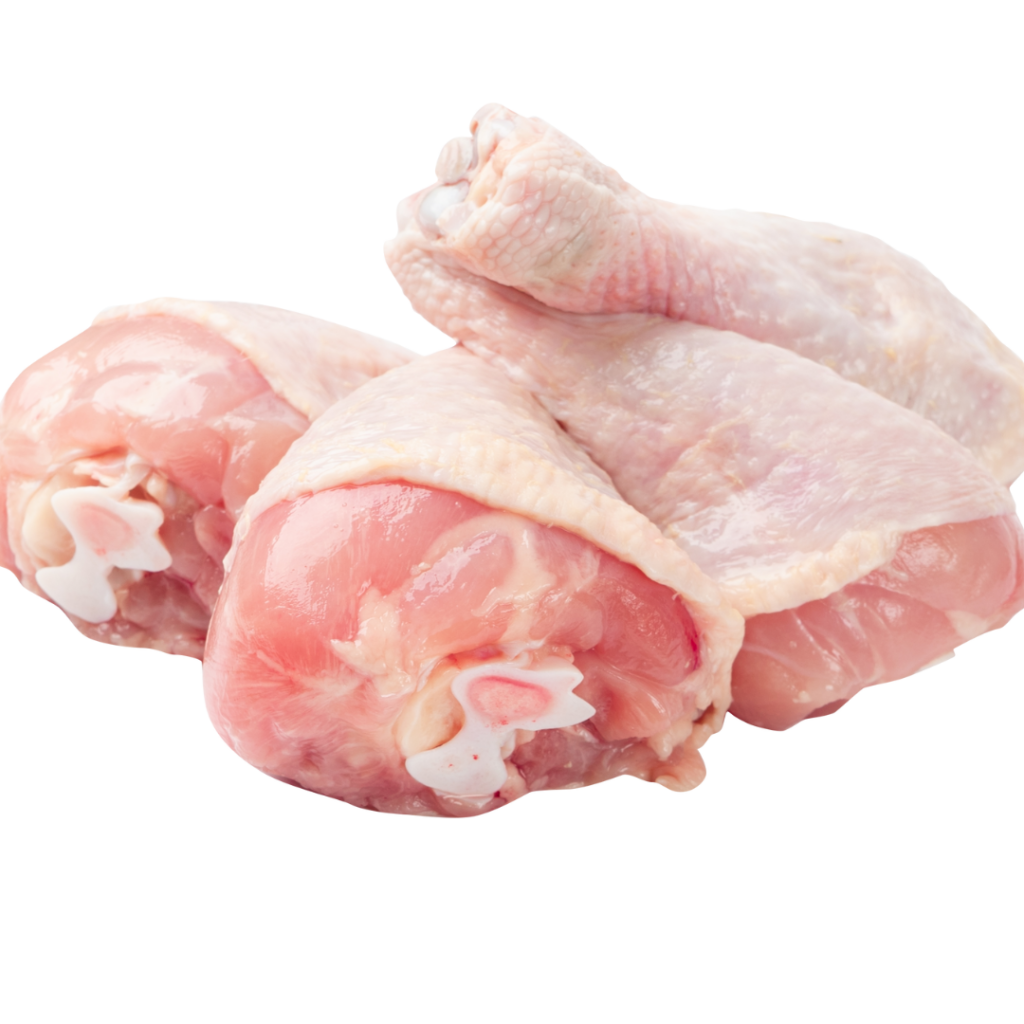
We make the same recommendation for ground turkey. Choose an option with higher fat content, if possible, to allow it to stay moist and juicy while cooking, making it safer for your baby. Healthy fats like this are great for your baby’s brain development and are nothing to worry about.
Food safety tips for cooking turkey
Since turkey is a type of poultry, you need to be careful to cook it to the right temperature to avoid food-borne illnesses (2). Babies are more susceptible to these illnesses and can have more severe reactions, as compared to adults.
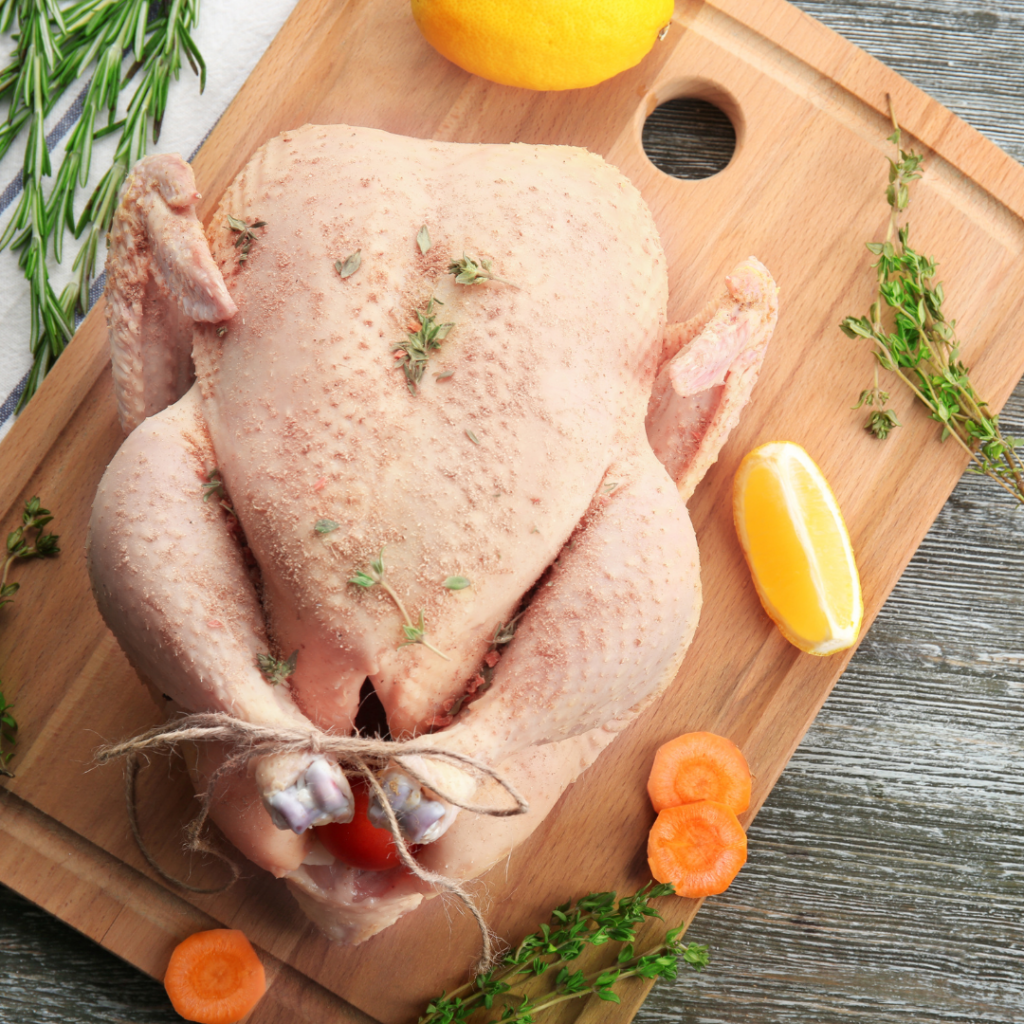
Use a meat thermometer to confirm that both the turkey and any stuffing you’ve put inside of it, reach 165°F (74°C) (2). Always insert the thermometer into the center of the stuffing and the thickest part of the turkey in the breast, thigh, and wing (2). When cooking a whole turkey it’s important to check all four areas to ensure it is cooked evenly (2).
Once cooked, let the turkey stand for 20 minutes before removing the stuffing or cutting into it (2). This allows the stuffing to continue cooking for a bit longer – and makes it easier to carve (2)!
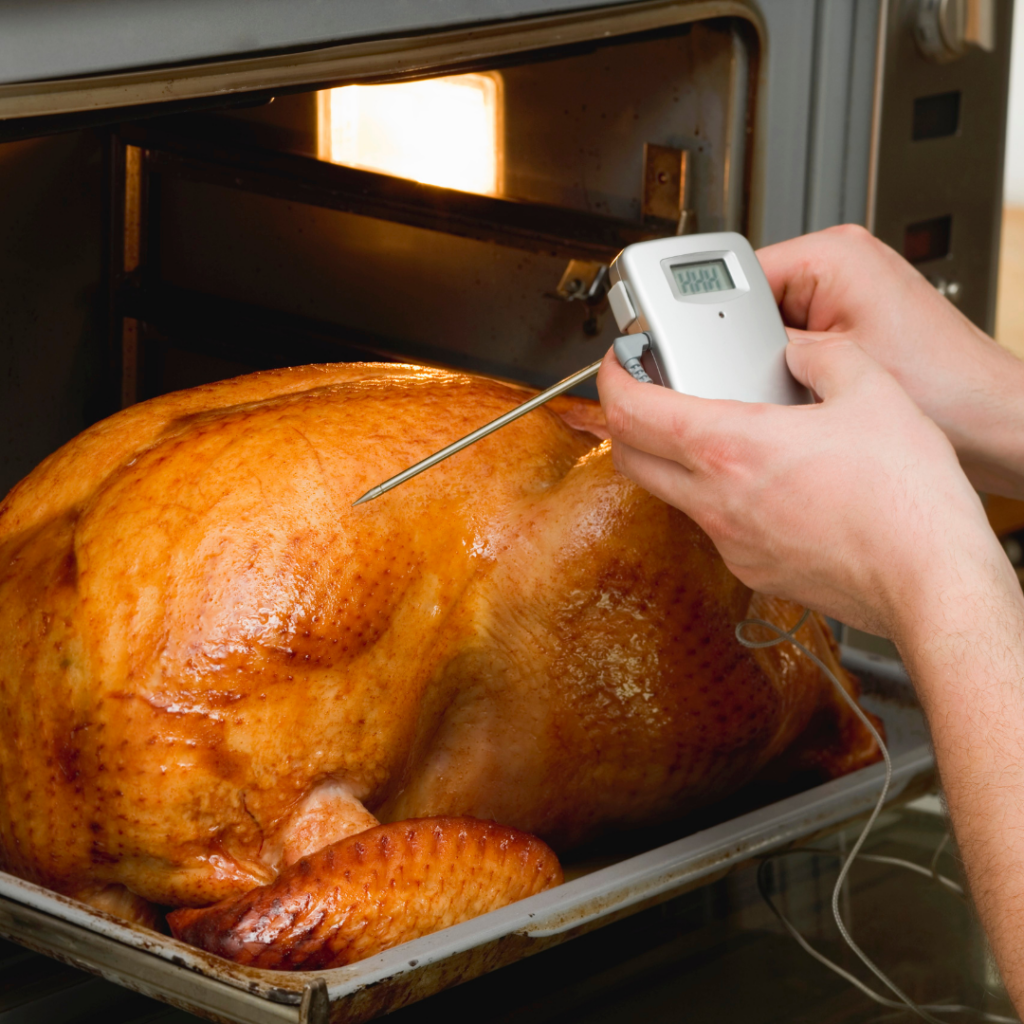
It’s also important to follow proper handling protocols and thoroughly clean and disinfect any surface or tool that comes in contact with the raw turkey (2). It’s recommended to use separate tools for handling the turkey, such as a separate cutting board, knife, etc. (2).
Thoroughly washing your hands before and after touching the turkey can help prevent the spread of those illnesses to other foods or areas of the kitchen (2). Additionally, it is not recommended to wash your raw turkey before cooking (2). This puts you at a much greater risk of spreading germs and contaminating other surfaces (2).
How to serve turkey according to the Texture Timeline™
These are the safest, suggested ways to serve food to your baby based on the scientific, developmental, and clinical research and expertise available to date and are vetted by pediatric doctors, speech-language pathologists, and dietitians. However, please note that babies can technically choke on anything, including purees. Always take into account your child’s individual abilities and needs and check with your doctor or feeding therapist on the safety of offering these foods to your baby. Be mindful of how to set up a safe eating environment and please know that all material, opinions, advice, and information found on mylittleeater.com is for informational and educational purposes only. See our disclaimer for more information.
What is the Texture Timeline™?
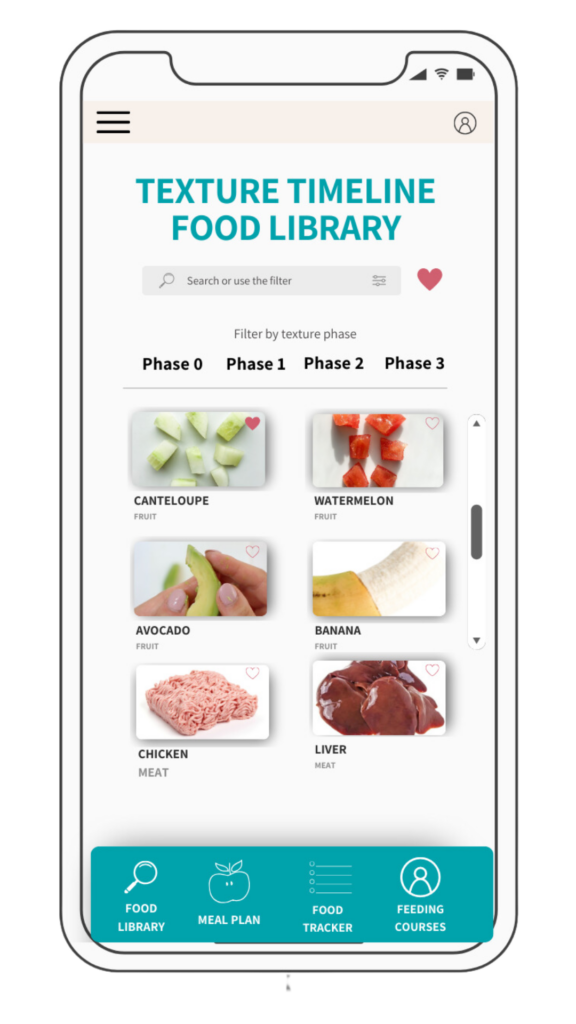
A tool exclusive to My Little Eater that allows you to start solids with your baby using purées, finger foods, or a mixture of both. We sort all foods into different phases of the timeline based on texture difficulty, presenting multiple ways to serve each food depending on what you and your baby are ready for.
You can start with any phase of the Texture Timeline™. The goal is to always be moving forward on the timeline so that you can advance your baby to more challenging textures in a timely manner. This will allow your baby to develop and practice new eating skills and ensure that they don’t stay stuck on one texture for too long.
Using the Texture Timeline™ can help to prevent picky eating, all while keeping the feeding process enjoyable and less stressful for you because you can ease into the difficult textures that often cause more anxiety and worry.
Texture Timeline Phase 0
Option 1: Drumstick bone, meat removed (Palmar grasp)
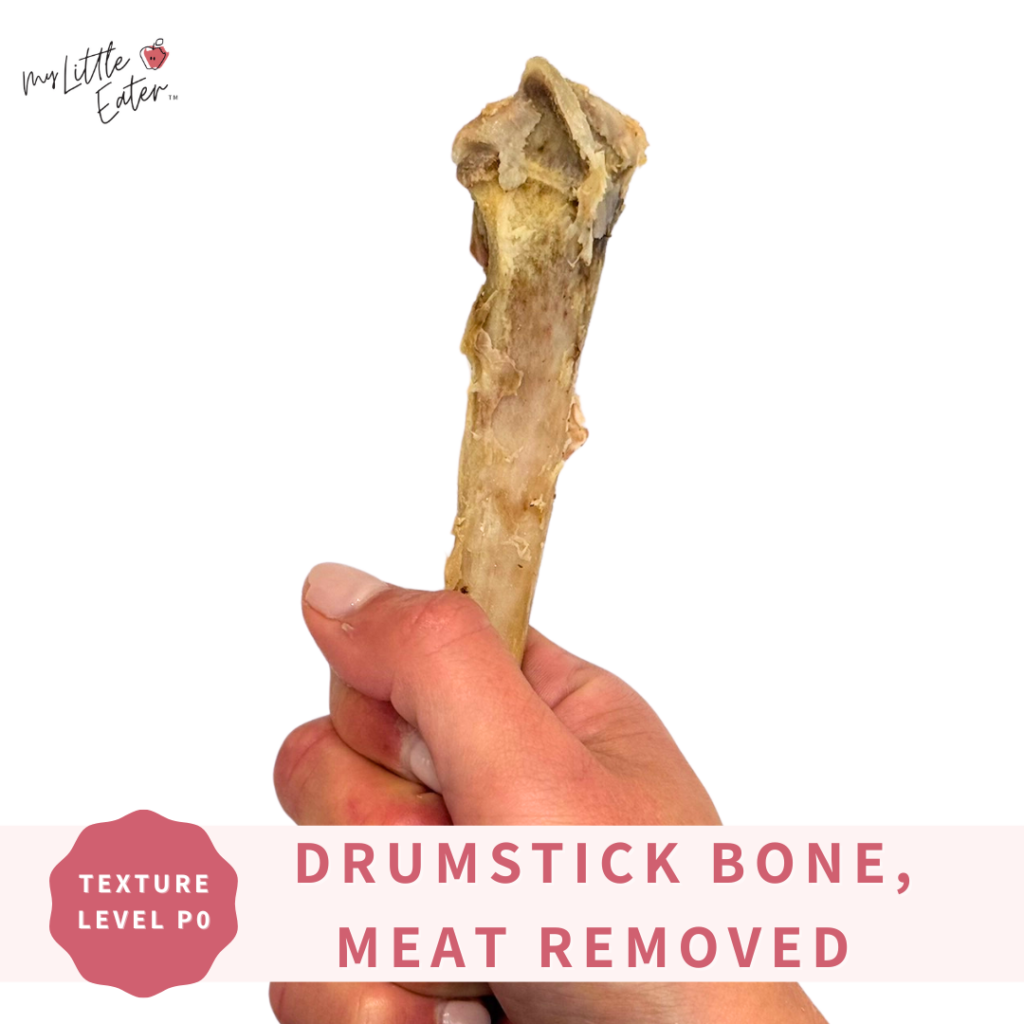
Turkey drumstick bones with the meat removed make for a good, highly resistive, whole food for your baby to gnaw on before they have teeth and the ability to take bites. It’s a great way for your baby to begin exploring the boundaries of their mouth and get exposure to a new flavor and texture with a very low risk of choking.
Step 1: Slow-cook turkey drumsticks until an internal temperature of 165°F (74°C) is reached.
Step 2: Remove the thin outer skin from the meat of the drumstick, along with the cartilage cap located at the bottom of the bone (this small piece can be a choking hazard if not removed).
Step 3: There will be 3-4 thin, long, toothpick-like bones located in the middle of the drumstick within the meaty portion. You may be able to see the end of these bones sticking out near the bottom of the drumstick, but if not, use your fingers to feel around for them. Once you’ve located them, pull the bones upwards to remove them from the drumstick. These bones can be quite sharp, so it’s very important that they be removed before you serve a drumstick to your baby.
Step 4: Remove all of the remaining meat from the drumstick until you’re left with only the large bone.
Step 5: Offer the drumstick bone (meat removed) to your baby for them to pick up and hold using their palmar grasp.
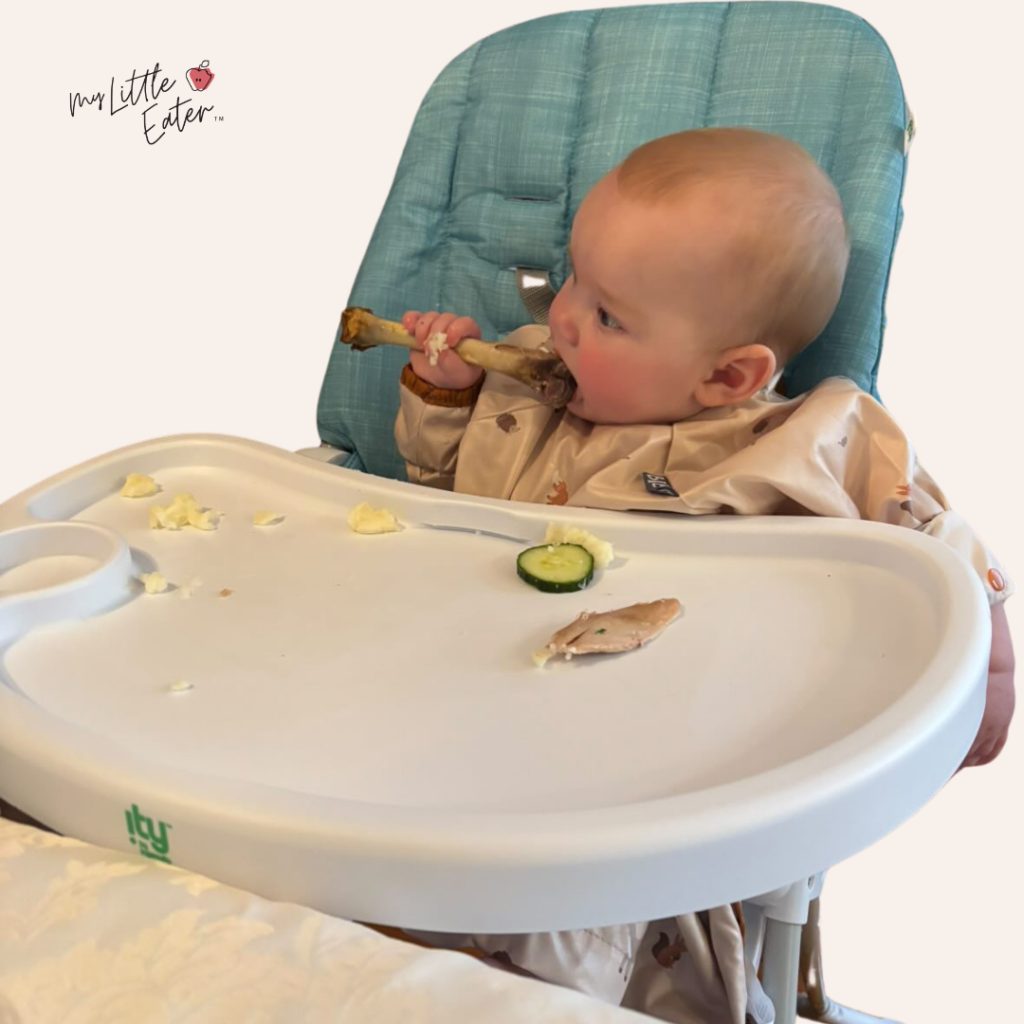
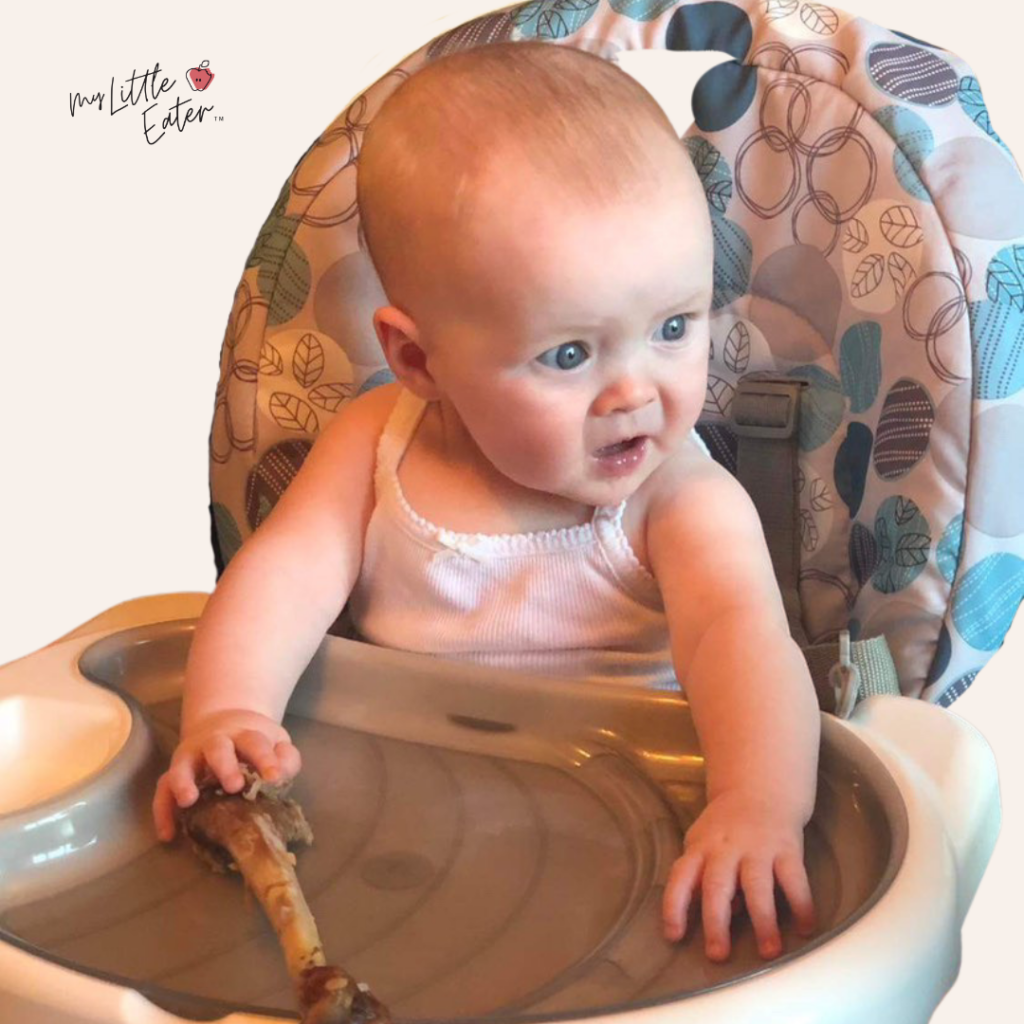
Ella and Elodie, both 6 months, enjoy a turkey drumstick as a phase 0 food.
Texture Timeline Phase 0
Option 2: Thin purée (Utensil)
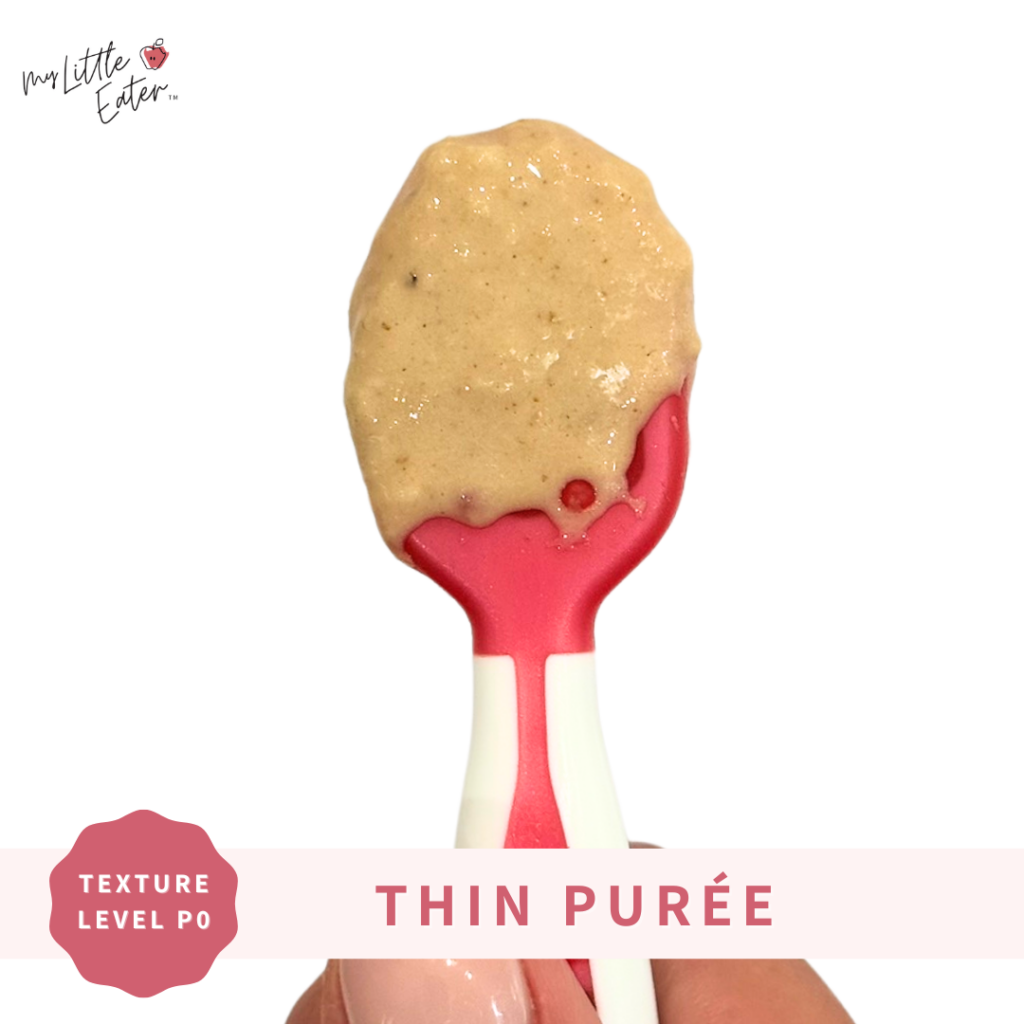
Step 1: Slow-cook turkey until an internal temperature of 165°F (74°C) is reached.
Step 2: Add cooked turkey meat into a blender along with water, breast milk, or formula. Blend until a smooth, thin purée is achieved (the consistency should be thin enough that it drips off of a spoon when tilted). Serve to your baby on a preloaded spoon.
Texture Timeline Phase 1
Blended (Utensil)
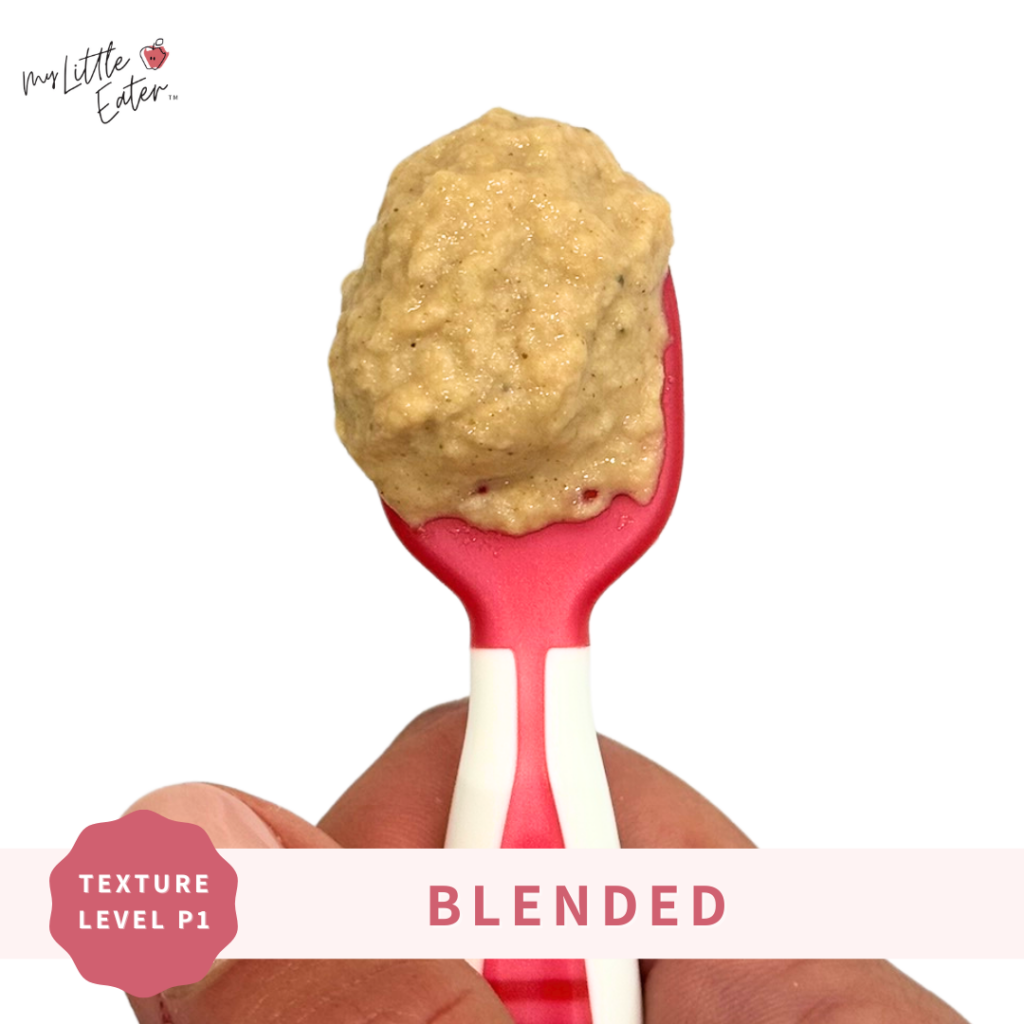
Step 1: Slow-cook turkey until an internal temperature of 165°F (74°C) is reached.
Step 2: Add cooked turkey meat into a blender and blend until a thick purée is achieved. You can add a bit of water, breast milk, or formula to help with the blending process (the final consistency should be thick enough that it holds its shape on a spoon when tilted). Serve to your baby on a preloaded spoon. Or, if they aren’t interested in using a spoon, let them dig in with their hands!
Texture Timeline Phase 2
Slow-cooked, shredded, mixed into a purée (Utensil)
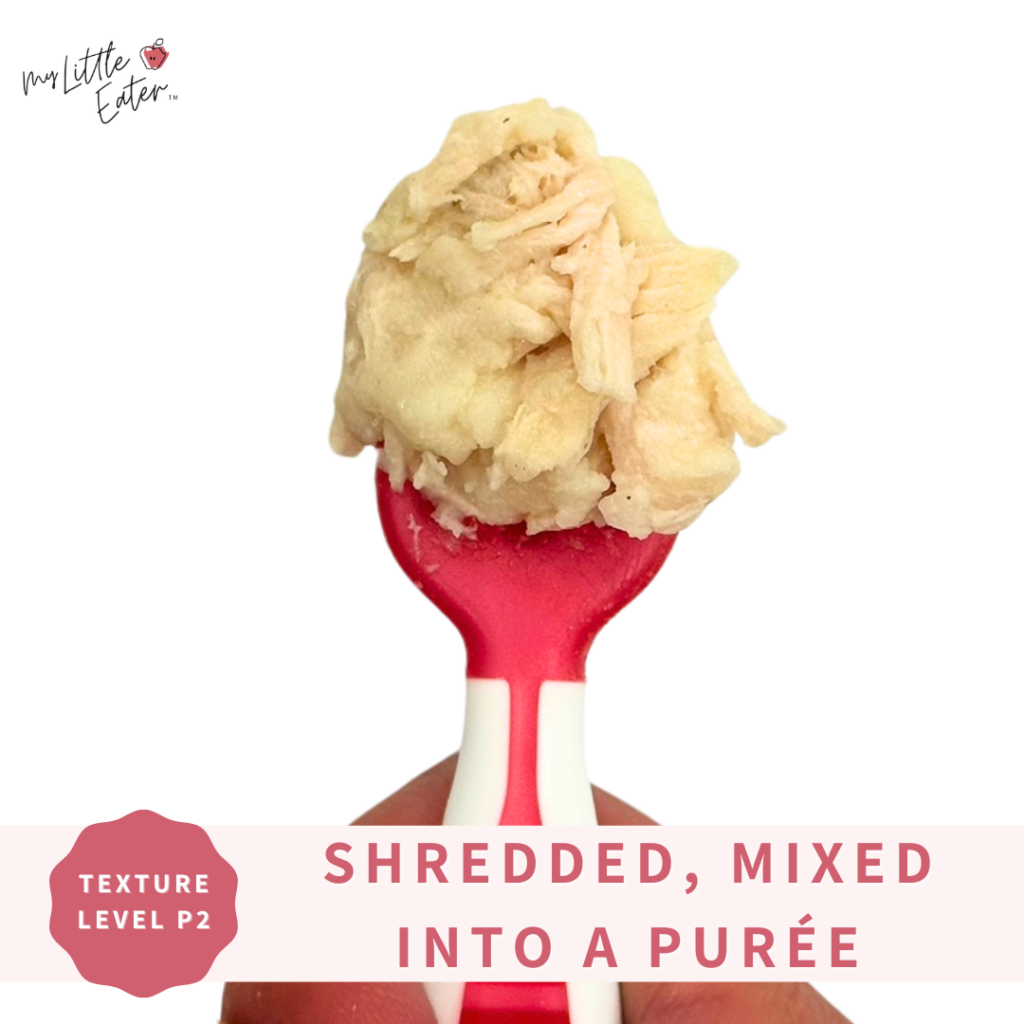
Step 1: Slow-cook turkey until an internal temperature of 165°F (74°C) is reached.
Step 2: Remove the meat from the bone, then shred it by pulling it apart using two forks, or with your hands. You can also shred the turkey by briefly mixing it with a hand mixer.
Step 3: Mix the shredded turkey into a binding purée like mashed potatoes or mashed avocado. This will give the mixture more moisture and make it more cohesive so that it’s easier for your baby to eat.
Step 4: Serve to your baby on a preloaded spoon. Or, if your baby isn’t interested in using a spoon, you can let them dig in with their hands!
Texture Timeline Phase 3
Option 1: Slow-cooked, turkey drumstick (Palmar grasp)
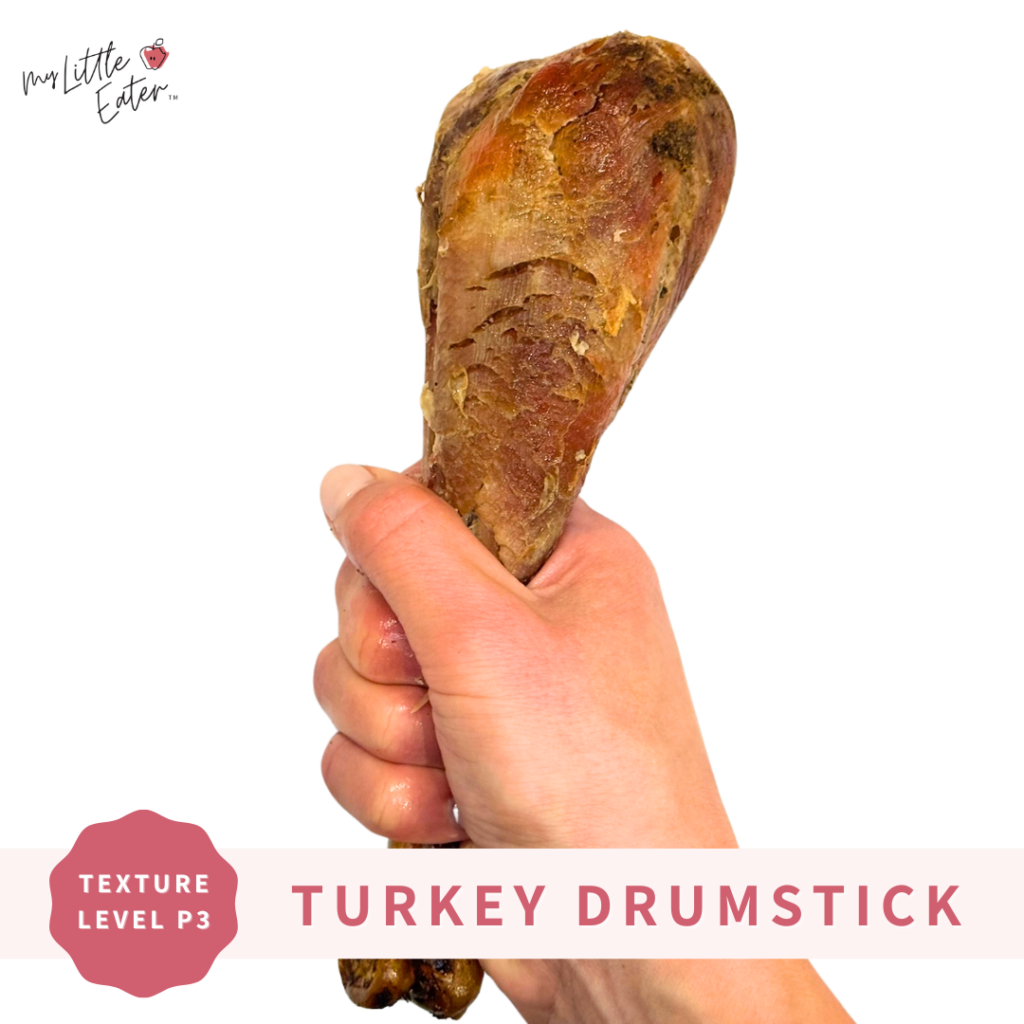
Step 1: Slow-cook turkey drumsticks until an internal temperature of 165°F (74°C) is reached.
Step 2: Remove the thin outer skin from the meat of the drumstick, along with the cartilage cap located at the bottom of the bone (this small piece can be a choking hazard if not removed).
Step 3: There will be 3-4 thin, long, toothpick-like bones located in the middle of the drumstick within the meaty portion. You may be able to see the end of these bones sticking out near the bottom of the drumstick, but if not, use your fingers to feel around for them. Once you’ve located them, pull the bones upwards to remove them from the drumstick. These bones can be quite sharp, so it’s very important that they be removed before you serve a drumstick to your baby.
Step 4: Once all cartilage and bones have been removed and only the meat is remaining on the drumstick bone, serve to your baby for them to pick up and hold using their palmar grasp.
Texture Timeline Phase 3
Option 2: Slow-cooked, large pieces (Palmar grasp)
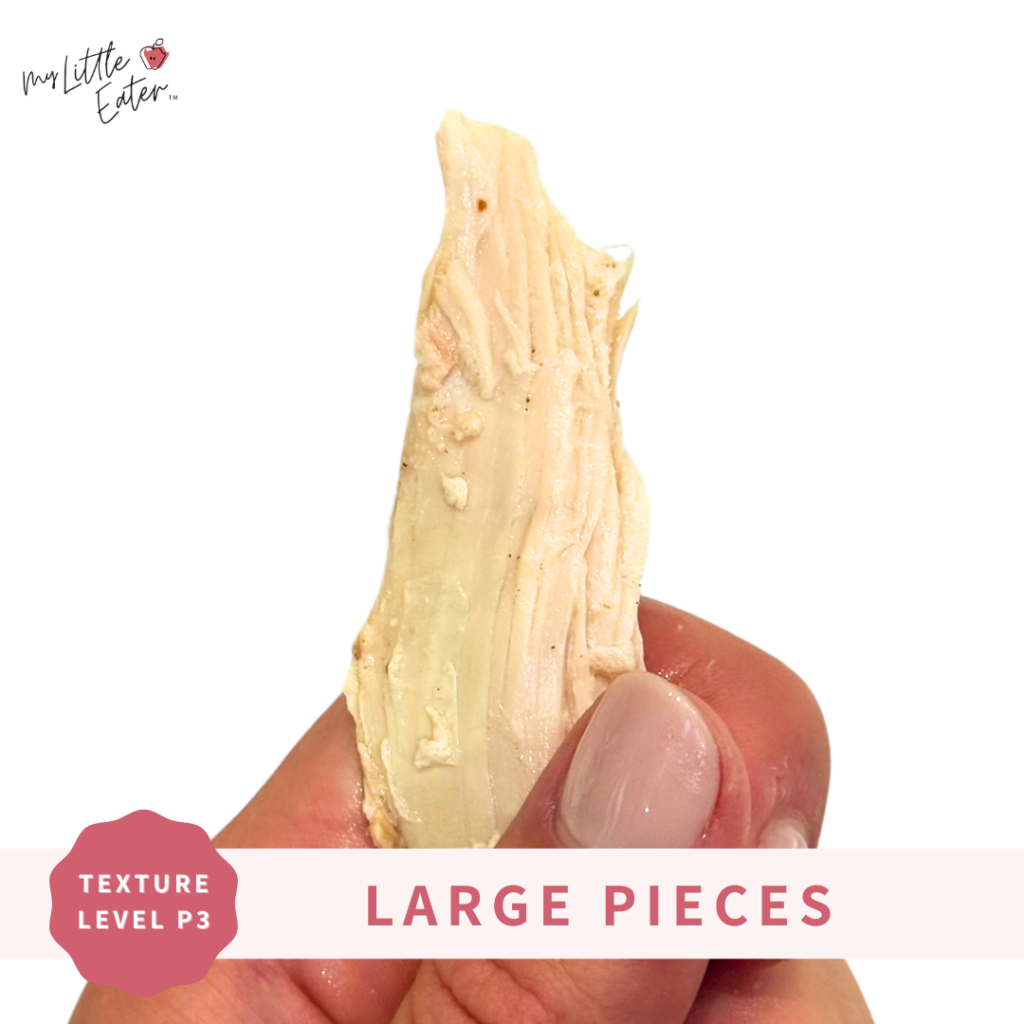
Step 1: Slow-cook turkey until an internal temperature of 165°F (74°C) is reached.
Step 2: Remove the meat from the bone, then tear it into flat, large pieces about 1-2 inches in width and 2-3 inches in length.
Step 3: Moisten the pieces of turkey with a bit of its own juice, then serve it to your baby for them to pick up and hold using their palmar grasp.
Texture Timeline Phase 3
Option 3: Slow-cooked, shredded (Pincer grasp)
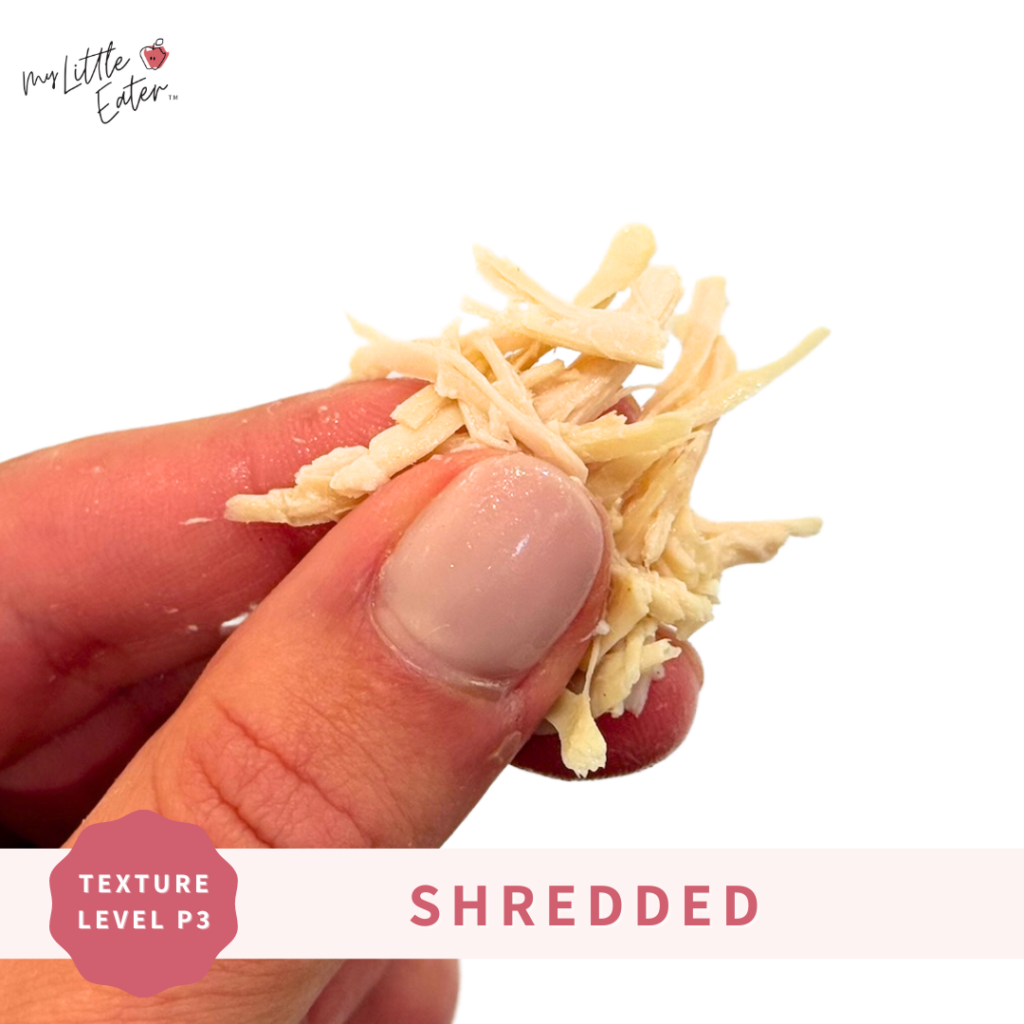
Step 1: Slow-cook turkey until an internal temperature of 165°F (74°C) is reached.
Step 2: Remove the meat from the bone, then shred it by pulling it apart using two forks, or with your hands. You can also shred the turkey by briefly mixing it with a hand mixer or food processor.
Step 3: Moisten the shredded turkey with a bit of its own juice, then serve it to your baby for them to pick up and hold using their pincer grasp.
Texture Timeline Phase 0
Thin purée (Utensil)
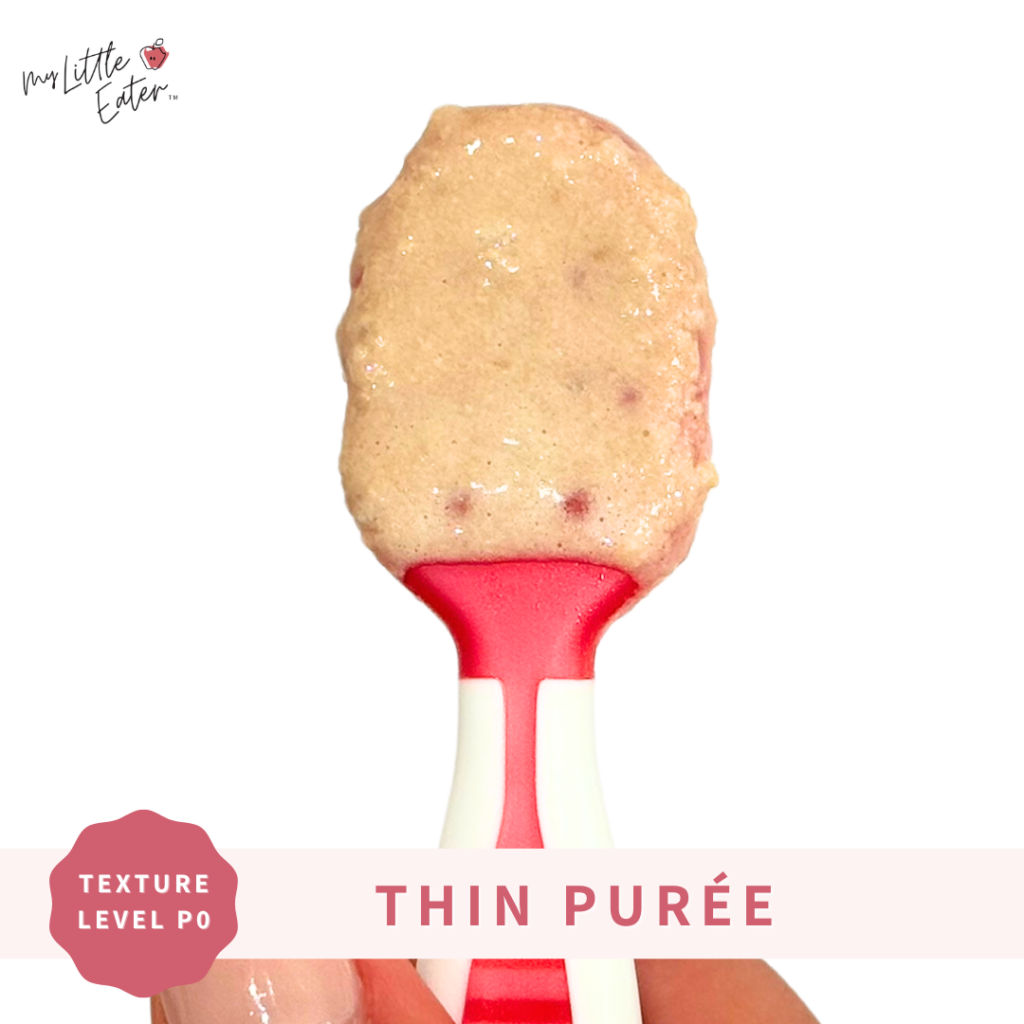
Step 1: Cook ground turkey in a frying pan until an internal temperature of 165°F (74°C) is reached.
Step 2: Add cooked ground turkey into a blender along with water, breast milk, or formula. Blend until a smooth, thin purée is achieved (the consistency should be thin enough that it drips off of a spoon when tilted). Serve to your baby on a preloaded spoon.
Texture Timeline Phase 1
Blended (Utensil)
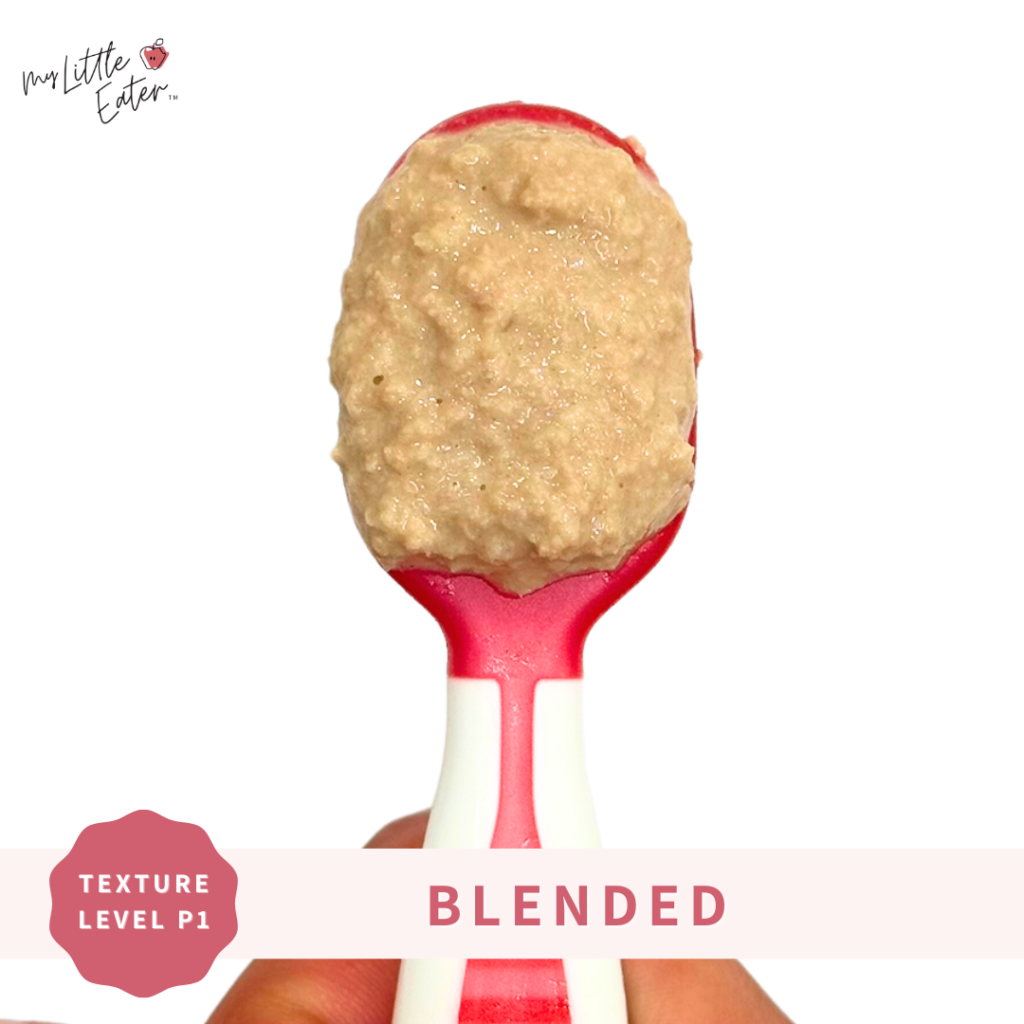
Step 1: Cook ground turkey in a frying pan until an internal temperature of 165°F (74°C) is reached.
Step 2: Add cooked ground turkey into a blender and blend until a thick purée is achieved. You can add a bit of water, breast milk, or formula to help with the blending process (the final consistency should be thick enough that it holds its shape on a spoon when tilted). Serve it to your baby on a preloaded spoon. Or, if they aren’t interested in using a spoon, let them dig in with their hands!
Texture Timeline Phase 2
Ground, mixed into a purée (Utensil)
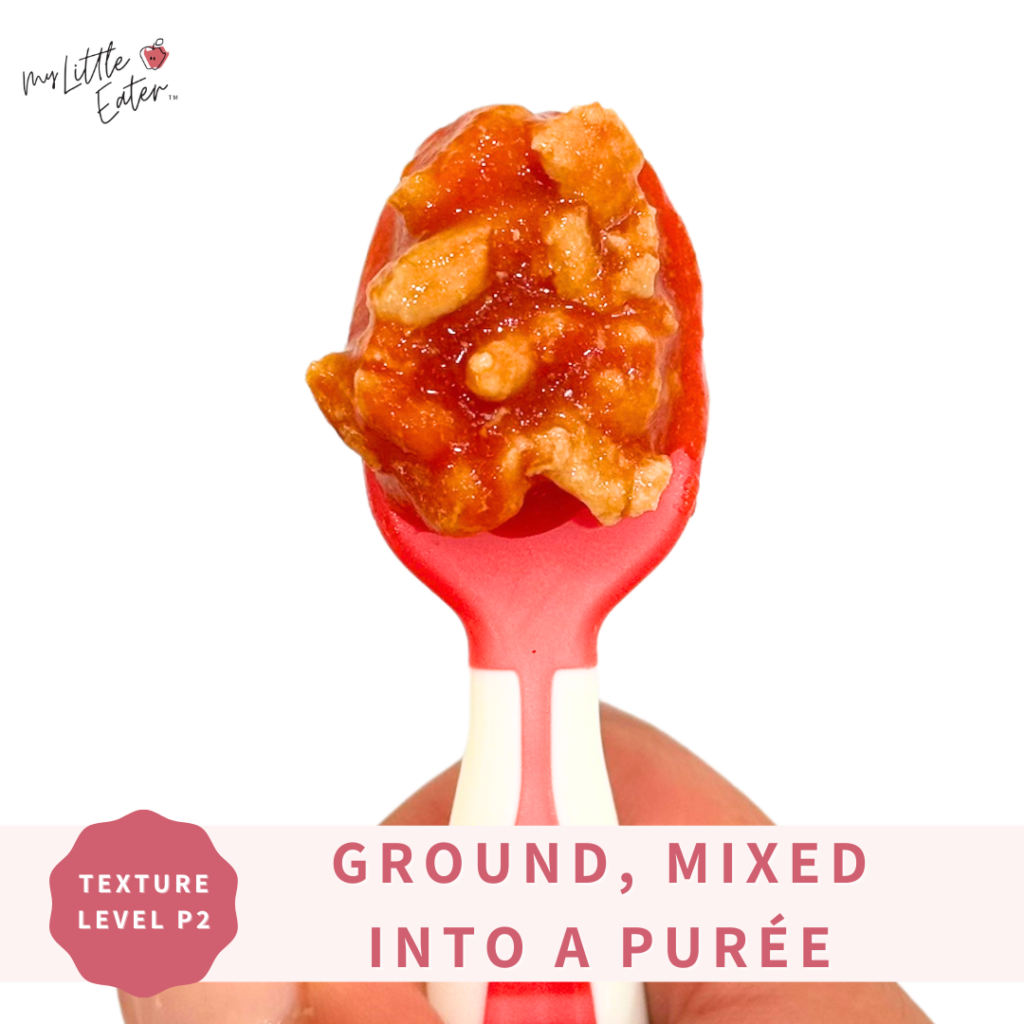
Step 1: Cook ground turkey in a frying pan until an internal temperature of 165°F (74°C) is reached.
Step 2: Lightly mash the ground turkey to break it into smaller pieces.
Step 3: Mix the ground turkey into a binding purée like tomato sauce. This will give the mixture more moisture and make it more cohesive so that it’s easier for your baby to eat.
Step 4: Serve to your baby on a preloaded spoon. Or, if your baby isn’t interested in using a spoon, you can let them dig in with their hands!
Texture Timeline Phase 3
Option 1: Loose ground turkey (Pincer grasp)
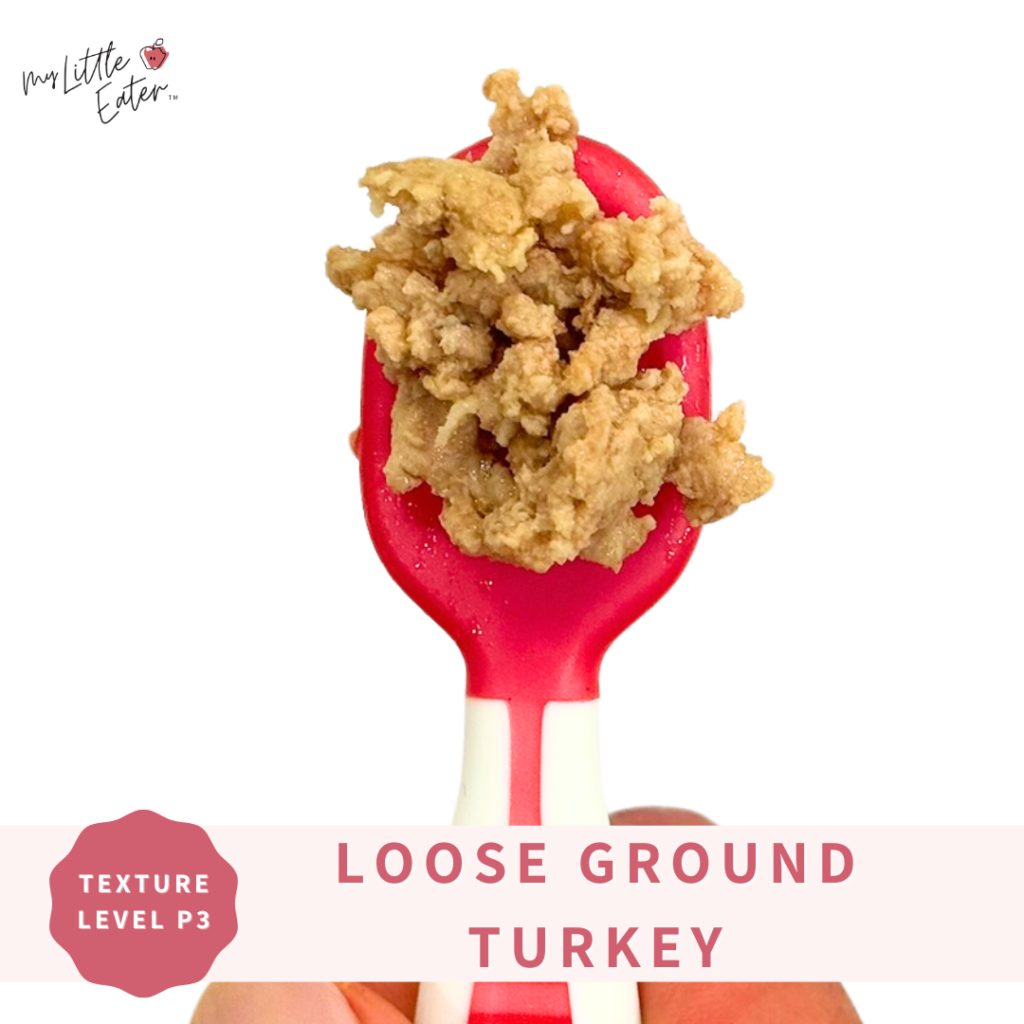
Step 1: Cook ground turkey in a frying pan until an internal temperature of 165°F (74°C) is reached.
Step 2: Lightly mash the ground turkey to break it into smaller pieces.
Step 3: Serve the loose pieces of ground turkey to your baby on a preloaded spoon. Or, if your baby isn’t interested in using a spoon, you can let them use their hands to practice picking up pieces of ground turkey using their pincer grasp.
Texture Timeline Phase 3
Option 2: Turkey meatballs (Palmar grasp)
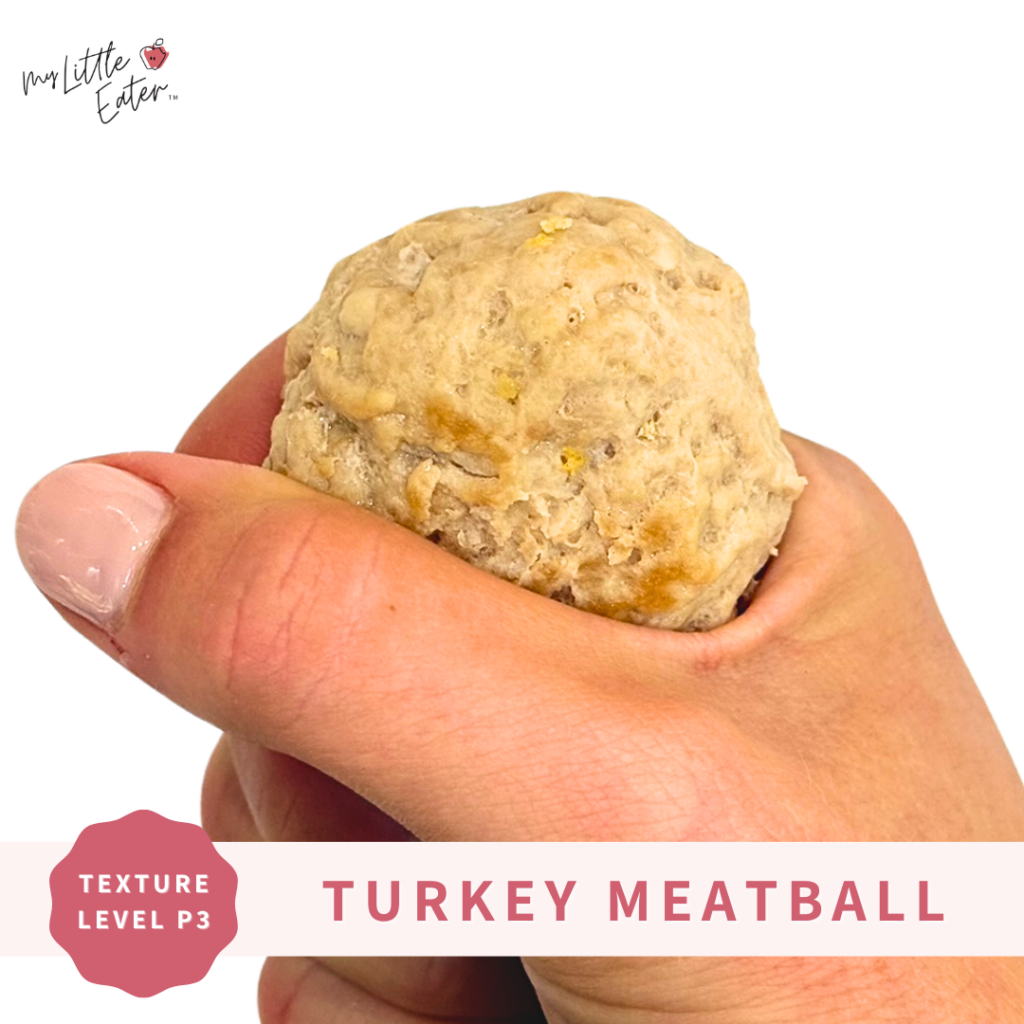
Use ground turkey in your favorite meatball recipe.
We have a Swedish meatball recipe on page 60 of our Baby Led Feeding meal plan that is perfect for this.
Alternatively, you can use ground turkey in your favorite burger recipe, then cut the burger patty into strips.
Serve baby meatballs or burger patty strips for them to pick up and hold using their palmar grasp.

Hannah is 13 months old and eating a yummy turkey meatball using her palmar grasp.
Spices for turkey
Don’t be afraid of adding flavor to your baby’s food! Despite popular belief, babies do not have to be served bland food – in fact, we recommend you don’t.
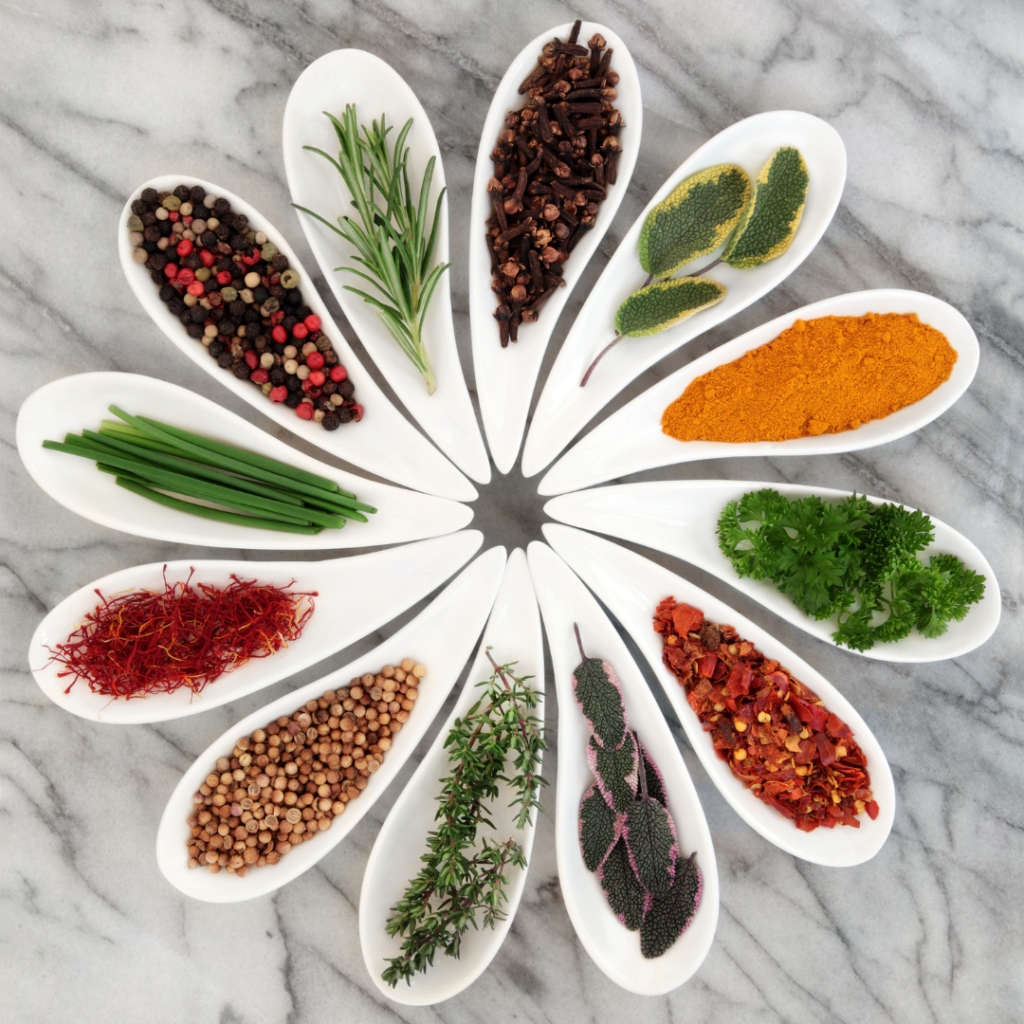
If you need some inspiration, our favorite spices to use when cooking turkey are sage, rosemary, pepper, thyme, oregano, garlic powder, etc.
Recommended next...
Recommended next...
Learn more about the benefits of using herbs and spices in your baby’s food. Plus, get some of our favorite combinations!
Nutritional benefits
Like all animal proteins, turkey is an excellent source of complete protein, which means it contains all of the essential amino acids that our bodies cannot make on their own (1,3). Turkey is also rich in iron, which is a nutrient that babies need lots of when first starting solids to support healthy growth and brain development (1,4).
Other important vitamins and minerals found in turkey include (1):
- Zinc to support healthy growth, development, and immune function (5).
- Vitamin B12 for healthy brain development and the production of healthy red blood cells (6,7).
- Vitamin B6 which is needed for normal brain development, immune function, and the production of healthy red blood cells (8).
Overall, turkey is an excellent, nutrient-dense food to introduce to your baby!
Fun fact
Fun fact
Have you ever felt a bit sleepy after eating a turkey dinner?
Turkey contains an amino acid called “tryptophan”, which helps to produce a hormone called serotonin. Serotonin can promote feelings of happiness and relaxation and it also helps to produce the hormone melatonin, which is responsible for letting your body know that it’s time to sleep. However, the notion that the tryptophan in turkey is responsible for making you feel sleepy after a big turkey dinner is actually a myth!
In fact, turkey contains less tryptophan than chicken!
It’s more likely that people end up feeling sleepy after eating turkey because they’ve just eaten a big meal (such as at Thanksgiving or Christmas dinner), not because of the tryptophan (9).
Can babies be allergic to turkey?
Turkey is not one of the top 10 highly allergenic foods and can be introduced alongside other foods without having to wait (the 2-day wait rule is for top allergens only).
That said, you can develop an allergy to any food, and although rare, it is still possible to be allergic to turkey (10).
Turkey can also be a trigger for food protein-induced enterocolitis syndrome (FPIES) (11). This is a type of gastrointestinal food allergy that affects mostly babies and young children. It causes symptoms of severe vomiting, diarrhea, and dehydration (12). The primary treatment of FPIES is to strictly avoid the trigger food. The good news is that most children tend to outgrow FPIES by around age 5 (13).
If you suspect your baby or toddler has an allergy to turkey, it’s best to consult with your doctor for appropriate treatment, diagnosis, and medical advice.
To get instant access to all of the foods in the Texture Timeline™ Food Video Library, along with our signature course for starting solids with evidence-based research and expert guidance, enroll in our Baby Led Feeding Program!
Complete with video lessons, printable resources for everything along the way, and an app to access it all at your fingertips, it’s like having a team of feeding experts in your pocket supporting you every step of the way.
Was this helpful? Pin it to save for later!
References
- U.S. Department of Agriculture. (2019). Turkey, Ground, cooked. https://fdc.nal.usda.gov/fdc-app.html#/food-details/171506/nutrients
- https://www.foodsafety.gov/blog/preparing-your-holiday-turkey-safely
- Hoffman, J. R., & Falvo, M. J. (2004). Protein – Which is Best?. Journal of sports science & medicine, 3(3), 118–130.
- Iron needs of babies and children. (2007). Paediatrics & child health, 12(4), 333–336. https://doi.org/10.1093/pch/12.4.333
- Institute of Medicine (US) Panel on Micronutrients. (2001). Dietary Reference Intakes for Vitamin A, Vitamin K, Arsenic, Boron, Chromium, Copper, Iodine, Iron, Manganese, Molybdenum, Nickel, Silicon, Vanadium, and Zinc. National Academies Press (US).
- Venkatramanan, S., Armata, I. E., Strupp, B. J., & Finkelstein, J. L. (2016). Vitamin B-12 and Cognition in Children. Advances in nutrition (Bethesda, Md.), 7(5), 879–888. https://doi.org/10.3945/an.115.012021
- Kumar, N. (2014). Neurologic aspects of cobalamin (B12) deficiency. Handbook of clinical neurology, 120, 915–926. https://doi.org/10.1016/B978-0-7020-4087-0.00060-7
- Mackey, A., Davis, S., & Gregory, J. (2006). Vitamin B6. Modern Nutrition in Health and Disease. Lippincott Williams and Wilkins, 194-210.
- UAB Medical West. (n.d.). The Truth About Turkey & Tryptophan. https://medicalwesthospital.org/blog/the-truth-about-turkey-tryptophan/#
- Cahen, Y. D., Fritsch, R., & Wüthrich, B. (1998). Food allergy with monovalent sensitivity to poultry meat. Clinical and experimental allergy: journal of the British Society for Allergy and Clinical Immunology, 28(8), 1026–1030. https://doi.org/10.1046/j.1365-2222.1998.00356.x
- American College of Allergy, Asthma, & Immunology. (2019). Food Protein-Induced Enterocolitis Syndrome (FPIES). https://acaai.org/allergies/allergic-conditions/food/food-protein-induced-enterocolitis-syndrome-fpies/
- Feuille, E., & Nowak-Węgrzyn, A. (2015). Food Protein-Induced Enterocolitis Syndrome, Allergic Proctocolitis, and Enteropathy. Current allergy and asthma reports, 15(8), 50. https://doi.org/10.1007/s11882-015-0546-9
- Caubet, J.C., Ford, L.S., Sickles, L., Järvinen, K.M., Sicherer, S.H., Sampson, H.A., & Nowak-Węgrzyn, A. (2014). Clinical features and resolution of food protein–induced enterocolitis syndrome: 10-year experience, Journal of Allergy and Clinical Immunology, 134(2), 382-389.e4. https://doi.org/10.1016/j.jaci.2014.04.008

Bianca Gruenewald, RD
Bianca is a Registered Dietitian and works in a client support role at My Little Eater Inc. She's a proud auntie to her three year old niece and four year old nephew!

Bianca Gruenewald, RD
Bianca is a Registered Dietitian and works in a client support role at My Little Eater Inc. She's a proud auntie to her three year old niece and four year old nephew!

Mallory Roberts, SLP
Mallory is a Speech-Language Pathologist, Infant Feeding Specialist, and Craniosacral Therapist. She's also a busy mom of four little ones!

Mallory Roberts, SLP
Mallory is a Speech-Language Pathologist, Infant Feeding Specialist, and Craniosacral Therapist. She's also a busy mom of four little ones!
